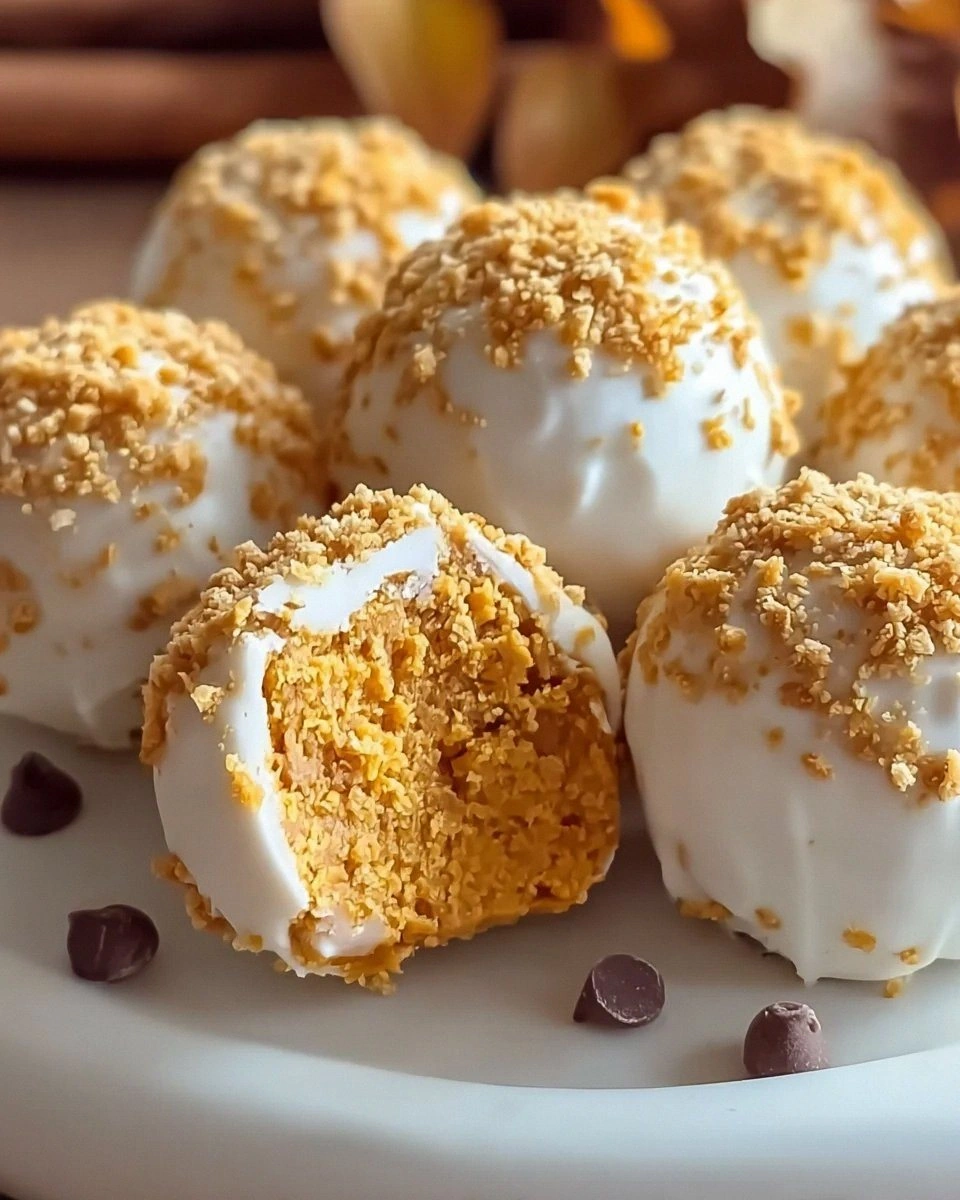
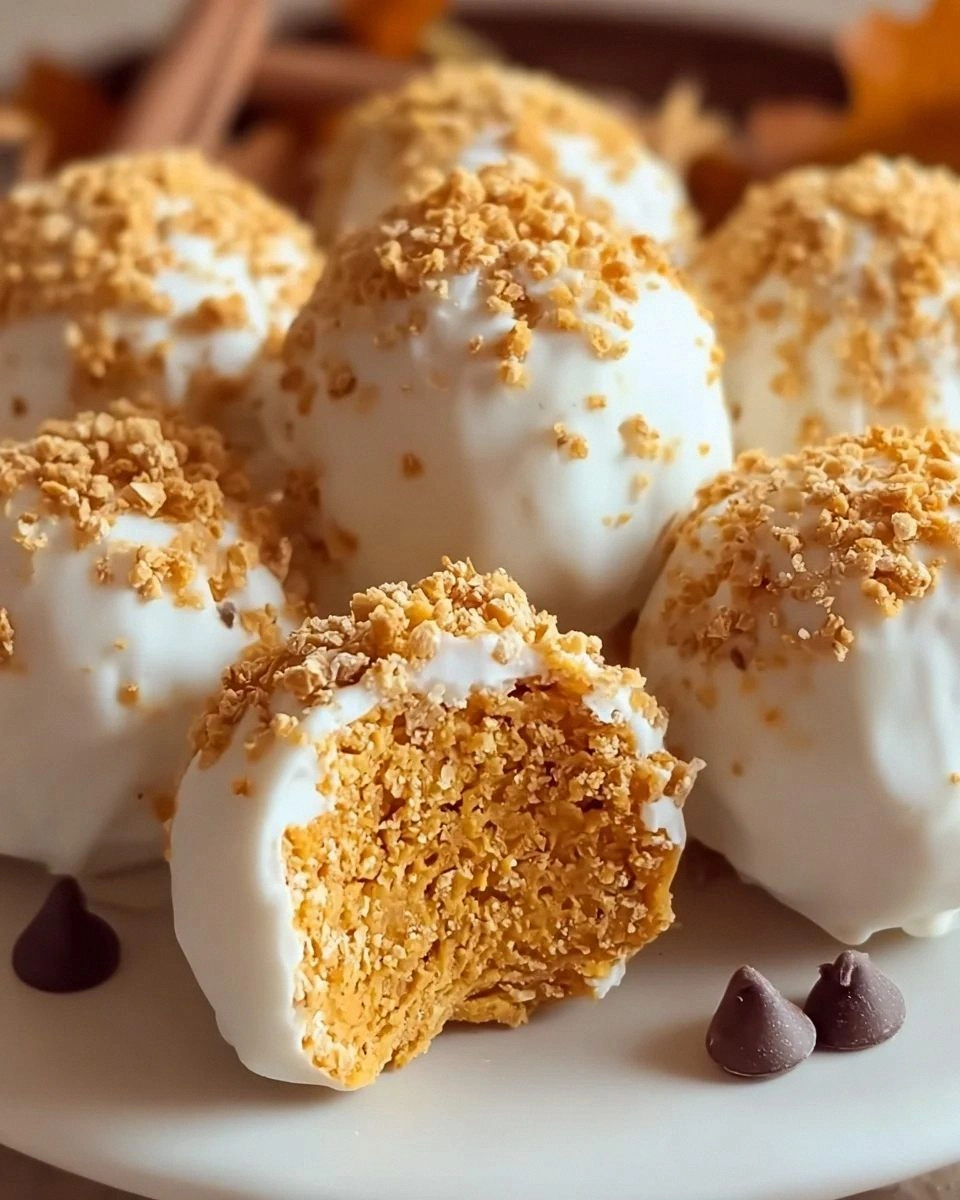
I still remember the day my oven died right before Thanksgiving. There I was, standing in my kitchen with a can of pumpkin puree in one hand and a broken heating element in the other, when my neighbor texted me: "Bring dessert to dinner tomorrow!" Panic mode activated. But here's the thing about kitchen disasters — they often lead to the most brilliant discoveries. What started as a catastrophe turned into an obsession that had me testing eighteen different versions of these no-bake pumpkin cheesecake balls until I finally cracked the code to the perfect texture, the most addictive flavor balance, and that melt-in-your-mouth sensation that makes people close their eyes when they take the first bite.
The first batch was a gloopy disaster that looked like orange soup wearing a graham cracker sweater. My dog wouldn't even taste-test them, and she once ate an entire stick of butter off the counter. But something magical happened when I accidentally over-whipped the cream cheese mixture — it became this impossibly light, mousse-like cloud that paired with pumpkin like they were long-lost soulmates. The texture reminded me of those expensive truffles you buy in fancy chocolate shops, except these had the warm, cozy flavors of fall wrapped up in a portable, poppable package that doesn't require a fork or even a plate.
Picture this: It's 11 PM, you're in your pajamas, and you're rolling these little spheres of autumn heaven between your palms while the scent of cinnamon and nutmeg drifts through your kitchen. No oven heating up the house, no timers beeping, no stress about cracks forming on top of a traditional cheesecake. Just you, some cream cheese, and the satisfaction of creating something that looks way more complicated than it actually is. These babies have become my secret weapon at potlucks, where people gather around the dessert table like moths to a flame, popping them like candy while asking for the recipe before they've even swallowed.
What makes these little gems absolutely irresistible is the contrast between the silky smooth pumpkin cheesecake interior and the satisfying crunch of the graham cracker coating. They're like the love child of a pumpkin pie and a cheesecake, but somehow better than both. And here's the kicker — they actually taste better the next day, which means you can make them ahead and look like a dessert genius when guests arrive. The flavors meld and deepen, becoming this complex symphony of warm spices, tangy cream cheese, and earthy pumpkin that dances on your taste buds and leaves you reaching for just one more.
What Makes This Version Stand Out
No Oven Drama: While everyone else is sweating over water baths and worrying about cheesecake cracks, you'll be casually rolling these beauties in your living room. No preheating, no temperature checking, no praying to the baking gods for mercy. Just pure, stress-free dessert creation that leaves your oven free for more important things, like reheating pizza.
Texture Perfection: Most no-bake recipes end up with that weird, gelatinous texture that feels like eating flavored pudding with a spoonful of sand. Not these. The secret lies in the ratio of cream cheese to pumpkin, which I've fine-tuned through seventeen batches and one very patient family who volunteered as taste-testers. The result is a smooth, truffle-like center that holds its shape but melts the moment it hits your tongue.
Make-Ahead Magic: These actually improve with age, which is practically unheard of in the dessert world. The spices have time to bloom and mingle, creating layers of flavor that weren't there yesterday. I dare you to taste one on day one, then try another on day three — it's like they're two completely different desserts, both delicious in their own right.
Portion Control (Sort Of): Each ball is a two-bite wonder that feels indulgent without being overwhelming. Of course, this only works if you can stop at one, which brings me to my next point — nobody can. I've watched disciplined eaters who count almonds suddenly lose all self-control when faced with a plate of these. Consider yourself warned.
Year-Round Appeal: While pumpkin spice everything has become the punchline of fall jokes, these transcend seasonal clichés. The pumpkin flavor is subtle and sophisticated, not like drinking a scented candle. I've served these at summer barbecues, and people devour them without any pumpkin fatigue or ironic eye-rolling.
Kid-Friendly Assembly: This is the rare recipe where having tiny helpers actually improves the process. Kids love rolling the balls, and their small hands are perfect for creating uniform sizes. Plus, there's no raw egg or other sketchy ingredients, so you don't have to worry about them sneaking tastes.
Instagram-Worthy Results: These look like you spent hours in a professional kitchen, not twenty minutes in your pajamas. The rustic charm of hand-rolled balls coated in graham cracker crumbs has this artisanal vibe that makes people think you attended culinary school in France, not YouTube university at 2 AM.
Inside the Ingredient List
The Flavor Foundation
Cream cheese forms the backbone of these balls, and here's where you shouldn't cheap out. That block that's been sitting in your fridge since July? Toss it. You want the full-fat, brick-style cream cheese that's fresh and soft enough to leave a fingerprint when pressed. The low-fat stuff contains more water, which makes your balls weep and separate into a sad, wet mess. I've tested with both, and the difference is like comparing a silk scarf to a paper towel — technically they're both fabric, but nobody wants to wear the paper one.
Pumpkin puree is the star, but not the hero — there's a difference. You want pure pumpkin, not pumpkin pie filling, which comes pre-sweetened and spiced and will throw off your entire flavor balance. The canned stuff works beautifully here because it's consistent in moisture content and texture. Fresh pumpkin sounds romantic until you've roasted, peeled, and pureed four pumpkins only to end up with watery orange soup that turns your cheesecake balls into sad little puddles.
The Sweetness Squad
Powdered sugar dissolves instantly into the cream cheese, creating a smooth sweetness without any grainy texture. Granulated sugar leaves you with tiny sugar crystals that feel like sand between your teeth — not the sensation you're going for in an otherwise velvety dessert. Brown sugar adds depth with its molasses notes, but too much makes the mixture heavy and dense. The trick is using just enough to add complexity without turning your balls into lead weights.
Maple syrup might seem like an unnecessary extra, but it's the secret weapon that ties everything together. The liquid sweetness helps thin the mixture just enough for perfect rolling consistency while adding that cozy, caramel-like flavor that screams autumn comfort. Skip it, and your balls will taste fine but lack that certain je ne sais quoi that has people asking for your secret ingredient.
The Spice Cabinet
Pumpkin pie spice is convenient, but making your own blend elevates these from good to legendary. Cinnamon provides the warm base note, nutmeg adds that distinctive autumn aroma, ginger brings a subtle heat that balances the sweetness, and cloves contribute depth without overwhelming. The key is restraint — too much spice, and you'll feel like you're chewing on a potpourri sachet. Too little, and they just taste like vaguely orange cream cheese balls.
The Texture Team
Vanilla extract rounds out the flavors, bridging the gap between the tangy cream cheese and earthy pumpkin. Use the real stuff, not the imitation vanilla that tastes like regret and childhood baking failures. A splash of heavy cream loosens the mixture just enough for easy rolling while adding richness that makes these taste like they came from a boutique chocolate shop.
Graham cracker crumbs create the classic cheesecake crust experience in every bite. Fresh crumbs from actual crackers beat the pre-made stuff every time — they have better texture and haven't been sitting in a warehouse absorbing weird flavors. Pulse them in a food processor until they resemble coarse sand, leaving a few slightly larger pieces for textural interest.
The Method — Step by Step
- Start with your cream cheese at room temperature — this is non-negotiable. Cold cream cheese will fight you every step of the way, leaving you with lumpy balls that look like they have cottage cheese mixed in. Beat it in a stand mixer (or with a hand mixer if you're feeling ambitious) for a full two minutes on medium speed. You're not just mixing here; you're incorporating air that will make your final product light and fluffy instead of dense like a cheesecake brick. The mixture should look like thick whipped cream and leave soft peaks when you lift the beaters.
- Add the pumpkin puree gradually, about a quarter cup at a time, mixing thoroughly between additions. This prevents the mixture from seizing up into a curdled mess. The pumpkin should integrate completely, creating a uniform pale orange color without any streaks. If you dump it all in at once, you'll be chasing pumpkin lumps around the bowl for ten minutes while your arm falls off from mixing. The texture should resemble a thick milkshake at this point — pourable but not runny.
- Now comes the sweetness and spice. Sift in the powdered sugar through a fine-mesh strainer to prevent those annoying sugar lumps that refuse to dissolve. Add your spice blend, salt, vanilla, and maple syrup. Mix on low speed just until combined — over-mixing here can make the cream cheese break down and turn grainy. The mixture should smell like autumn married comfort food and had a beautiful baby. Taste it now and adjust the spices if needed, but remember that the flavors will intensify as it chills.
- Here's where patience becomes your best friend. Cover the bowl with plastic wrap pressed directly onto the surface (this prevents a skin from forming) and refrigerate for at least two hours. I know, I know — you want to roll them now. But warm mixture equals sticky disaster equals you cursing my name while washing cream cheese goo off your hands for the third time. The mixture needs to firm up enough to hold its shape when rolled. If you're in a hurry, pop it in the freezer for 45 minutes, stirring every 15 minutes to ensure even cooling.
That's it — you did it. But hold on, I've got a few more tricks that'll take this to another level...
Insider Tricks for Flawless Results
The Temperature Rule Nobody Follows
Room temperature isn't just a suggestion — it's the difference between smooth, professional-looking balls and lumpy disasters that look like they were made by someone wearing oven mitts. Take your cream cheese out of the fridge at least two hours before you start, and don't even think about microwaving it to speed things up. Microwaved cream cheese develops hot spots that will cook the edges while leaving the center cold, creating a texture nightmare that's impossible to fix. If you forgot to take it out (we've all been there), cut it into small cubes and let it sit on the counter for 30 minutes, stirring occasionally.
Why Your Nose Knows Best
Don't underestimate the power of fresh spices. That jar of cinnamon that's been sitting in your cabinet since 2019? It's lost most of its volatile oils, which means it's contributing color more than flavor. Buy small quantities of whole spices and grind them yourself, or at least replace your ground spices every six months. Your nose will tell you immediately if spices are still good — they should smell vibrant and make you want to sneeze, not like dusty cardboard. The difference between fresh and stale spices in this recipe is like comparing a live orchestra to a MIDI file.
The 5-Minute Rest That Changes Everything
After you mix everything together, let the mixture rest for five minutes before chilling. This brief pause allows the spices to bloom and the pumpkin to fully hydrate the sugar, creating a more complex flavor profile. It's like letting a good wine breathe — the transformation is subtle but noticeable. You'll taste warm notes that weren't there before, and the texture will be smoother and more cohesive. Skip this step, and your balls will taste fine but lack that certain depth that makes people close their eyes when they bite in.
The Rolling Secret From Candy Makers
Professional chocolatiers know that the secret to perfectly round truffles lies in the temperature of your hands. Run your hands under cold water for 30 seconds, then dry them thoroughly before rolling. Cool hands prevent the mixture from melting and sticking, giving you smooth, professional-looking balls instead of misshapen blobs. If you're making a large batch, return the bowl to the fridge every few minutes to keep the mixture firm. Warm hands equal sticky mess, and sticky mess equals you cursing in the kitchen at 11 PM.
Storage Wisdom From My Grandmother
Store these beauties in an airtight container with a piece of bread. The bread absorbs excess moisture that can make the graham cracker coating soggy, keeping everything crisp and fresh. Replace the bread every couple of days — it will get hard as a rock while doing its moisture-wicking duty. This old-school trick works better than those fancy silica gel packets and keeps your balls tasting fresh for up to a week. My grandmother used this for everything from cookies to crackers, and it never fails.
Creative Twists and Variations
This recipe is a playground. Here are some of my favorite ways to switch things up:
The Chocolate Lover's Dream
Replace half the pumpkin with melted white chocolate that's been cooled to room temperature. The white chocolate adds richness and sweetness while maintaining that gorgeous orange color. Roll them in crushed Oreos instead of graham crackers for a cookies-and-cream vibe that makes people forget they're eating pumpkin anything. Drizzle with dark chocolate for the full chocolate experience that satisfies even the most dedicated chocoholics.
The Bourbon Ball Version
Add two tablespoons of good bourbon to the mixture — nothing fancy, just something you'd actually drink. The alcohol enhances the other flavors while adding its own caramel and vanilla notes. The bourbon also helps prevent the mixture from freezing solid if you want to serve these partially frozen for a refreshing summer treat. Just don't serve these to kids or anyone who shouldn't be enjoying a boozy dessert.
The Nutcracker Suite
Mix finely chopped toasted pecans into the graham cracker coating for added crunch and nutty flavor. Toast the pecans first in a dry pan until fragrant — this step is crucial for developing their flavor. The combination of pumpkin, cream cheese, and pecans tastes like the holidays exploded in your mouth in the best possible way. These are especially good with a cup of coffee after dinner when you want something sweet but not overwhelming.
The S'mores Mashup
Add mini marshmallow pieces and tiny chocolate chips to the mixture before chilling. The marshmallows dissolve slightly, creating little pockets of sweetness, while the chocolate chips provide surprise bursts of chocolate. Roll them in a mixture of graham cracker crumbs and crushed Golden Grahams cereal for extra crunch and that authentic s'mores flavor. These disappear faster than regular s'mores at a campfire, and nobody has to worry about burning their marshmallows.
The Tropical Getaway
Replace the maple syrup with coconut cream and add a teaspoon of rum extract. Roll them in toasted coconut flakes mixed with graham cracker crumbs for a tropical twist that transports you from autumn to island time. The pumpkin flavor becomes subtle and sophisticated, more about the spices than the vegetable itself. These are perfect for those weird weather days in early fall when it's too hot for traditional pumpkin desserts but you still want those cozy flavors.
The Breakfast Version
Add a tablespoon of instant espresso powder to the mixture for a subtle coffee flavor that makes these acceptable breakfast fare. Roll them in a mixture of graham cracker crumbs and crushed cornflakes for that breakfast cereal vibe. They're like the best part of a pumpkin spice latte combined with cheesecake, condensed into a portable format that makes morning meetings bearable. Just don't tell your nutritionist I suggested eating cheesecake balls for breakfast.
Storing and Bringing It Back to Life
Fridge Storage
These little gems will keep beautifully in an airtight container in the refrigerator for up to a week, but let's be honest — they'll be gone long before that. The key is using a container that seals tightly to prevent them from absorbing other fridge flavors. Nobody wants cheesecake balls that taste like last night's leftover pizza. Layer them between sheets of parchment paper if you're stacking them, and add that slice of bread I mentioned earlier to absorb excess moisture. They'll actually taste better after a day or two as the flavors meld and mature, developing complexity that wasn't there initially.
Freezer Friendly
For longer storage, these freeze like champions. Arrange them in a single layer on a parchment-lined baking sheet and freeze until solid, about two hours. Then transfer to a freezer-safe container or zip-top bag with as much air removed as possible. They'll keep for up to three months, though I recommend labeling them with the date because frozen cheesecake balls look suspiciously like frozen cookie dough, and you don't want to confuse the two at midnight. Thaw them in the refrigerator overnight for best texture, or let them sit at room temperature for about 30 minutes if you're impatient.
Best Reheating Method
Technically, you don't reheat these since they're served cold, but bringing them to the right temperature makes all the difference. Remove them from the refrigerator about 10 minutes before serving to take the chill off. This slight warming allows the cream cheese to soften just enough to achieve that luxurious, melt-in-your-mouth texture. If they've been frozen, give them a full 30 minutes at room temperature. Too cold, and they taste like cream cheese ice cubes. Too warm, and they get soft and sticky. Room temperature is the sweet spot where magic happens.