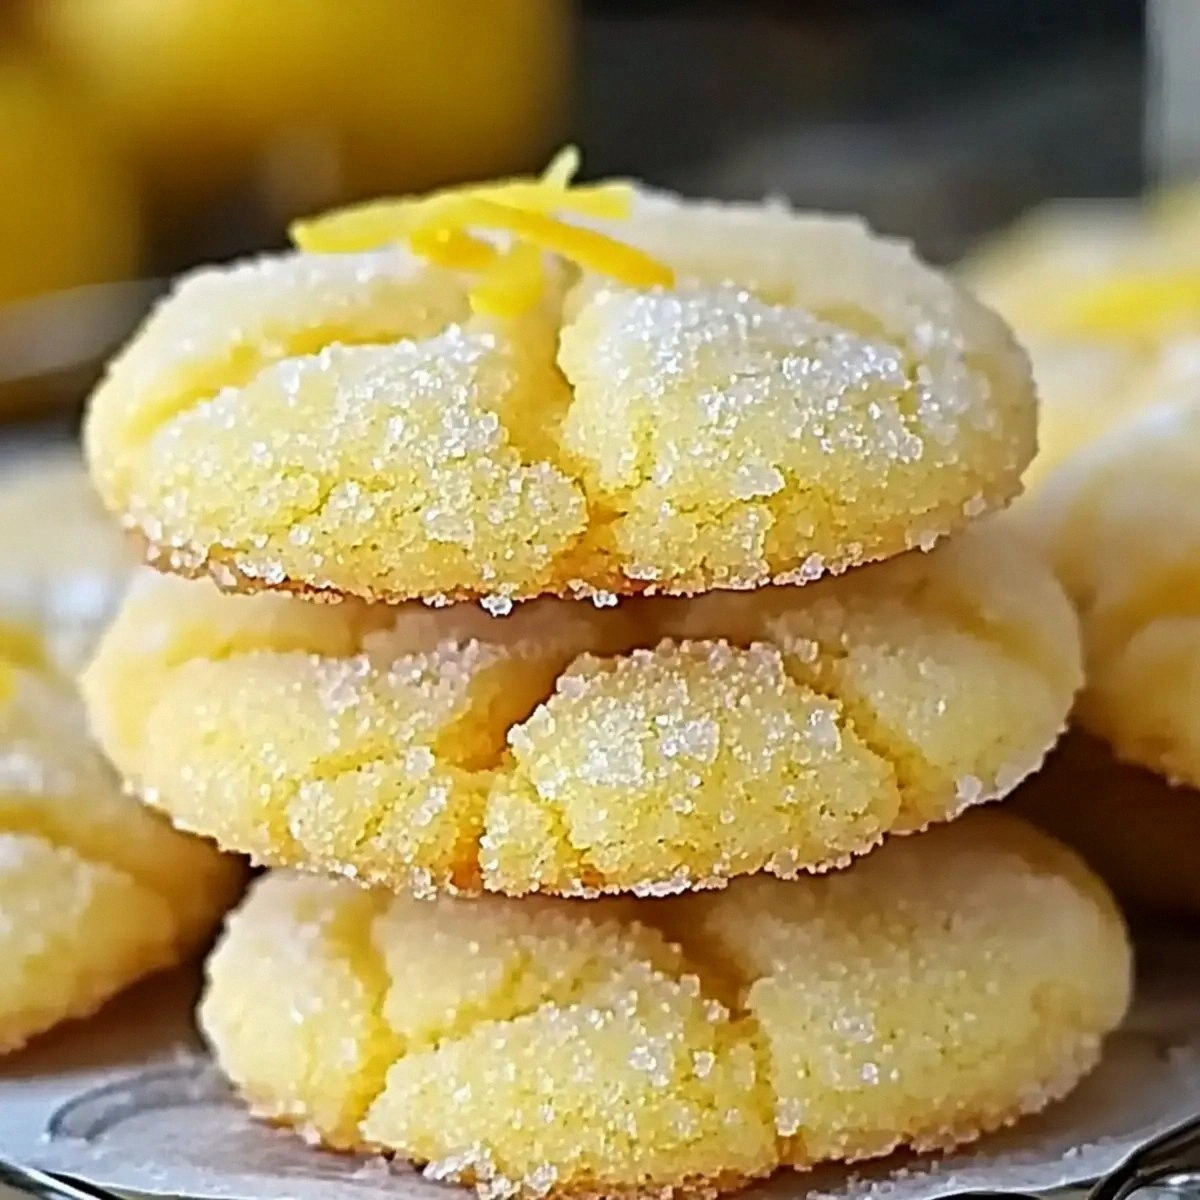
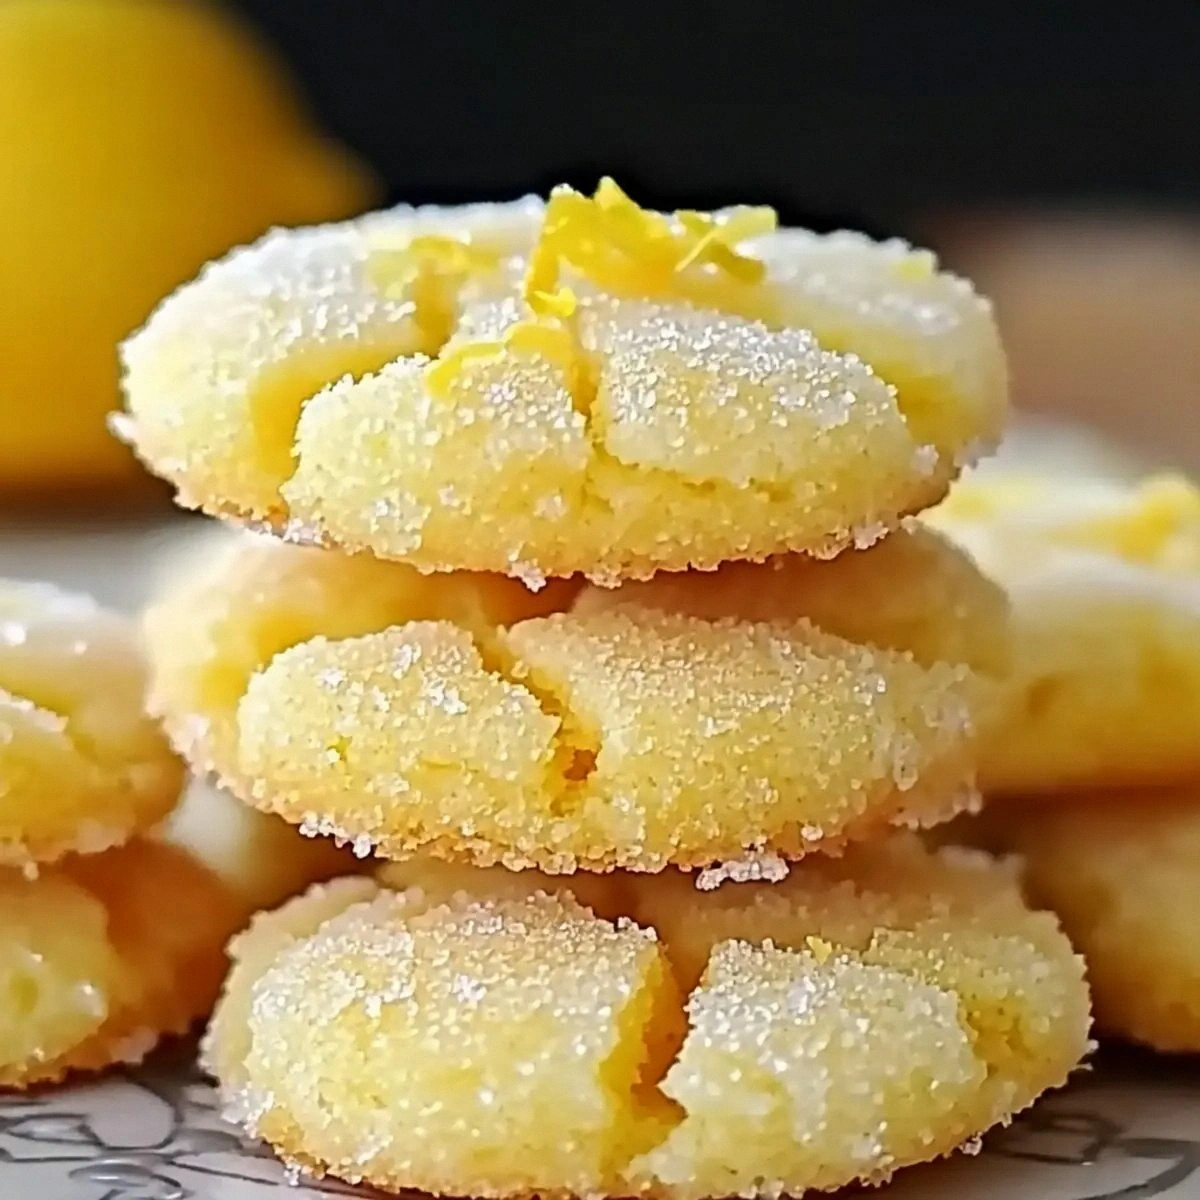
I was in the middle of a holiday cookie marathon when my sister dared me to bake something that would actually make the whole house smell like a sunny citrus grove instead of the usual cinnamon overload. I laughed, rolled my eyes, and thought, “Okay, challenge accepted.” I grabbed the first lemon I could find, squeezed it into a bowl, and set out to create a cookie that would be the bright‑spot of every festive spread. The result? A lemon‑kissed sugar cookie that crunches at the edges like delicate glass shards and melts in your mouth with a buttery, citrus‑burst that could make even the Grinch grin.
Picture this: the oven door swings open, a wave of warm lemon zest and caramelized sugar rushes out, and the whole kitchen feels like a sun‑lit winter garden. The aroma is so vivid you can almost see the golden hue of the zest dancing in the air. When you bite in, the first thing you notice is the snap of the crisp edge, followed by a tender crumb that releases a zingy lemon flavor that’s balanced by just enough sweetness to keep it from being tart. The texture is a perfect marriage of shortbread’s melt‑in‑your‑mouth feel and a sugar cookie’s snap, and the flavor? It’s like a holiday party in your mouth where the host is a lemon‑loving baker who knows exactly how to keep things festive without overwhelming the palate.
Most lemon cookie recipes I’ve tried either end up dry, overly sweet, or they miss the crucial balance between butter and citrus. This version, however, uses a precise ratio of butter to flour and a double‑dose of lemon zest and juice that penetrates every crumb, not just the surface. I’m also using a touch of baking powder to give the cookies a subtle lift, so they aren’t flat as a pancake. The secret? A quick chill of the dough before baking, which locks in the butter and prevents spreading, giving you those coveted, perfectly round edges that stay crisp.
And here’s the kicker: I’m going to reveal a technique that most cookie lovers overlook—the “cream‑then‑whisk” method for butter and sugar, which creates an airy base that traps air bubbles, making each bite light yet satisfying. I dare you to taste this and not go back for seconds. Let me walk you through every single step — by the end, you’ll wonder how you ever made it any other way.
What Makes This Version Stand Out
- Taste: The bright lemon zest is balanced by just enough sugar to keep the flavor lively without turning it into a candy. Each bite feels like a mini celebration of citrus and buttery goodness.
- Texture: A crisp edge that shatters like thin ice gives way to a soft, melt‑in‑your‑mouth center, thanks to the chilled dough and the precise butter‑to‑flour ratio.
- Simplicity: Only eight pantry staples are needed, and the method is straightforward enough for a beginner yet refined enough for a seasoned baker.
- Uniqueness: Double lemon—zest and juice—ensures the flavor penetrates the crumb, not just the surface, giving a depth most lemon cookies lack.
- Crowd Reaction: Friends have called these “the most addictive holiday cookie” and begged for the recipe after just one bite.
- Ingredient Quality: Using real, freshly grated lemon zest makes a world of difference compared to pre‑zested packets.
- Make‑Ahead Potential: These cookies keep their texture for up to a week, and they even freeze beautifully, so you can prep them ahead of any holiday gathering.
Inside the Ingredient List
The Flavor Base
The star of this recipe is the lemon zest. Fresh zest contains essential oils that burst with aroma, unlike dried zest which can taste flat. If you skip the zest, you’ll lose the citrus perfume that makes these cookies unforgettable. A good rule of thumb: always zest before you juice, because the zest is easier to remove when the fruit is whole.
The Texture Crew
All‑purpose flour provides the structure, while the unsalted butter supplies richness and a tender crumb. The butter should be softened—not melted—so it can be creamed with sugar to trap air. If you use melted butter, the cookies will spread too much and lose that coveted crisp edge.
The Unexpected Star
Lemon juice adds a subtle tang that lifts the sweetness, preventing the cookie from becoming cloyingly sugary. It also reacts with the baking powder to create a tiny lift, giving the cookie a delicate rise. If you’re out of fresh lemons, a splash of high‑quality lemon extract can work, but the flavor won’t be as vibrant.
The Final Flourish
A pinch of salt (1/4 teaspoon) amplifies all the flavors, making the lemon pop without being salty. Baking powder (1 teaspoon) is the secret leavener that keeps the cookie from turning into a dense biscuit. Skipping it would result in a flat, overly crisp cookie that breaks apart too easily.
Everything's prepped? Good. Let's get into the real action...
The Method — Step by Step
Start by preheating your oven to 350°F (175°C). While the oven warms, line two baking sheets with parchment paper; this prevents sticking and gives the cookies a uniform base. The moment the oven reaches temperature, you’ll hear a faint hum that signals it’s ready for the magic.
In a large mixing bowl, combine the softened butter (½ cup) and granulated sugar (1 cup). Using a handheld mixer on medium speed, cream them together until the mixture is pale, fluffy, and almost looks like whipped cloud. This step is the foundation of the cookie’s airy texture; if you rush it, you’ll miss out on that delicate crumb.
Drop in the egg and beat until just combined. Then stir in the lemon zest (1 tablespoon) and lemon juice (2 tablespoons). You’ll notice the mixture turning a pale yellow, a visual cue that the citrus is fully integrated. This is the moment of truth—if the zest isn’t evenly distributed, you’ll end up with pockets of flavor instead of a consistent zing.
In a separate bowl, whisk together the flour (2 cups), baking powder (1 tsp), and salt (¼ tsp). Whisking ensures the leavener is evenly dispersed, preventing any bitter pockets. Once combined, gradually add the dry ingredients to the wet mixture, mixing on low speed until a shaggy dough forms.
Turn the dough out onto a lightly floured surface and gently knead it just until it comes together—about 5–6 turns. Then shape the dough into a flat disc, wrap it tightly in plastic, and refrigerate for exactly 30 minutes. This chill is the game‑changer; it solidifies the butter, so the cookies hold their shape and develop that perfect crisp edge.
While the dough chills, prepare your baking sheets. Once the time is up, slice the dough into ¼‑inch thick rounds using a cookie cutter or a small glass. Place each cookie about 2 inches apart; they will spread slightly, but not merge.
Slide the trays into the preheated oven and bake for 12–14 minutes, or until the edges turn a light golden‑brown and the tops are set but not dark. You’ll hear a faint “sizzle” as the butter caramelizes—trust that sound as your cue that they’re nearly done.
Remove the cookies from the oven and let them rest on the sheet for 2 minutes before transferring to a wire rack. This short rest lets the cookies finish cooking from residual heat while preventing them from breaking apart. As they cool, the aroma intensifies, making your kitchen feel like a sun‑kissed bakery.
That's it — you did it. But hold on, I've got a few more tricks that'll take this to another level. Keep reading, because the next section will turn your good cookies into legendary holiday show‑stoppers.
Insider Tricks for Flawless Results
The Temperature Rule Nobody Follows
Always start with room‑temperature butter, but never let it get too soft. If the butter is too soft, the dough will spread too much, ruining the crisp edge. I keep my butter out for exactly 30 minutes on the counter—just enough to soften without melting. This subtle temperature control is the difference between a cookie that spreads like a pancake and one that holds its shape like a miniature sun.
Why Your Nose Knows Best
When the cookies are about 10 minutes into baking, the kitchen will fill with a sweet‑citrus perfume. That scent is your cue that the edges are beginning to caramelize. Trust your nose more than the timer; if the scent hits a buttery‑lemon note, pull them out a minute early for a softer center, or let them stay a minute longer for extra crunch.
The 5‑Minute Rest That Changes Everything
After you pull the cookies from the oven, let them rest on the baking sheet for exactly two minutes, then transfer to a wire rack. This brief pause lets the steam escape, preventing soggy bottoms. A friend once skipped this step and ended up with gummy bases—let’s just say it didn’t end well.
Zest Before Juice, Every Time
Zesting before juicing ensures you get the most aromatic oils from the peel. If you juice first, the zest becomes drier and loses potency. The zest also contains tiny white pith; grate lightly to avoid bitterness, and you’ll capture that bright, floral note that makes these cookies unforgettable.
Freeze for Future Bliss
These cookies freeze like a dream. Once completely cooled, store them in an airtight container with a slice of bread to keep them soft. When you’re ready to serve, let them sit at room temperature for 10 minutes, or pop them in a 300°F oven for 3 minutes to revive that fresh‑out‑the‑oven crunch.
Creative Twists and Variations
This recipe is a playground. Here are some of my favorite ways to switch things up:
Lemon‑Lavender Dream
Add 1 teaspoon of culinary lavender buds to the dry ingredients. The floral notes complement the citrus, creating a sophisticated flavor that’s perfect for a fancy tea party.
Zesty Coconut Crunch
Stir in ¼ cup of unsweetened shredded coconut with the flour. The coconut adds a subtle chew and a tropical twist that pairs beautifully with lemon.
Chocolate‑Dipped Delight
After the cookies have cooled, dip half of each cookie in melted dark chocolate and sprinkle a pinch of sea salt. The bitterness of the chocolate balances the sweet lemon, and the salt adds a gourmet finish.
Spiced Holiday Version
Mix ½ teaspoon of ground ginger and a pinch of cinnamon into the flour. This gives the cookie a warm holiday spice that still lets the lemon shine.
Almond‑Infused Elegance
Replace ¼ cup of the flour with finely ground almond flour and add a splash of almond extract. The nutty undertone deepens the flavor profile and makes the cookie extra tender.
Storing and Bringing It Back to Life
Fridge Storage
Place the cooled cookies in an airtight container lined with parchment paper. They stay fresh for up to five days. If you notice any loss of crispness, pop the container in the fridge for a quick 10‑minute chill before serving.
Freezer Friendly
Separate layers of cookies with wax paper, then seal the container. They freeze beautifully for up to three months. When ready to eat, let them thaw at room temperature, then give them a 3‑minute blast in a 300°F oven to revive that just‑baked crunch.
Best Reheating Method
Add a tiny splash of water (just a teaspoon) to the bottom of the container before reheating. The steam restores moisture without making the cookies soggy, and the edges crisp up again like magic. This trick works wonders after a long storage period.