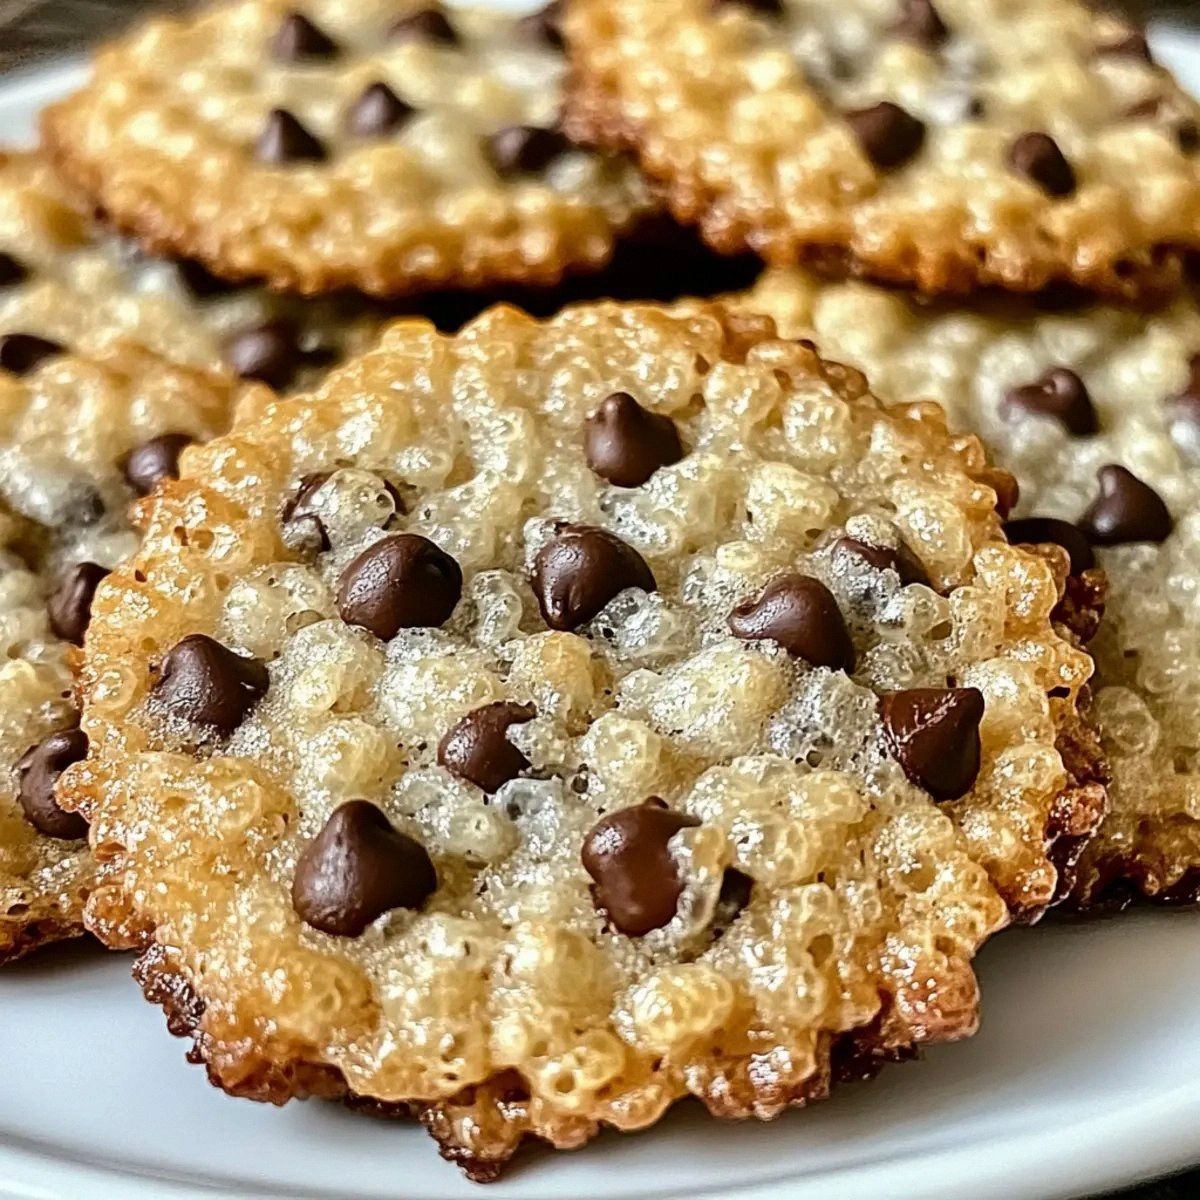
Picture this: it’s a rainy Tuesday, the kind where the sky looks like someone spilled a bucket of charcoal over the city, and I’m standing in my kitchen with a half‑finished batch of bland, over‑baked chocolate chip cookies that could double as paperweights. I stared at the sad, crumbly circles and thought, “There’s got to be a better way to satisfy this chocolate craving without turning my taste buds into a desert.” That moment of desperation birthed a cookie that would change my snack game forever—a fudgy, salty, dark‑chocolate masterpiece that practically melts in your mouth while still giving you that satisfying snap on the edges. I’m not kidding when I say this is hands down the best version you’ll ever make at home, and I dare you to taste this and not go back for seconds.
The moment the dough hits the counter, you can hear it sigh, a soft, buttery whisper that promises decadence. The scent of melted butter and unsweetened cocoa swirls together like a midnight perfume, teasing your nose with hints of caramelized sugar and toasted espresso. As the cookies bake, the kitchen fills with an aroma that’s part coffee shop, part bakery, and part guilty‑pleasure indulgence—so intoxicating that even the cat pauses its nap to sniff the air. When you finally pull them out, the tops glisten with a thin, crackly crust that shatters like thin ice, while the interiors stay soft, dense, and almost gooey, a perfect contrast that makes you want to hug the tray.
What truly sets this version apart is a secret ingredient: a pinch of flaky sea salt that dances on the surface, amplifying the deep, earthy notes of the 70% cacao chocolate. Most recipes either skip the salt entirely or drown the cookies in a sugary overload, but I discovered that just a whisper of sea salt can turn a good cookie into an unforgettable experience. And let’s talk about the butter—melted, not softened, which coats every flour particle, creating a silky texture that feels like velvet on the tongue. I’ll be honest — I ate half the batch before anyone else got to try it, and that’s because the flavor balance is so spot‑on that you’ll want to keep the whole thing to yourself.
Okay, ready for the game‑changer? I’m about to walk you through every single step—from selecting the perfect dark chocolate to mastering the bake that yields a cookie that’s crisp on the outside, fudgy on the inside, and just salty enough to make your taste buds sing. By the end, you’ll wonder how you ever made it any other way, and you’ll have a go‑to recipe that will impress friends, family, or that one coworker who always steals your snacks. Let’s dive in and create a cookie that you’ll crave daily.
⚡ What Makes This Version Stand Out
- Flavor Explosion: The combination of bittersweet dark chocolate and a pinch of flaky sea salt creates a sweet‑salty harmony that dances on the palate, making each bite unforgettable.
- Texture Mastery: A melt‑in‑your‑mouth fudgy center contrasted with a crisp, caramelized edge delivers the best of both worlds, satisfying both chew and crunch cravings.
- Simplicity: Only ten ingredients, all pantry staples, mean you won’t need a trip to the specialty store—just a good chocolate bar and a pinch of patience.
- Ingredient Quality: Using 70% cacao dark chocolate ensures a deep, robust cocoa flavor that lower‑cocoa chips can’t match, elevating the entire cookie.
- Crowd Reaction: These cookies have a reputation for disappearing within minutes of being placed on a plate—perfect for parties, potlucks, or solo indulgence.
- Make‑Ahead Potential: The dough can be refrigerated for up to 24 hours, allowing flavors to meld and making the baking process a breeze on a busy day.
- Cooking Method: Baking at a slightly lower temperature than usual prevents over‑drying and promotes that coveted fudgy interior.
- Versatility: The base recipe is a blank canvas for mix‑ins like toasted nuts, orange zest, or even a drizzle of caramel after baking.
Alright, let's break down exactly what goes into this masterpiece...
🍋 Inside the Ingredient List
The Flavor Base
The unsweetened cocoa powder is the unsung hero that gives these cookies their deep, almost coffee‑like richness. It’s the foundation that lets the dark chocolate shine without being overpowered by sugar. If you skip it, you’ll end up with a cookie that tastes more like a sweet biscuit than a sophisticated treat. For a subtle twist, try swapping half the cocoa for espresso powder to intensify that mocha vibe.
The Texture Crew
All‑purpose flour provides structure, while the melted butter creates a tender crumb that feels like silk against your tongue. The baking soda acts as a leavening agent, giving the cookies a slight lift so they don’t turn into flat, dense discs. A pinch of salt isn’t just for seasoning; it balances the sweetness and enhances the chocolate’s natural bitterness. If you’re gluten‑sensitive, a 1‑to‑1 gluten‑free flour blend works just as well, though the texture will be a tad more delicate.
The Unexpected Star
Dark chocolate chips or chunks are the heart of the cookie, delivering pockets of molten bliss that ooze out as the cookie cools. Using 70% cacao or higher ensures that each bite has that bittersweet snap rather than a sugary melt. If you can’t find high‑cacao chips, break a solid dark chocolate bar into chunks for even bigger pockets of goodness. The flaky sea salt sprinkled on top just before baking adds a crunchy pop that awakens the palate.
The Final Flourish
Granulated sugar and light brown sugar work together to create a balanced sweetness—granulated sugar for crispness, brown sugar for chew and a hint of caramel. Eggs act as binders, providing structure while also adding richness. A splash of vanilla extract rounds out the flavor profile, giving the cookies that warm, homey aroma you associate with classic bake‑outs. If you’re avoiding dairy, substitute the butter with a high‑quality coconut oil, but expect a subtle coconut undertone.
Everything's prepped? Good. Let's get into the real action...

🔥 The Method — Step by Step
Preheat your oven to 350°F (175°C) and line two baking sheets with parchment paper. This temperature is low enough to keep the cookies from over‑browning while still allowing the edges to crisp up beautifully. As the oven warms, the kitchen fills with that buttery, cocoa‑laden perfume that says, “We’re about to create something magical.” Let the heat do its work; don’t rush this step, because a properly preheated oven is the secret weapon for even baking.
🪄 Kitchen Hack: Place a small oven‑safe dish of water on the lower rack; the steam helps keep the cookie interiors fudgy.In a medium bowl, whisk together the flour, cocoa powder, baking soda, and a pinch of salt until fully combined. The dry mix should look uniformly dark, like a rich espresso shot. This step is crucial because it ensures the leavening agent is evenly distributed, preventing any unexpected pockets of flatness. Feel the powder between your fingers; it should be fine and velvety, not gritty.
In a separate large bowl, combine the melted butter with the granulated sugar and light brown sugar. Beat with a wooden spoon or electric mixer on low until the mixture becomes glossy and the sugars start to dissolve—this usually takes about a minute. The mixture should look like liquid amber, shimmering in the light, promising a deep caramel flavor. If you hear a faint crackle, that’s the sugar crystals popping, a good sign you’re on the right track.
Add the eggs, one at a time, beating well after each addition, then stir in the vanilla extract. The batter will thicken slightly, turning a richer, darker hue. This is the moment of truth where the dough starts to come together; you’ll notice the batter becoming smoother and more cohesive. If you over‑mix, you risk developing gluten, which can make the cookies tough—so stop once everything is just combined.
Gradually fold the dry ingredients into the wet mixture, using a spatula to gently incorporate them. Scrape the sides of the bowl to make sure no flour pockets remain. The dough should be thick but pliable, with a slightly sticky consistency that clings to the spoon. At this point, you’ll see the chocolate chips waiting to be folded in, like tiny dark jewels.
Stir in the dark chocolate chips or chunks, making sure they’re evenly distributed throughout the batter. The chips should be coated in the dough, not sinking to the bottom. This ensures every bite gets a burst of molten chocolate. If you’re feeling adventurous, reserve a handful of chips for sprinkling on top right before baking for an extra crunchy surprise.
👀 Watch Out: Over‑mixing at this stage can cause the butter to separate, leading to greasy cookies.Cover the dough with plastic wrap and refrigerate for at least 30 minutes, or up to 24 hours if you’re planning ahead. This chilling step lets the flour fully hydrate and the butter solidify slightly, which results in a more controlled spread during baking. While the dough chills, the kitchen will still be perfumed with that intoxicating cocoa‑butter blend—patience is a virtue, but the aroma is a reward.
Scoop the chilled dough onto the prepared baking sheets using a cookie scoop or two‑tablespoon measuring spoon, spacing them about 2 inches apart. Lightly press each mound down with the back of a spoon to flatten just a touch; you want them to spread just enough to form that coveted thin edge. Sprinkle a pinch of flaky sea salt on top of each cookie—this is the final flourish that will make your taste buds sing.
🪄 Kitchen Hack: Use a small kitchen scale for consistent cookie size; 30 g per cookie yields perfect uniformity.Bake for 12‑14 minutes, or until the edges are set and lightly golden while the centers still look soft and slightly undercooked. The cookies will continue to firm up as they cool, so resist the urge to over‑bake. When you open the oven, you’ll be greeted by that irresistible scent of toasted chocolate and butter—Chef’s kiss.
Allow the cookies to cool on the baking sheet for 5 minutes before transferring them to a wire rack. This short rest lets the cookies set without becoming too crumbly. As they cool, the sea salt crystals will glisten like tiny snowflakes on a dark landscape. Finally, grab a cookie, feel the soft interior give way to a crisp edge, and experience that perfect sweet‑salty balance that will have you reaching for another.
That's it — you did it. But hold on, I've got a few more tricks that'll take this to another level...
🏆 Insider Tricks for Flawless Results
The Temperature Rule Nobody Follows
Most home bakers bake at 375°F, assuming a hotter oven equals a faster bake. In reality, a slightly lower temperature (350°F) gives the cookies a chance to set slowly, preserving that fudgy interior while still forming a crisp edge. If you’ve ever burned the tops of your cookies while the centers remained doughy, this rule will save you. Trust me, the extra 25 degrees makes a world of difference.
Why Your Nose Knows Best
Your sense of smell is a reliable indicator of doneness—when you catch that faint caramelized aroma, the cookies are ready to come out. Don’t rely solely on the timer; ovens can vary by up to ten minutes. A quick sniff test prevents over‑baking, keeping the centers luxuriously soft. If you’re unsure, pull one out early, let it cool a minute, and give it a taste; you’ll quickly learn the scent‑to‑taste correlation.
The 5‑Minute Rest That Changes Everything
After baking, let the cookies rest on the sheet for exactly five minutes before moving them. This short pause lets the residual heat finish the cooking process, while steam trapped beneath the cookies prevents them from cracking. Skipping this step often results in a crumbly texture that shatters when you try to bite. So set a timer, sip some coffee, and enjoy the anticipation.
Butter Temperature Trick
Melted butter can be too fluid, causing the dough to spread excessively. By chilling the melted butter for 10 minutes before mixing, you achieve a semi‑solid state that incorporates more evenly, giving you better control over cookie spread. This hack is especially useful on humid days when dough can become overly sticky.
The Salt Sprinkle Finale
Don’t just dump a heap of sea salt on the whole tray—sprinkle a pinch on each cookie individually. This ensures every bite gets that perfect salty pop, rather than some cookies being oversalted and others bland. The visual of glistening salt crystals also makes the cookies look Instagram‑ready.
🎨 Creative Twists & Variations
This recipe is a playground. Here are some of my favorite ways to switch things up:
Nutty Noir
Fold in ½ cup of toasted chopped walnuts or pecans for an added crunch and a buttery undertone that pairs beautifully with dark chocolate. The nuts also introduce a subtle earthiness that deepens the flavor profile. Perfect for those who love a bit of texture contrast.
Citrus Zest Surprise
Add the zest of one orange or lemon to the wet ingredients before mixing in the dry. The bright citrus notes cut through the richness, creating a sophisticated flavor balance. This variation is a hit at brunches where guests expect something a little more refined.
Spiced Seduction
Introduce ½ teaspoon of ground cinnamon and a pinch of ground cayenne pepper for a warm, subtle heat that lingers after each bite. The spice combo amplifies the chocolate’s depth and adds an unexpected kick—great for chilly evenings.
White Chocolate & Sea Salt
Swap half of the dark chocolate chips for high‑quality white chocolate chunks, then finish with extra flaky sea salt. The sweet, creamy white chocolate contrasts with the bitter dark, while the salt ties the flavors together. A true indulgence for those who can’t decide between dark and white.
Coffee‑Infused
Dissolve 1 tablespoon of instant espresso powder in the melted butter before combining with the sugars. This infusion adds a robust coffee flavor that complements the cocoa, turning the cookies into a mocha‑lover’s dream. Pair with a cold brew for the ultimate treat.
Peanut Butter Swirl
Drop dollops of creamy peanut butter onto the dough before baking, then use a fork to swirl it through. The salty, nutty ribbons create pockets of flavor that mingle with the chocolate, reminiscent of a classic PB&J but way more sophisticated.
❄️ Storing & Bringing It Back to Life
Fridge Storage
Place cookies in an airtight container with a slice of bread; the bread will keep them soft for up to five days. The container should be kept in the refrigerator if your kitchen is warm, preventing the chocolate from melting.
Freezer Friendly
Layer cookies between parchment sheets, then seal them in a freezer‑safe bag. They’ll stay fresh for up to three months. To reheat, microwave for 10‑15 seconds or bake at 300°F for 5 minutes, adding a tiny splash of water to the container to steam them back to perfection.
Best Reheating Method
For a just‑baked feel, warm cookies in a preheated 350°F oven for 4‑5 minutes, or pop them in the microwave for 8‑10 seconds. Adding a teaspoon of water to the plate before microwaving creates steam that restores the fudgy interior without making them soggy.