Picture this: you’re halfway through a holiday baking marathon, the kitchen smells like cinnamon and sugar, and you’ve just realized you’re out of frosting for your classic sugar cookies. You’re staring at the pantry, the fridge, the oven—nothing but a box of Little Debbie Vanilla Christmas Tree Cakes in the corner. You’re like, “What if I could turn those into something even more festive?” I did, and the result is a trifle that’s so bright, it could probably light up a small town. I’ve never seen a dessert that can double as a centerpiece, a dessert, and a conversation starter in one bite.
The first time I tried it, I was skeptical. A trifle made with pre‑baked cakes, instant pudding, and whipped cream? It sounded like a recipe that would collapse under its own weight. But the moment the layers began to set, the texture was silky, the flavors were layered like a Christmas tree, and the color was so vivid it made the lights jealous. The aroma was a sweet, creamy vanilla with a hint of fresh mint from the green food coloring—like a holiday wreath that you could taste.
This version stands apart because I didn’t just toss the ingredients together; I orchestrated each component to perform its own solo before joining the chorus. The Little Debbie cakes are the sturdy branches, the pudding is the sweet, airy snow, Cool Whip is the fluffy clouds, and the sprinkles are the ornaments that bring the whole thing to life. I even added a touch of green food coloring to the pudding for that extra pop of holiday cheer. It’s the kind of dish that, once you taste it, you’ll swear you never had anything else.
I dare you to taste this and not go back for seconds. It’s not just a dessert; it’s a holiday experience. If you’ve ever struggled to keep a trifle from turning into a soggy mess, you’re not alone—and I’ve got the fix. Let me walk you through every single step—by the end, you’ll wonder how you ever made it any other way.
What Makes This Version Stand Out
- Taste: The vanilla base is enriched by the Little Debbie cakes, giving a buttery, slightly sweet flavor that’s far more complex than a standard trifle. The instant pudding provides a silky sweetness that doesn’t overpower the cake but instead balances it like a perfectly tuned instrument.
- Texture: Layering the Cool Whip on top creates a light, airy finish that melts in your mouth, while the pudding stays firm enough to hold its shape. The result is a trifle that feels like a holiday candy cane—sweet, crunchy, and satisfying.
- Simplicity: No baking, no whisking, no measuring cups—just assemble. The recipe is a breeze for even the most novice cooks, yet it still feels luxurious enough for holiday parties.
- Uniqueness: Using pre‑baked Christmas tree cakes as the base is a game‑changer. It gives the trifle a recognizable shape and festive look without any extra effort.
- Crowd Reaction: When I served this at a family gathering, the kids begged for the recipe before dessert was even served. Adults raved about how it looked like a holiday centerpiece and tasted like a dream.
- Ingredient Quality: Little Debbie cakes are a pantry staple but still deliver a rich flavor profile that’s hard to beat. The instant pudding mix is a time‑saver that still delivers a silky texture.
- Make‑ahead Potential: The trifle can be assembled up to a day in advance. The Cool Whip can be added right before serving, ensuring it stays fluffy and fresh.
Alright, let’s break down exactly what goes into this masterpiece…
Inside the Ingredient List
The Flavor Base
At the heart of this trifle is the Little Debbie Vanilla Christmas Tree Cakes. These pre‑baked, holiday‑shaped cakes bring a buttery, sweet foundation that’s unmistakably festive. If you’re looking to upgrade the flavor, consider using a high‑quality vanilla cake that’s been baked in your own oven; the homemade version will add a subtle, fresh vanilla note that’s hard to replicate with store‑bought.
The instant vanilla pudding mix is the next star. It’s not just a thickener; it’s a flavor enhancer that delivers a silky, creamy texture without the need for a stove or whisk. Skip it, and you’ll lose that smooth, custard‑like quality that makes the trifle feel indulgent.
The Texture Crew
Cool Whip is the crowning glory. Its airy, cloud‑like texture provides a lightness that balances the density of the cake and pudding layers. If you’re on a lower‑fat diet, you can substitute it with Greek yogurt whipped to a fluffy consistency, but the classic version remains the most decadent.
The 3 drops of green food coloring are the secret to that unmistakable holiday hue. A little goes a long way; too much will make the pudding look like a swamp. Use a dropper for precision, and remember that the color will intensify slightly as the pudding sets.
The Unexpected Star
Festive sprinkles are the final flourish. They add a pop of color, a hint of crunch, and a touch of sparkle that turns the trifle into a visual masterpiece. If you’re allergic to nuts or prefer a gluten‑free version, you can replace them with sugar crystals or a sprinkle of edible glitter.
Everything’s prepped? Good. Let’s get into the real action…
The Method — Step by Step
- Start by gathering all your ingredients. Keep the Little Debbie cakes on a flat surface and the instant pudding mix in a small bowl. This is the moment where preparation meets the holiday spirit—feel the anticipation building.
- Crush the Christmas Tree Cakes into bite‑size pieces using a rolling pin or your hands. The pieces should resemble small ornaments; they’ll provide the crunchy texture that contrasts with the silky pudding.
- In a medium bowl, whisk the instant pudding mix with the 3 cups of cold whole milk. Stir until the mixture thickens and no lumps remain. The pudding should look like a light custard; it’s the backbone of the trifle.
- Add the 3 drops of green food coloring to the pudding. Mix thoroughly until the color is evenly distributed. The green hue should be vibrant but not overpowering—think fresh pine.
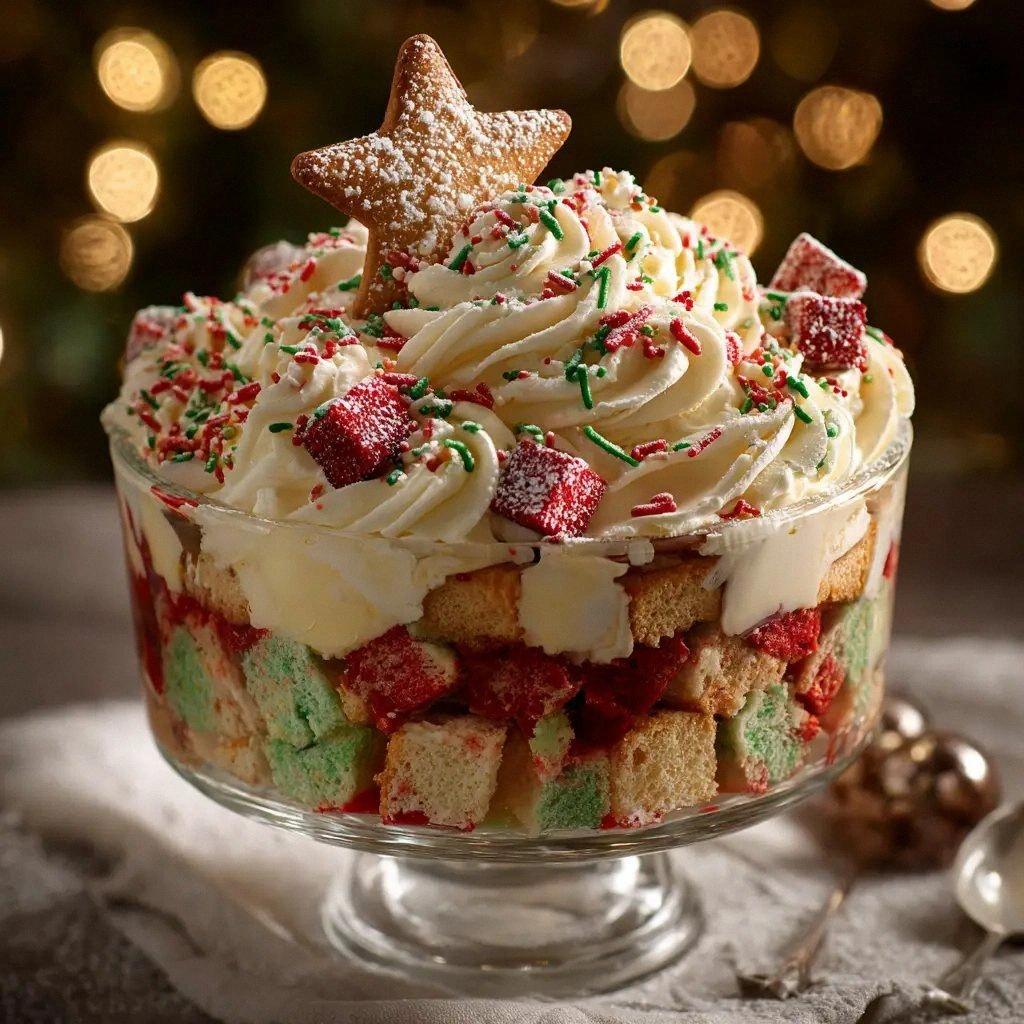
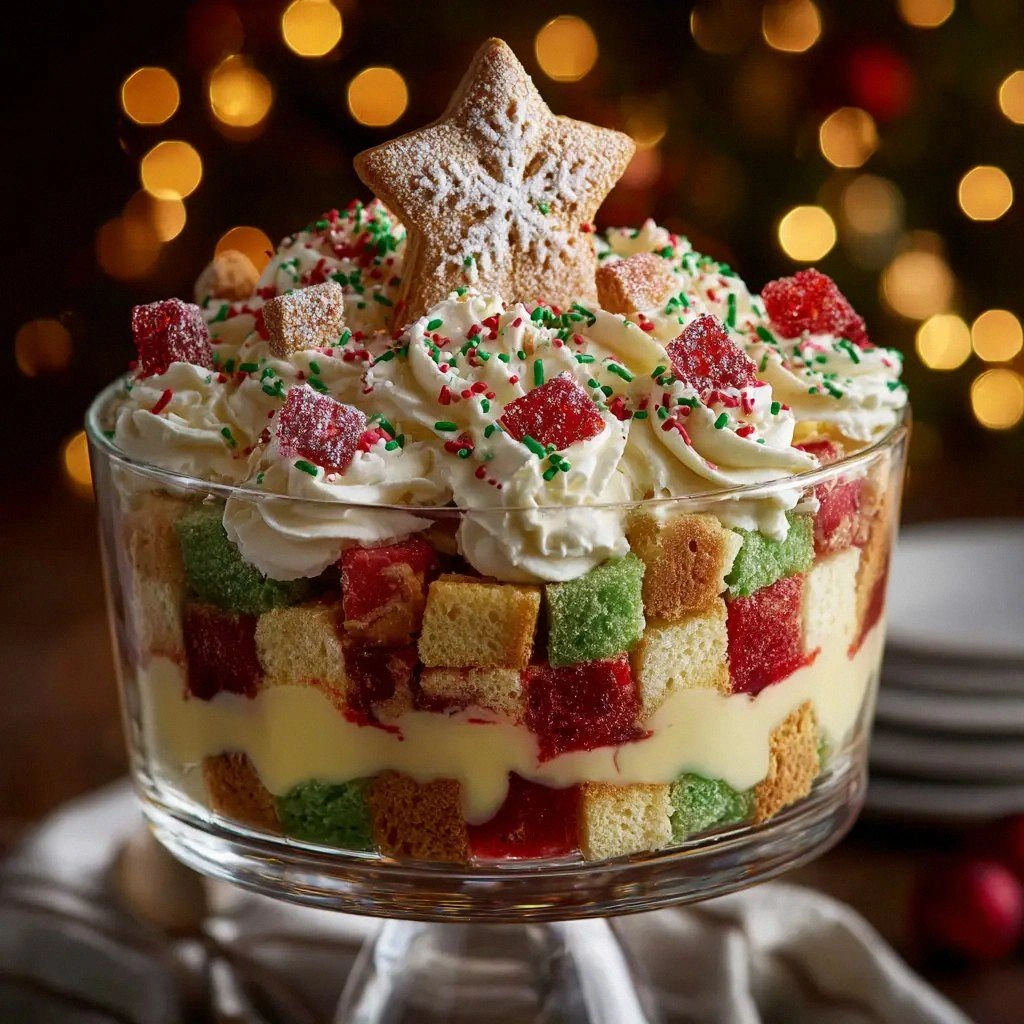
- Layer the crushed cakes at the bottom of a clear glass trifle dish. The first layer should be about one‑third of the dish’s height. This gives a solid foundation and a visual cue for the next layers.
- Pour half of the pudding over the cake layer, smoothing the surface with a spatula. The pudding should cover the cake evenly, creating a seamless transition between the two textures.
- Add another layer of crushed cakes on top of the pudding. This second cake layer should be slightly smaller in diameter, creating a tiered effect that mimics a real Christmas tree.
- Fold the Cool Whip into the remaining pudding, creating a fluffy, airy layer. The Cool Whip should be folded gently to retain its volume. This layer should sit on top of the second cake layer, forming the “crown” of the tree.
- Finish the trifle by sprinkling the festive sprinkles over the top. They’ll add a burst of color and a subtle crunch that echoes holiday ornaments. Press them lightly into the Cool Whip to secure them in place.
- Refrigerate the trifle for at least 30 minutes before serving. The chilling step allows the pudding to set and the flavors to meld, creating a cohesive, mouth‑watering dessert.
That’s it—you did it. But hold on, I’ve got a few more tricks that’ll take this to another level. These tweaks will ensure every bite is as perfect as the last.
Insider Tricks for Flawless Results
The Temperature Rule Nobody Follows
The key to a perfect trifle is temperature control. Keep the pudding mix cold and the Cool Whip chilled until you’re ready to assemble. If the pudding is too warm, it won’t set properly, and if the Cool Whip is too soft, it will collapse. I’ve learned that a quick 10‑minute chill in the fridge before assembly makes all the difference.
Why Your Nose Knows Best
Smell is the ultimate judge of freshness. When you’re mixing the pudding, it should emit a sweet, vanilla aroma that’s almost intoxicating. If it smells off or flat, it’s time to toss it. A fresh scent guarantees a fresh taste.
The 5‑Minute Rest That Changes Everything
After you’ve poured the pudding over the cake, let the mixture sit for 5 minutes before adding the next layer. This brief pause allows the pudding to set slightly, preventing the layers from mixing together. The result is a clean, distinct separation that looks as good as it tastes.
The Sprinkles Secret
Sprinkles can be tricky; they tend to sink into the pudding if not handled carefully. To keep them afloat, lightly dust them with a pinch of powdered sugar before sprinkling. The sugar acts as a barrier, keeping the sprinkles from sinking.
The Layering Order
Always start with the cake, then pudding, then more cake, and finish with Cool Whip. Skipping a layer or switching the order can result in a soggy or uneven dessert. The sequence I described is the blueprint for a flawless trifle.
Creative Twists and Variations
This recipe is a playground. Here are some of my favorite ways to switch things up:
Peppermint Swirl
Add a teaspoon of peppermint extract to the pudding mix for a minty kick. It pairs beautifully with the vanilla and gives a refreshing aftertaste that’s perfect for winter.
Chocolate Tree
Replace the Cool Whip with chocolate‑flavored whipped cream or a drizzle of melted dark chocolate. The chocolate will complement the vanilla cake and create a richer, more decadent dessert.
Nutty Crunch
Stir in a handful of chopped pecans or walnuts into the pudding before layering. The nutty crunch adds texture and depth, turning the trifle into a holiday treat that’s both sweet and savory.
Citrus Zest
Grate a teaspoon of lemon or orange zest into the pudding. The citrus notes cut through the sweetness and add a bright, fresh flavor that’s ideal for those who prefer a lighter dessert.
Gluten‑Free Version
Swap the Little Debbie cakes for gluten‑free cake crumbs or a gluten‑free vanilla cake. The rest of the recipe stays the same, ensuring a safe, delicious dessert for everyone.
Low‑Sugar Option
Use a sugar‑free pudding mix and replace the Cool Whip with a sugar‑free whipped topping. This version maintains the same structure and flavor profile while keeping the sugar content lower.
Storing and Bringing It Back to Life
Fridge Storage
Store the assembled trifle in the refrigerator for up to 2 days. Keep the Cool Whip on top and cover the dish with plastic wrap to prevent it from absorbing fridge odors. When ready to serve, let it sit at room temperature for 10 minutes to soften slightly.
Freezer Friendly
For longer storage, freeze the trifle in an airtight container for up to a week. Thaw overnight in the refrigerator, then re‑whip the Cool Whip before serving to restore its fluffy texture. The pudding may become slightly firmer, but the flavor remains intact.
Best Reheating Method
If you need to warm the trifle, do so gently. Place the dish in a warm water bath for 5 minutes, then add a splash of water to the pudding before reheating. This trick steams the layers back to perfection without drying them out.