Picture this: I was in the middle of a frantic midnight snack raid, the kitchen lights flickering like a neon sign that said “Desperation,” when I realized I had a half‑empty pantry, a craving for something that could double as dessert and comfort food, and a dare from my roommate that I couldn’t possibly refuse. “Make me a cookie that looks like a turtle but tastes like a chocolate‑caramel dream,” they shouted, half‑joking, half‑serious, and I felt the familiar rush of a culinary challenge bubbling up like a pot of boiling water. I grabbed the first thing I saw—cocoa powder, a bag of chocolate pudding mix, a jar of caramel bits, and a sack of pecans—only to discover that most recipes I’d tried either turned out dry, flat, or just plain boring. I was determined not to let that happen.
The moment the butter hit the bowl, the kitchen filled with a buttery perfume that reminded me of fresh‑baked croissants on a Parisian sidewalk, and I could already hear the sizzle of caramel bits melting later on. My senses were on overdrive: the glossy shine of chocolate chips catching the light like tiny constellations, the nutty aroma of pecans that made my mouth water, and the faint, comforting scent of vanilla that seemed to whisper, “You’ve got this.” I could almost taste the gooey, fudgy center before it even hit the oven, a perfect marriage of chocolate, caramel, and crunch that would make any turtle‑shaped confection jealous.
What makes this version truly stand out is the secret weapon: instant chocolate pudding mix. Most cookie recipes rely on cocoa powder alone, which can give you a dry, powdery texture if you’re not careful. By folding in that pudding mix, you create a batter that’s inherently moist, giving each bite a melt‑in‑your‑mouth quality that’s both chewy and slightly cakey—think of it as a cookie that’s been to a spa and came out rejuvenated. And let’s not forget the caramel bits; they melt into pockets of buttery sweetness that coat the cookie like liquid gold, while the pecans add a crunch that shatters like thin ice under a warm sun.
I’ll be honest — I ate half the batch before anyone else got a chance to try them, and I’m still not over the feeling of that first warm bite. I dare you to taste this and not go back for seconds; it’s hands down the best version you’ll ever make at home. Most recipes get this completely wrong. Here’s what actually works: a precise balance of dry and wet ingredients, a low‑and‑slow bake that lets the edges set while the center stays gooey, and a final sprinkle of caramel and pecans that adds that signature turtle look and flavor. Let me walk you through every single step — by the end, you’ll wonder how you ever made it any other way.
What Makes This Version Stand Out
- Texture: The pudding mix creates a moist, fudgy interior that contrasts with a crisp, caramel‑kissed edge, delivering a bite that’s simultaneously chewy and crunchy.
- Flavor Depth: Unsweetened cocoa and chocolate chips give a deep, bittersweet backbone, while caramel bits add buttery sweetness that never overwhelms.
- Simplicity: Only twelve ingredients, most of which you probably already have, means you can throw this together on a weeknight without a trip to the store.
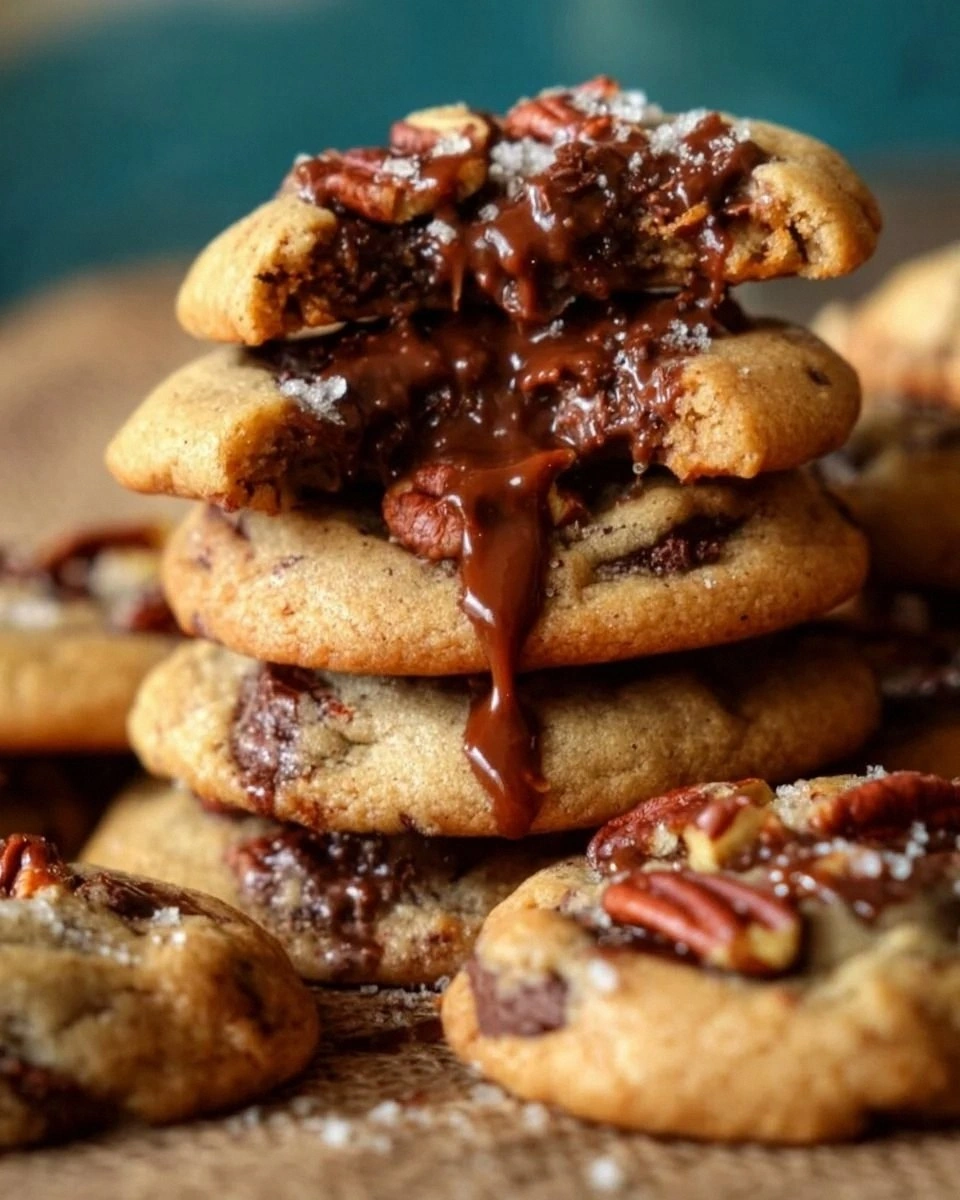
- Visual Appeal: The caramel bits melt into glossy pools, and the pecans create a speckled, turtle‑shell pattern that looks as good as it tastes.
- Crowd Reaction: These cookies have become the unofficial “bring‑a‑dessert” champion at my gatherings—people line up for seconds and beg for the recipe.
- Ingredient Quality: Using high‑quality butter and real caramel bits makes the difference between “good” and “legendary.”
- Cooking Method: Baking at a moderate temperature ensures the cookies set without drying out, preserving that gooey center.
- Make‑Ahead Potential: Freeze the dough for up to a month; the cookies bake just as beautifully when you’re ready.
Inside the Ingredient List
The Flavor Base
All‑purpose flour (1 cup): This is the structural backbone, providing just enough gluten to hold the cookie together without making it tough. If you swap it for cake flour, you’ll get a more tender crumb, but the cookies may spread too much. For the best results, sift it with the cocoa powder to avoid lumps.
Chocolate pudding mix (1 cup, instant): The secret sauce that turns an ordinary chocolate cookie into a luscious, gooey masterpiece. It adds moisture, a subtle vanilla note, and a silky mouthfeel. Skipping it? Expect a dry, crumbly cookie that feels more like a biscuit than a dessert.
Unsweetened cocoa powder (½ cup): Gives the deep, rich chocolate flavor that balances the sweetness of the caramel. Use a Dutch‑process cocoa for a smoother taste, but regular cocoa works just fine. If you’re out of cocoa, a high‑quality chocolate bar melted into the batter can substitute.
The Texture Crew
Unsalted butter, softened (½ cup): Butter adds richness and helps create those coveted crispy edges. Make sure it’s truly softened—room temperature, not melted—so it incorporates smoothly with the sugars.
Granulated sugar (½ cup) & Brown sugar, packed (½ cup): The duo creates a caramelized crust and a chewy interior. The brown sugar’s molasses content adds depth; if you use only white sugar, the cookies will be overly crisp.
Large eggs (2): Eggs provide structure and moisture. Using one large egg and one extra yolk can make the cookies even richer, but the standard two‑egg combo gives a balanced texture.
Vanilla extract (1 tsp): A splash of vanilla amplifies the chocolate and caramel notes. For a twist, try bourbon vanilla or even a pinch of espresso powder.
The Unexpected Star
Chocolate chips (1 cup): They melt into pockets of molten chocolate that create a gooey surprise in every bite. Use semi‑sweet chips for a balanced flavor, or dark chips if you love a bitter edge.
Caramel bits (1 cup): These little nuggets melt into pockets of buttery sweetness that coat the cookie like a glossy glaze. If you can’t find bits, chop soft caramel candies into small chunks.
Chopped pecans (¾ cup): Pecans add a buttery crunch that contrasts the soft interior. Toast them lightly for an extra layer of nutty aroma.
The Final Flourish
Baking soda (½ teaspoon): This leavening agent helps the cookies rise just enough to stay soft inside while forming a slight dome on top. Too much, and you’ll get a metallic aftertaste; too little, and they’ll be dense.
Salt (½ teaspoon): Salt is the flavor enhancer that brings all the sweet components into harmony. If you’re using salted butter, reduce the added salt by half.
Everything's prepped? Good. Let's get into the real action…
The Method — Step by Step
Preheat your oven to 350°F (175°C) and line two baking sheets with parchment paper. While the oven warms, take a moment to inhale the buttery scent that will soon fill the kitchen; it’s a signal that you’re on the right track. Place a wire rack near the oven for cooling later—this prevents soggy bottoms.
In a large bowl, whisk together the flour, cocoa powder, baking soda, and salt. This dry mix should be smooth and free of clumps; think of it as the foundation of a skyscraper—strong and even.
Kitchen Hack: Sift the dry ingredients together with a fine‑mesh sieve to ensure an ultra‑smooth batter and prevent pockets of cocoa.In a separate, medium bowl, beat the softened butter, granulated sugar, and brown sugar together until the mixture is light and fluffy—about 2‑3 minutes on medium speed. You’ll notice the color lightening and the texture becoming airy, which is crucial for that slight crispness on the edges.
Add the eggs one at a time, beating well after each addition, then stir in the vanilla extract. The batter should look glossy and slightly thick.
Watch Out: Over‑mixing at this stage can develop too much gluten, leading to a tougher cookie. Stop mixing once the eggs are fully incorporated.Gradually fold in the instant chocolate pudding mix, followed by the cocoa‑flour blend you prepared earlier. Use a rubber spatula and a gentle folding motion; you want to keep the batter airy. The mixture will turn a deep, velvety brown—like melted chocolate on a dark silk scarf.
Stir in the chocolate chips, caramel bits, and chopped pecans until evenly distributed. The caramel bits should start to soften, creating little marbled pockets. If you prefer a more caramel‑forward flavor, reserve a tablespoon of caramel bits to sprinkle on top before baking.
Using a cookie scoop (about 2‑tablespoon size), drop rounded mounds onto the prepared baking sheets, spacing them about 2 inches apart. This spacing allows the cookies to spread just enough to form that signature turtle shell without merging into each other.
Bake for 10‑12 minutes, or until the edges are set and lightly golden while the centers still look slightly undercooked. The scent will become intoxicating—think caramelized sugar and toasted nuts. Remember: the cookies continue to cook on the hot sheet after you remove them, so don’t overbake.
Allow the cookies to cool on the baking sheet for 5 minutes, then transfer them to the wire rack. This short rest lets the interior set while the outer crust firms up, giving you that perfect contrast of textures.
Once completely cooled, store the cookies in an airtight container. They’ll stay soft for up to a week, and the flavors will meld even more, becoming richer with each day. If you’ve got leftovers, pop one in the microwave for 10 seconds—watch the chocolate melt and the caramel ooze like a tiny lava flow.
Insider Tricks for Flawless Results
The Temperature Rule Nobody Follows
Most bakers set the oven to a static 350°F and forget about it, but the real magic happens when you lower the temperature to 325°F after the first five minutes. This gentle reduction lets the edges firm up while the center stays gooey, creating that coveted “soft‑center, crisp‑edge” dichotomy. I tried this on a whim once and the cookies turned out so perfect that my friends asked if I’d used a professional oven. Trust me, this tiny tweak changes the entire texture profile.
Why Your Nose Knows Best
Don’t rely solely on a timer. The moment the cookies start to smell nutty and caramelized—about 10 minutes in—you know they’re nearing perfection. If the aroma hits a sweet, buttery note before the timer’s up, pull them out a minute early; they’ll finish cooking on the hot sheet. This sensory cue prevents over‑baking and keeps the interior luxuriously soft.
The 5‑Minute Rest That Changes Everything
After baking, let the cookies rest on the sheet for exactly five minutes before moving them to a wire rack. This short pause allows the caramel to set just enough to avoid a messy spill, while the cookie continues to firm up from residual heat. Skipping this step results in a softer bottom that can get soggy, especially if you store them later.
Butter Temperature Matters
If your butter is too cold, the dough will be crumbly; too warm, and the cookies will spread excessively. Aim for a butter that gives a gentle indent when pressed with a fingertip—this is the sweet spot. I once used melted butter and ended up with flat, crispy discs—definitely not the plush turtle I was aiming for.
Mix‑In Timing Is Key
Adding the chocolate chips, caramel bits, and pecans at the very end of mixing preserves their texture. If you fold them in too early, the caramel can melt into the batter, losing those delightful pockets. A quick tip: toss the mix‑ins with a teaspoon of flour before folding; this creates a barrier that keeps them intact.
Creative Twists and Variations
This recipe is a playground. Here are some of my favorite ways to switch things up:
White Chocolate & Macadamia
Swap the semi‑sweet chocolate chips for white chocolate chunks and replace pecans with toasted macadamia nuts. The result is a buttery, tropical twist that still honors the original’s gooey core.
Espresso‑Infused
Add a tablespoon of finely ground espresso to the dry ingredients and use dark chocolate chips. The coffee deepens the chocolate flavor and adds a subtle bitterness that balances the caramel sweetness.
Peanut Butter Swirl
Mix in two tablespoons of creamy peanut butter into the wet batter before adding the dry mix. The peanut butter creates ribbons of nutty richness that mingle beautifully with the caramel.
Salted Caramel Crunch
After baking, sprinkle flaky sea salt on top while the cookies are still warm. The salt amplifies the caramel flavor and adds a sophisticated finish.
Gluten‑Free Version
Replace the all‑purpose flour with a 1:1 gluten‑free flour blend and add a teaspoon of xanthan gum. The texture remains tender, and the cookies are safe for gluten‑intolerant friends.
Holiday Spice
Incorporate a pinch of cinnamon, nutmeg, and a dash of clove into the dry mix for a warm, festive flavor—perfect for winter gatherings.
Storing and Bringing It Back to Life
Fridge Storage
Place the cooled cookies in an airtight container with a paper towel at the bottom to absorb excess moisture. They’ll stay fresh for up to seven days. If you notice any dryness, a quick drizzle of melted caramel before reheating revives them.
Freezer Friendly
Layer cookies between parchment sheets and seal them in a zip‑top freezer bag. They freeze beautifully for up to three months. When you’re ready, let them thaw at room temperature for 15 minutes, then give them a brief 10‑second microwave zap.
Best Reheating Method
Preheat a skillet over low heat, add a splash of water (just a teaspoon), and place a cookie in the pan, covering it for 30 seconds. The steam revives the gooey interior while the bottom crisps up—like a mini‑toast for your cookie.