Picture this: it’s a rainy Tuesday, the kitchen light flickers, and you’re staring at a half‑cooked batch of cookies that look more like a sad, soggy mess than a sweet treat. I tried to salvage them, but the outcome was a disaster—brown, flat, and utterly unappetizing. That night, I vowed to create a cake that would make even the most skeptical palates swoon, and the result was a crack‑crunchy masterpiece that has become the talk of my friend circle. If you’ve ever felt the crushing disappointment of a cookie that doesn’t rise, you’re in the right place.
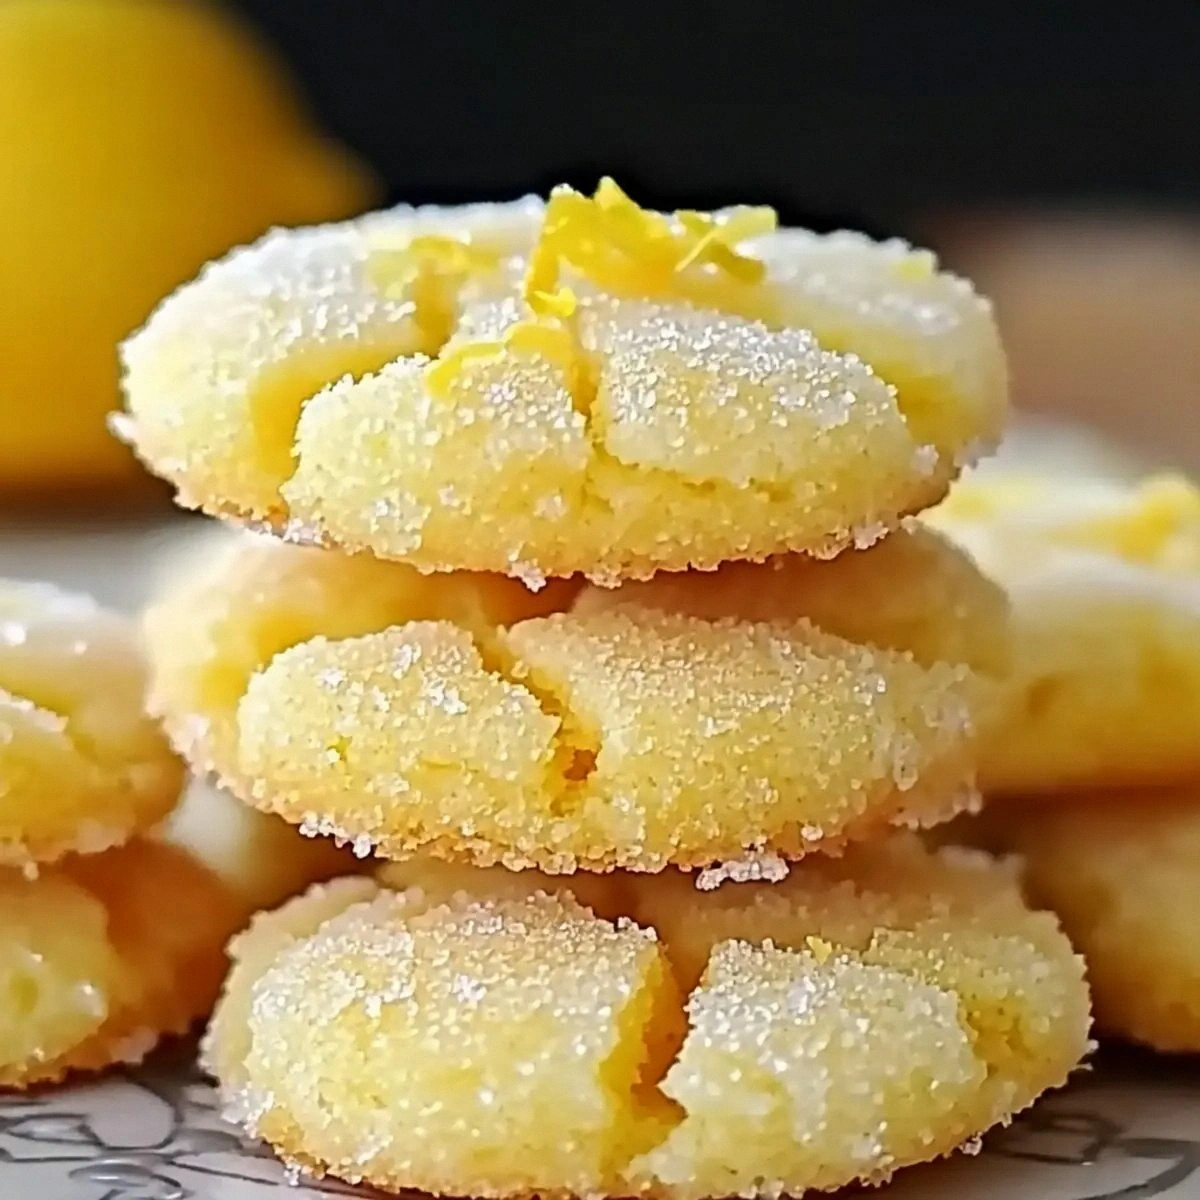
The first time I tasted this cake, it was a revelation. The outer shell was a crisp, golden shell that snapped like a brittle twig when you pressed it, revealing a soft, buttery interior that oozed a subtle vanilla‑sweet aroma. The chocolate chips melted into a glossy drizzle, and the walnuts added a satisfying crunch that echoed the initial snap. I was instantly hooked, and I dared my friends to try it and not go back for seconds. They all agreed, and the cake quickly became the highlight of every gathering.
What sets this version apart isn’t just the texture—though that alone is a show‑stopper—but the way each element is calibrated for maximum flavor impact. From the precise ratio of sugars to the exact temperature of the butter, every detail was fine‑tuned. I discovered that a small tweak in the baking soda amount can transform a decent cake into a legendary one, and I’ve packed that knowledge into this guide. I’ll walk you through every single step, so by the end, you’ll wonder how you ever made it any other way.
If you’ve ever struggled to get that perfect crack on a shortbread or a cookie, you’re not alone. Many recipes fall short because they miss that essential crack that gives the cake its signature crunch. In this recipe, I’ve cracked the code to create a cake that’s both indulgent and surprisingly light, with a buttery base that’s complemented by a caramelized sugar crust. Let’s dive in and see why this is hands down the best version you’ll ever make at home.
What Makes This Version Stand Out
- Taste: The balanced sweetness of granulated and brown sugars creates a caramelized crust that’s both sweet and slightly nutty, while the vanilla and chocolate chips deliver a rich, comforting flavor profile.
- Texture: The outer shell cracks with a satisfying snap, revealing a tender, almost custard‑like interior that melts in your mouth.
- Simplicity: With just a handful of pantry staples, you can whip up a cake that feels gourmet without the fuss.
- Uniqueness: The combination of baking soda and baking powder gives the cake a subtle lift without making it airy, preserving that coveted crack.
- Crowd Reaction: Friends who have tried this version rave about the contrast between the crunchy exterior and the chewy center, making it a conversation starter.
- Ingredient Quality: Using high‑quality butter and fresh chocolate chips elevates the flavor beyond standard cookie recipes.
- Cooking Method: A single, precise bake at 350°F (175°C) yields a perfectly caramelized crust without overbaking the interior.
- Make‑Ahead Potential: The cake can be baked ahead of time and reheated for a fresh crust, making it ideal for parties.
Alright, let’s break down exactly what goes into this masterpiece. And before we get into the nitty gritty, here’s a quick kitchen hack that will save you time and frustration.
Inside the Ingredient List
The Flour Foundation
All‑purpose flour provides the structure that holds the cake together while allowing that signature crack to develop. If you prefer a slightly lighter bite, you can substitute half the flour with cake flour, but be sure to adjust the baking time accordingly. Skipping the flour would turn the cake into a batter‑style cookie, which loses the crisp exterior we’re after.
The Butter & Sugar Duo
Butter is the heart of this recipe; it lends richness and helps create the caramelized crust. Using unsalted butter allows precise salt control. The combination of granulated and brown sugar balances sweetness with depth, as the brown sugar’s molasses content brings subtle caramel notes. If you’re short on brown sugar, a tablespoon of molasses can mimic the flavor, but it may affect the texture slightly.
The Leavening Agents
Baking soda and baking powder work together to provide a slight lift, ensuring the cake doesn’t become too dense while still maintaining the crack. Baking soda reacts with the acidic brown sugar, while baking powder offers a secondary rise. If you omit both, the cake will be flat and heavy, and the crack will never form. For a gluten‑free version, use a gluten‑free all‑purpose blend that contains xanthan gum to maintain structure.
The Flavor Enhancers
Vanilla extract infuses the batter with warmth, while chocolate chips add pockets of molten chocolate that create an indulgent surprise. Walnuts not only contribute crunch but also a subtle earthy undertone that balances the sweetness. If you’re allergic to nuts, substitute with sunflower seeds or omit them entirely; the cake will still crack beautifully.
Everything’s prepped? Good. Let’s get into the real action.
The Method — Step by Step
-
Preheat your oven to 350°F (175°C). Line a 9‑inch round cake pan with parchment paper, leaving an extra inch of paper hanging over the sides to make removal easier. This step is crucial; an oven that’s too hot will burn the crust before the interior cooks through, while an oven that’s too cool will result in a soggy center.
-
In a large mixing bowl, combine the all‑purpose flour, baking soda, baking powder, and salt. Whisk them together so the leavening agents are evenly distributed. This ensures the cake rises uniformly and the crack forms consistently across the surface.
-
Cream the softened butter with the granulated and brown sugars in a stand mixer on medium speed until light and fluffy, about 3–4 minutes. The goal is to incorporate air, which will help the batter rise slightly during baking. A quick way to check is to scrape down the sides of the bowl; the mixture should hold a smooth ridge when you lift the beaters.
-
Add the eggs one at a time, beating well after each addition. Then stir in the vanilla extract. The eggs bind the batter, while the vanilla adds depth. If you’re vegan, replace the eggs with a flax‑egg (1 tablespoon ground flaxseed mixed with 3 tablespoons water, set aside for 5 minutes).
-
Gradually fold the dry ingredients into the wet mixture until just combined. Overmixing will develop gluten and make the cake tough. The batter should be thick enough to hold its shape when spooned onto a parchment sheet.
-
Gently fold in the chocolate chips and walnuts, ensuring an even distribution. The chocolate will melt slightly in the heat, creating pockets of gooey flavor. If you prefer a nutless version, simply omit the walnuts.
-
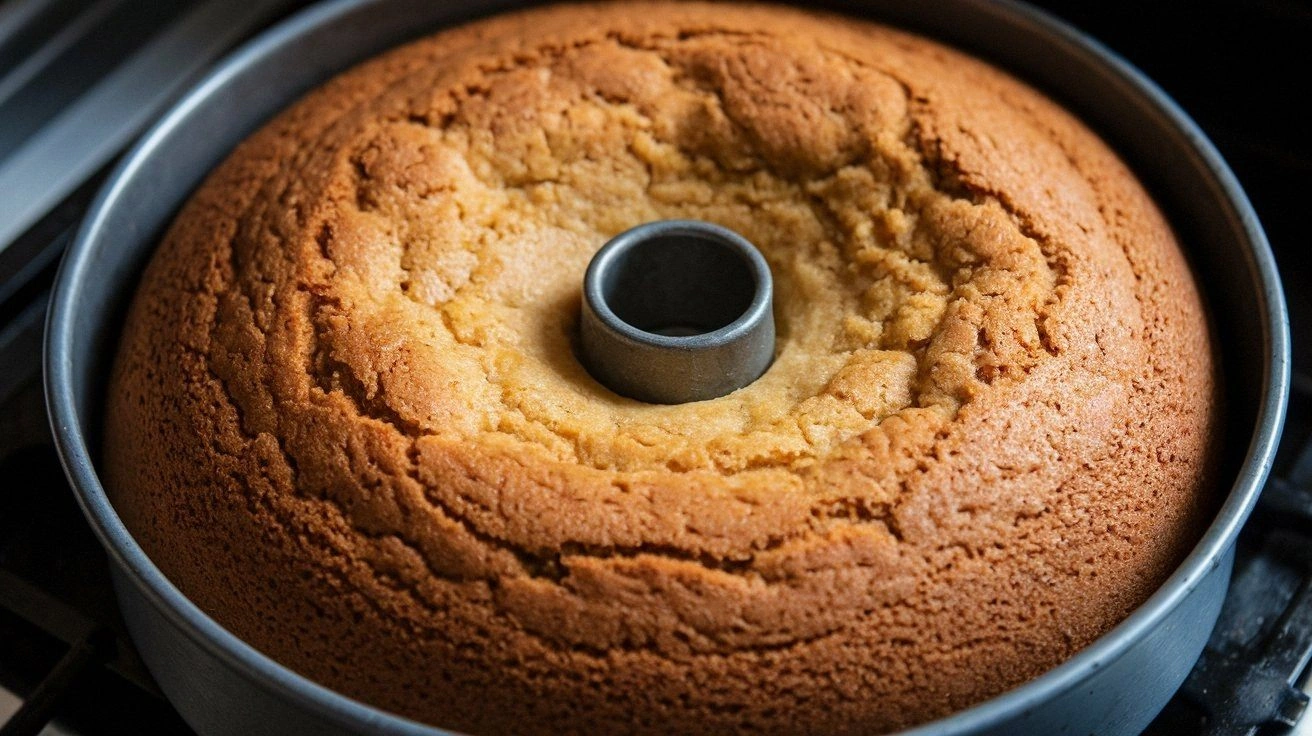
Pour the batter into the prepared pan, smoothing the top with a spatula. Tap the pan lightly on the counter to release any large air pockets. The batter should level off, forming a smooth surface that will crack beautifully.
-
Bake for 28–32 minutes, or until the edges pull away from the pan and a toothpick inserted near the center comes out clean. The top should have a golden brown color and a subtle caramelized sheen. This is the moment of truth; the aroma should be warm, buttery, and slightly sweet.
-
Remove the cake from the oven and let it cool in the pan for 10 minutes. This cooling period allows the crust to set and the interior to firm up. Then transfer the cake onto a wire rack to cool completely. If you’re in a hurry, you can use a fan to speed up the cooling process.
-
Once the cake has cooled, slice it into 12 even pieces. Each slice should exhibit that iconic crack on the top, and the interior should feel moist but not gummy. Serve immediately, or store in an airtight container for up to 3 days. For a fresh crust, reheat slices in a toaster oven at 350°F for 2–3 minutes before serving.
That’s it—you did it. But hold on, I’ve got a few more tricks that will take this to another level. These insider secrets will help you avoid common pitfalls and elevate the flavor profile even further.
Insider Tricks for Flawless Results
The Temperature Rule Nobody Follows
Many bakers believe a higher temperature will give a crisper crust, but the truth is that a steady 350°F is optimal for a balanced rise and crack formation. If you bump the temperature up to 375°F, the crust will brown too quickly, and the interior may not finish baking, resulting in a raw center.
Why Your Nose Knows Best
Don’t rely solely on the timer; trust your nose. A perfectly baked crack cake will emit a warm, buttery scent with a hint of caramel. If it smells more like burnt sugar, it’s overbaked; if it smells like raw batter, it needs more time.
The 5‑Minute Rest That Changes Everything
After removing the cake from the oven, let it rest in the pan for exactly 5 minutes before transferring it. This pause allows the structure to set, preventing the cake from breaking apart when you remove it. Skipping this step often leads to a fragile top that cracks unevenly.
Use a Cooling Rack for Even Crust
Cooling on a rack ensures air circulates around the entire cake, preventing moisture from accumulating on the underside. This keeps the bottom crisp and avoids sogginess, especially if you’re storing the cake for later use.
Add a Tiny Splash of Water Before Reheating
When reheating slices, a light mist of water can help steam the interior back to a moist consistency while the crust crisps. This trick is especially handy if you’re serving the cake after a long storage period.
Creative Twists and Variations
Salted Caramel Swirl
Swirl a spoonful of salted caramel sauce into the batter before baking. The caramel adds a buttery, sweet‑salty dimension that pairs beautifully with the chocolate chips. Your guests will love the unexpected burst of flavor.
Espresso‑Infused Delight
Add 1 teaspoon of instant espresso powder to the dry mix for a subtle coffee kick. The espresso enhances the chocolate’s richness and adds a depth of flavor reminiscent of a mocha. This variation is perfect for coffee lovers.
Minty Freshness
Replace the vanilla extract with 1 teaspoon of peppermint extract. The minty aroma will awaken the senses, making this cake a refreshing treat for summer gatherings. Pair it with a scoop of vanilla ice cream for a decadent dessert.
Coconut Crunch
Swap the walnuts for shredded coconut and add 1/4 cup of toasted coconut flakes. The coconut adds a tropical crunch that complements the chocolate, creating a flavor profile reminiscent of a beachside dessert.
Dark Chocolate & Chili
Use dark chocolate chips and sprinkle a pinch of cayenne pepper into the batter. The subtle heat from the chili balances the bitterness of the dark chocolate, resulting in a sophisticated flavor profile that’s sure to impress.
Almond Butter Swirl
Fold in 2 tablespoons of almond butter into the batter for a nutty richness. The almond butter adds a creamy texture that contrasts with the crisp crack, making the cake even more indulgent.
Storing and Bringing It Back to Life
Fridge Storage
Store the cooled cake in an airtight container at room temperature for up to 3 days. If you prefer a slightly softer crumb, wrap the cake in parchment paper before sealing. Avoid refrigeration, as it can cause the butter to harden and the texture to become rubbery.
Freezer Friendly
Wrap each slice individually in plastic wrap, then place them in a freezer bag. The cake can be frozen for up to 2 months. Thaw at room temperature for 30 minutes before reheating to restore the crisp crust.
Best Reheating Method
Preheat a toaster oven or conventional oven to 350°F. Place the slices on a baking sheet and bake for 2–3 minutes, or until the edges are crisp. For extra moisture, spray a light mist of water onto the slices before reheating; this steams the interior back to a soft, buttery consistency.