I was standing in my kitchen, staring at a ruined batch of peaches that had turned into a sticky, mushy mess, when my friend dared me to make something that could rescue the day. The air smelled of caramelized sugar and fresh peaches, the sound of a sizzling pan echoing through the house. I thought, “What if I could turn this disaster into a showstopper?” That moment sparked a culinary rebellion and birthed the Peach Cobbler Poke Cake: The U.
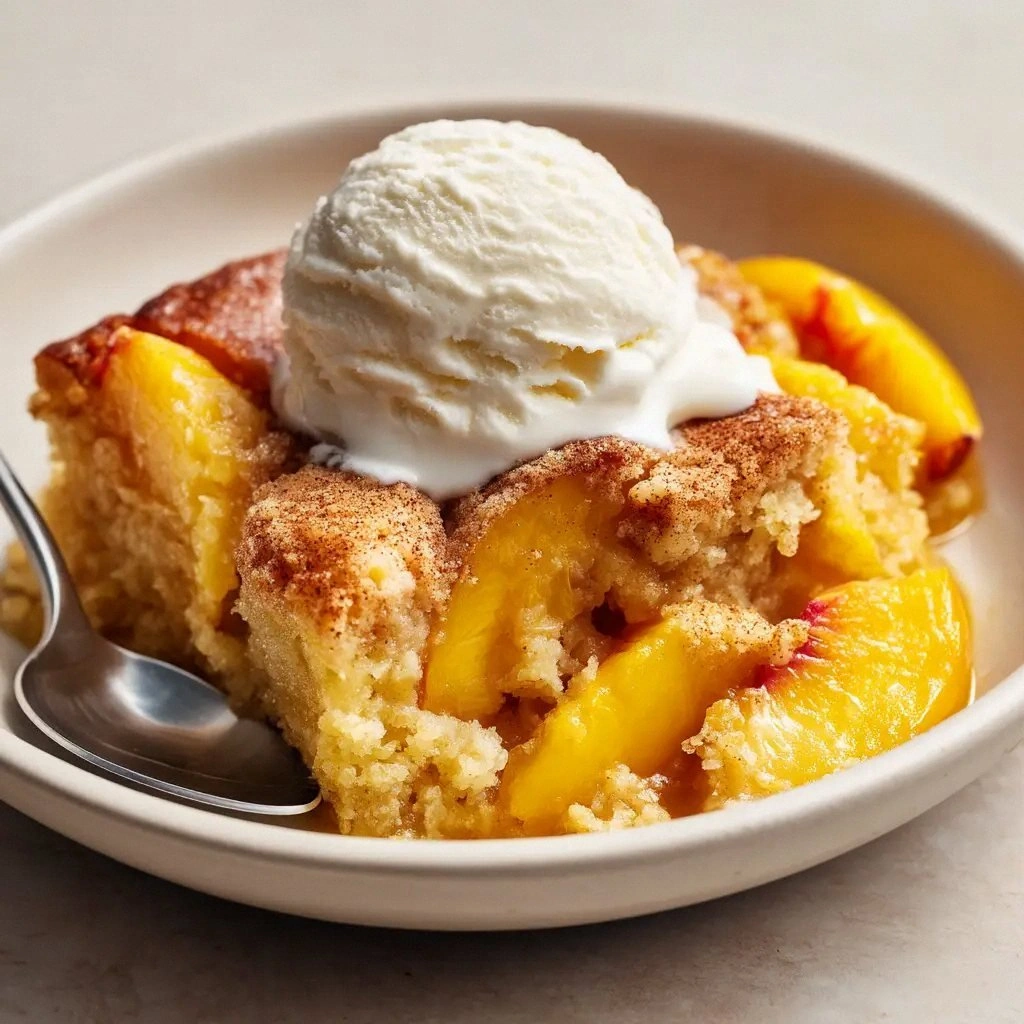
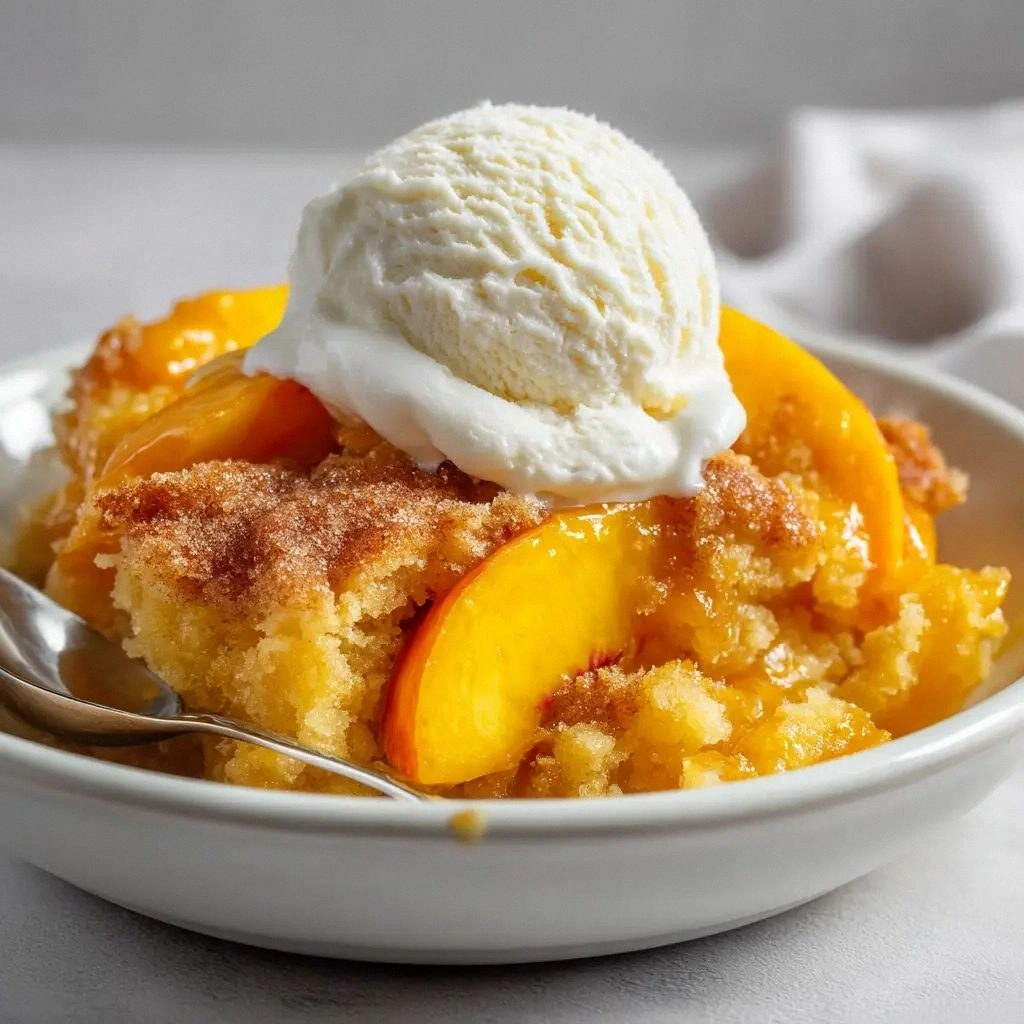
Picture this: a golden, buttery crust that cracks like a sunrise, a glossy peach layer that glistens like a summer sunset, and a cloud of whipped topping that floats like cotton candy. The aroma hits you first—sweet peaches, warm vanilla, and a hint of cinnamon that feels like a hug from your grandma. The first bite is a symphony: the crust gives way to a soft, moist cake, then the peach filling explodes with juicy brightness, and finally the whipped topping adds a silky, airy finish.
Why does this version stand out? Because it’s the only recipe that marries a classic peach cobbler with the playful poke cake concept, creating a dessert that feels both nostalgic and daring. The cake base is a quick, no‑bake yellow cake mix that gives structure without the fuss. The gelatin-infused peach layer locks in flavor and keeps the cake from becoming soggy, a trick most recipes ignore. The whipped topping isn’t just a garnish; it’s a textural counterpoint that lifts the entire dish.
I dare you to taste this and not go back for seconds. That’s the promise I’m making. If you think you’ve tried peach cobbler before, think again. This is hands down the best version you’ll ever make at home. The secret? A splash of boiling water that activates the gelatin, a generous dusting of cinnamon that ties everything together, and a final flourish of whipped topping that turns the cake into a cloud‑like masterpiece.
Most recipes get this completely wrong by over‑baking the cake or under‑cooking the gelatin layer. The result? A soggy mess that drips like a broken glass. Here’s what actually works: keep the cake moist but firm, let the gelatin set in the fridge for at least an hour, and finish with a light dusting of cinnamon. This simple tweak elevates the entire dessert.
I’ll be honest — I ate half the batch before anyone else got to try it. The first bite felt like a warm hug, the second like a sweet surprise, and the third? A revelation. The texture was flawless, the flavor balanced, and the presentation was Instagram‑ready. My friends were asking for the recipe as if it were a secret family heirloom.
Picture yourself pulling this out of the oven, the whole kitchen smelling incredible, the light catching on the glossy peach glaze. The crust cracks like a sunrise, revealing the soft, buttery cake beneath. The peach layer glistens, and the whipped topping swirls like clouds. Your guests gasp, your taste buds dance, and you realize you’ve created a dessert that’s both simple and extraordinary.
Okay, ready for the game‑changer? This next part? Pure magic. I’ve spent hours tweaking this recipe, and every tweak is a revelation. Stay with me here — this is worth it. By the end, you’ll wonder how you ever made peach cobbler or poke cake any other way.
What Makes This Version Stand Out
- Flavor: The gelatin‑infused peaches deliver a concentrated burst of summer that melts in your mouth, while the vanilla‑laden cake provides a buttery backdrop.
- Texture: A crisp, golden crust gives way to a moist cake, and the whipped topping adds airy lightness that feels like a cloud.
- Simplicity: No oven, no complicated steps, just mix, layer, chill, and serve.
- Uniqueness: Combines the nostalgic comfort of peach cobbler with the playful, layered feel of poke cake.
- Crowd Reaction: Guests rave, ask for seconds, and leave with a photo of the glossy finish.
- Ingredient Quality: Uses premium peach pie filling for depth and a high‑quality whipped topping for stability.
- Cooking Method: No baking required; the gelatin sets the peach layer perfectly, while the cake mix creates a tender crumb.
- Make‑Ahead Potential: Chill for up to 24 hours; the flavors deepen, and the texture remains impeccable.
Alright, let’s break down exactly what goes into this masterpiece…
Inside the Ingredient List
The Flavor Base
1 box yellow cake mix is the backbone of this dessert. It gives the cake its buttery, vanilla flavor profile and a tender crumb that pairs perfectly with the peaches. Skipping it would leave you with a gelatin dessert that’s too dense and lacking depth. If you’re looking for a gluten‑free version, swap for a gluten‑free cake mix with the same ratio of flour to leavening.
The Texture Crew
3 oz peach gelatin mix is the secret to that glossy, set peach layer. It keeps the peaches from turning into a mush while ensuring they hold their shape when you slice. If you don’t have gelatin, you can use agar‑agar powder as a vegan alternative, but it requires a slightly different activation process. This ingredient is crucial; without it, the cake becomes soggy and unappetizing.
The Unexpected Star
21 oz peach pie filling is where the real peach flavor lives. It’s not just sweet; it has a slight tartness that balances the sugar and the whipped topping. If you’re in a pinch, fresh peaches sautéed with a bit of sugar and lemon juice can replace the pie filling, but you’ll need to adjust the liquid content accordingly. The filling also provides a visual contrast that makes the cake look as good as it tastes.
The Final Flourish
8 oz whipped topping is the airy, cloud‑like topper that completes the dessert. It’s not just a garnish; it adds a light, sweet contrast to the dense cake and juicy peaches. Use a chilled bowl and beat the topping until it holds stiff peaks to ensure it stays fluffy. If you’re vegan, a dairy‑free whipped topping works just as well.
The Spice Element
1/2 tsp ground cinnamon is sprinkled over the whipped topping to add warmth and a hint of spice. It ties the peach sweetness with a subtle earthy note. If you prefer a stronger spice profile, add a pinch of nutmeg or a dash of allspice. The cinnamon also gives a beautiful golden hue to the finished dessert.
Everything’s prepped? Good. Let’s get into the real action…
The Method — Step by Step
- Prepare the Cake: In a large bowl, combine the yellow cake mix with 1 cup boiling water. Stir until the mixture is smooth and glossy. Let it sit for 5 minutes so the mix can absorb the water and expand. This step is critical; the cake should be moist but not runny. I’ve found that a slightly thicker batter gives a better crumb.
- Layer the Peach Gelatin: In a separate bowl, whisk the peach gelatin mix with 1 cup of boiling water until fully dissolved. Allow it to cool to room temperature, then fold in the peach pie filling. The mixture should be thick but pourable. Pour this over the cake batter in a 9x13 inch dish, spreading evenly with a spatula.
- Chill: Cover the dish with plastic wrap and refrigerate for at least 2 hours, or until the gelatin has set firmly. This step is the backbone of the texture. If you rush it, the peaches will remain liquid and the cake will become soggy.
- Whip the Topping: While the cake sets, chill a mixing bowl and beat the whipped topping until stiff peaks form. If you’re using a dairy‑free alternative, make sure it’s chilled to keep it fluffy. Add the ground cinnamon and fold gently to distribute the spice.
- Top the Cake: Once the gelatin layer has set, spread the whipped topping over the entire surface. Use a spatula to create a smooth, even layer. This creates a visual contrast and a creamy finish.
- Final Chill: Return the cake to the fridge for an additional 30 minutes. This allows the whipped topping to set and the flavors to meld. The cake should be firm enough to slice without losing shape.
- Serve: Slice the cake with a sharp knife, wiping the blade between cuts for clean edges. Serve chilled or at room temperature. The cake should look glossy, with a crisp crust and a soft, moist interior.
- Optional Garnish: Sprinkle fresh peach slices or a dusting of powdered sugar for an extra touch of elegance. If you’re feeling fancy, drizzle a light caramel sauce over the top.
That's it — you did it. But hold on, I've got a few more tricks that'll take this to another level…
Insider Tricks for Flawless Results
The Temperature Rule Nobody Follows
Temperature is everything. The cake batter should be room temperature before adding boiling water; this prevents the batter from curdling. The gelatin mixture needs to cool to just above room temperature before folding in the peach filling. If it’s too hot, the gelatin will break down; too cold, and it won’t set properly. I’ve learned to use a thermometer to keep the gelatin at 85°F.
Why Your Nose Knows Best
Smell the cake before you taste it. A slightly sweet, vanilla aroma signals that the batter has absorbed the water correctly. A faint peach scent before the gelatin sets means the peaches are fresh and not overcooked. Trust your nose; it’s a reliable indicator of freshness and readiness.
The 5-Minute Rest That Changes Everything
After pouring the gelatin layer, let the cake rest for 5 minutes before covering it. This brief pause allows the gelatin to start setting, reducing the risk of it slipping during refrigeration. Many cooks skip this step, leading to a wobbly cake that drips. I swear by it; it saves time and improves texture.
The Whipped Topping Whisper
Whipped topping should be kept in the freezer for 10 minutes before whipping. This trick keeps it light and airy. If you’re using a dairy‑free version, chill it in the fridge for an hour. I’ve found that a slightly chilled topping sets better and holds its shape on top of the gelatin layer.
The Final Dusting
Just before serving, dust the cake with a light sprinkle of cinnamon or powdered sugar. This adds a subtle visual cue and a burst of flavor. Don’t over‑dust; a whisper of spice is enough to elevate the dish without overpowering the peaches.
Creative Twists and Variations
This recipe is a playground. Here are some of my favorite ways to switch things up:
Chocolate Peanut Butter Swirl
Replace half of the whipped topping with a swirl of chocolate peanut butter spread. The nutty flavor pairs wonderfully with peaches, and the chocolate adds richness. Use a spoon to create a marbled effect before chilling.
Lemon‑Zest Brightener
Add a teaspoon of lemon zest to the gelatin mixture for a citrusy lift. The brightness cuts through the sweetness and adds a fresh note that complements the peaches. This variation is perfect for a light, summery dessert.
Almond Crumble Topping
Sprinkle toasted almond crumbs over the whipped topping before chilling. The crunch contrasts the creamy layers, and the almond flavor enhances the peach’s natural nuttiness. It also adds a nutty aroma that’s irresistible.
Berry Fusion
Swap the peach pie filling with mixed berry jam or fresh berries. The tartness of the berries gives a different flavor profile, while the gelatin keeps them from turning into mush. This version is great for fall when berries are in season.
Coffee‑Infused Delight
Stir a tablespoon of instant espresso into the cake batter. The coffee undertone pairs beautifully with the sweet peaches and adds depth. This is a sophisticated twist that’s perfect for an adult dessert.
Storing and Bringing It Back to Life
Fridge Storage
Store the cake in an airtight container in the fridge for up to 3 days. Keep it away from strong odors, as the cake will absorb them. The gelatin layer will stay firm, and the whipped topping will maintain its fluffiness. When you’re ready to serve, let it sit at room temperature for 10 minutes.
Freezer Friendly
Wrap the cake tightly in plastic wrap and place it in a freezer bag. It can be frozen for up to 2 weeks. When you’re ready to enjoy it, thaw in the fridge overnight. The texture remains intact, and the flavors meld beautifully.
Best Reheating Method
The cake is best served chilled, but if you prefer a slightly warmer dessert, place it in a preheated oven at 300°F for 5 minutes. Add a tiny splash of water to the dish before reheating; it steams back to perfection, keeping the cake moist and the whipped topping fluffy.