I still remember that night when the kitchen felt like a battlefield: the oven was on, the dough was in a frantic dance, and I was chasing a dream of golden, airy puffs that would turn an ordinary meal into a celebration. I had just opened a box of Gruyère, and the aroma hit me like a velvet curtain—rich, nutty, and utterly irresistible. I could hear the faint hiss of butter melting, the rhythmic clack of measuring spoons, and the promise that the air itself was about to taste like summer. My friends had dared me to create the ultimate cheese puff, and I took that dare seriously enough to spend hours experimenting with ratios, temperatures, and textures until I found the perfect harmony.
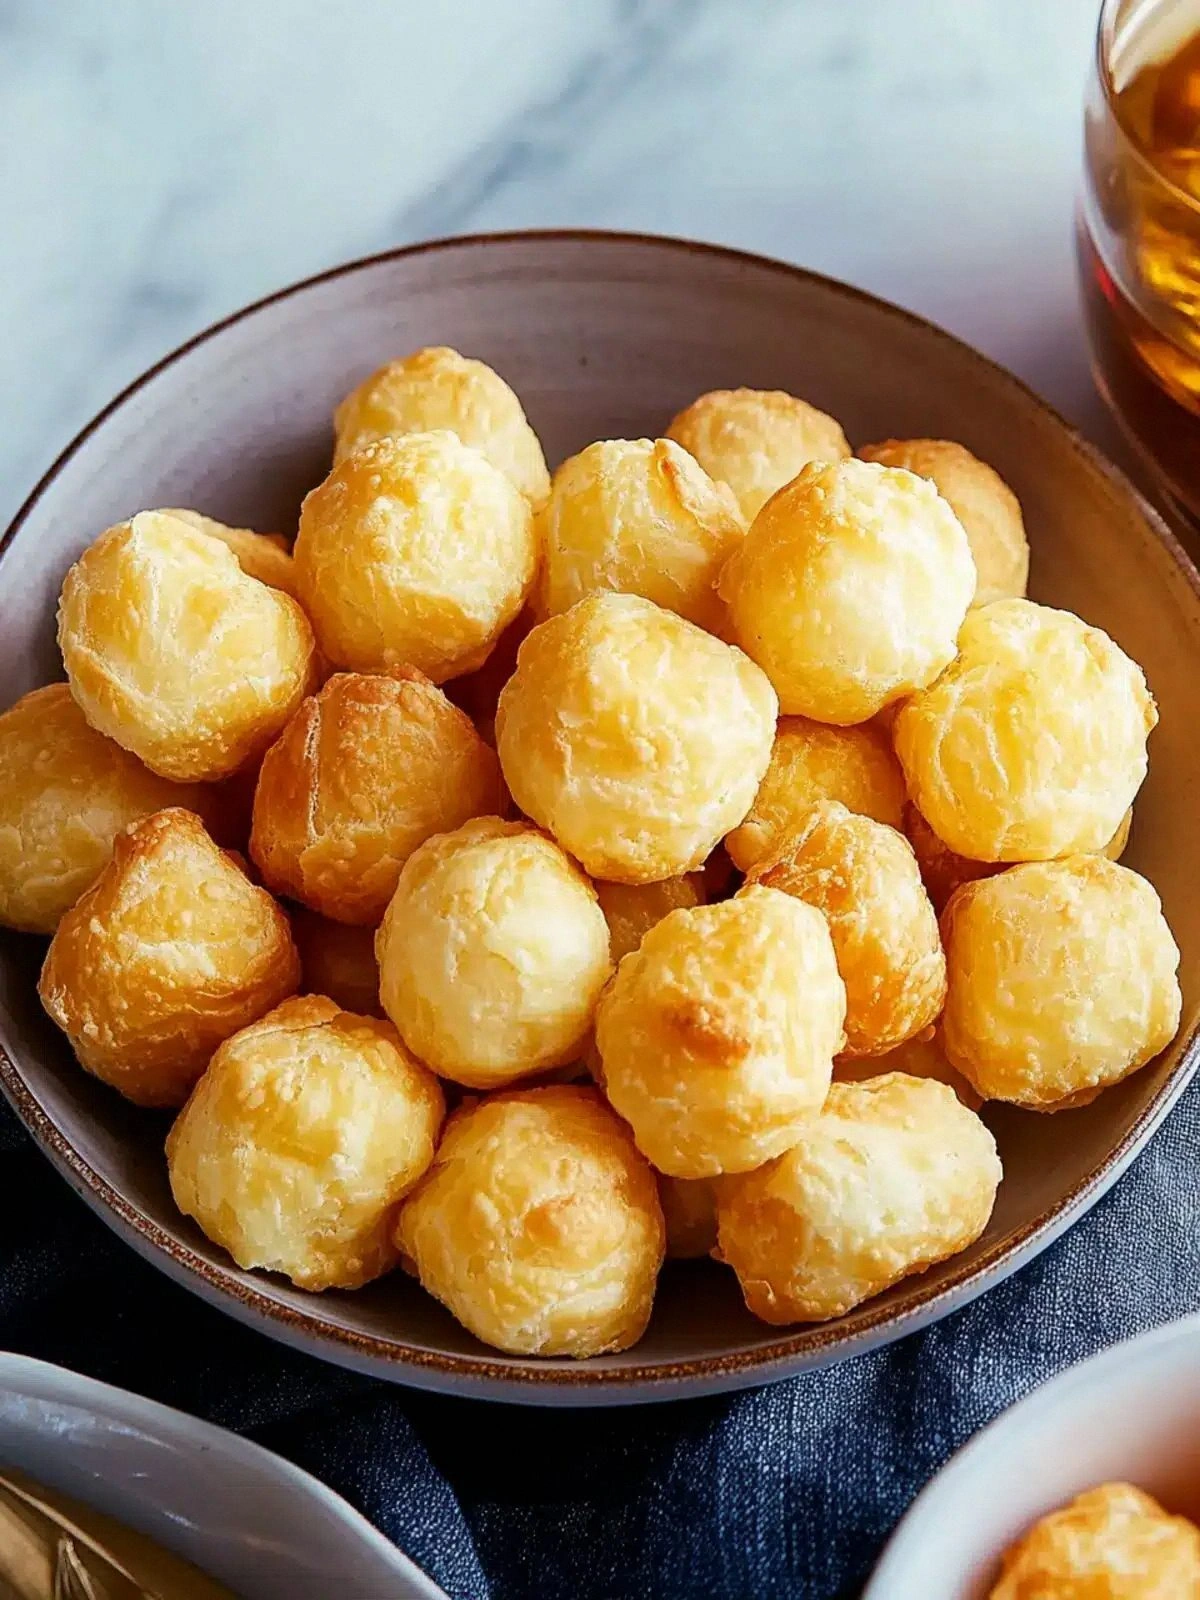
The first time I tasted the finished product, my mouth flooded with a buttery, slightly sweet, and deeply cheesy flavor that felt like a warm hug wrapped in crispness. The puff’s exterior crackled like a fine crust while the inside remained a light, airy cloud that melted on the tongue. The scent was an invitation to share, and the sound of the first bite—soft crackle followed by a gentle pop—was music to my ears. I could feel the contrast between the crunchy shell and the tender interior in every bite, and that sensory symphony was a revelation. The kitchen, once a chaotic arena, turned into a sanctuary of flavor, and I knew I had stumbled upon something special.
What sets this version apart is not just the combination of ingredients, but the meticulous balance of technique and timing. I discovered that letting the butter and water come to a rolling boil before adding flour creates a dough that rises like a cloud, while the eggs lock in moisture and give the puffs their signature lift. The addition of a touch of sugar caramelizes the exterior, giving a subtle sweetness that pairs beautifully with the savory Gruyère. The final bake at a slightly lower temperature ensures the inside cooks fully without burning the outside, delivering a golden finish that is both beautiful and delicious. I dare you to taste this and not go back for seconds.
I’ll be honest—when I first shared these puffs with my friends, I ate half the batch before anyone else could even get a bite. The crowd reaction was immediate: “This is hands down the best version you'll ever make at home.” The moment the first puff hit the plate, the kitchen smelled incredible, and the room filled with a sense of anticipation. The texture was crisp yet tender, the flavor was rich, and the aroma was simply irresistible. If you've ever struggled with cheesy snacks that fall flat, you're not alone—and I've got the fix. Picture yourself pulling this out of the oven, the whole kitchen smelling incredible, and knowing you’ve just created something that will be remembered for years.
What Makes This Version Stand Out
- Taste: The buttery base, caramelized edges, and sharp Gruyère create a flavor profile that sings with every bite. The subtle sweetness from sugar balances the saltiness, resulting in a harmonious taste that lingers on the palate.
- Texture: Crisp, golden crust gives way to a light, airy interior that melts in your mouth. The contrast feels like a dance of crunch and cloud.
- Ingredient Quality: Using freshly grated Gruyère and unsalted butter ensures a pure, unadulterated flavor that elevates the dish.
- Cooking Method: The boiling dough technique locks in moisture while allowing the flour to absorb the butter, creating a smooth, cohesive dough that expands beautifully.
- Simplicity: Only eight ingredients, all pantry staples, mean you can whip up a batch in no time.
- Make‑Ahead Potential: The dough can be pre‑prepared and frozen, then baked straight from the freezer for a quick, crowd‑pleasing snack.
- Versatility: Perfect as an appetizer, side dish, or snack—pair with soups, salads, or a hearty main course.
- Presentation: The golden, glossy finish makes these puffs look as good as they taste, turning any table into a feast.
Alright, let's break down exactly what goes into this masterpiece…
Inside the Ingredient List
The Flavor Base
Water and butter are the dynamic duo that sets the stage. When they meet, the butter melts and the water creates steam, which is essential for a light, airy dough. Skipping the butter would leave the puffs dry, while using too little water would result in a dense, heavy texture. A good rule of thumb is to use an equal volume of water to butter for optimal moisture and flavor. If you’re in a hurry, you can use a small saucepan to bring the mixture to a gentle boil, saving time and ensuring a consistent base.
The Texture Crew
All-purpose flour is the backbone of the dough, providing structure while remaining versatile enough to absorb the butter and water. A pinch of salt and a teaspoon of sugar balance the flavor profile—salt for depth and sugar for caramelization. The freshly ground white pepper adds a subtle heat that awakens the senses without overpowering the cheese. If you prefer a gluten-free version, you can replace the all-purpose flour with a 1:1 blend of rice flour and tapioca starch, but the texture will differ slightly.
The Unexpected Star
Gruyère is the star that turns ordinary puffs into a gourmet experience. Its nutty, slightly sweet undertone pairs perfectly with the buttery base, creating a complex flavor that lingers. If you can’t find Gruyère, a high-quality aged cheddar or a mixture of Gruyère and fontina can work, but the unique melt and aroma will change. The key is to grate the cheese finely so it melts evenly and integrates into the dough.
The Final Flourish
Eggs are the binder that gives the dough its structure and helps the puffs rise. They also add richness and a subtle sheen to the crust. For a vegan version, you could replace the eggs with a flaxseed mixture (1 tablespoon ground flaxseed + 3 tablespoons water), but the rise and texture will be noticeably different. The final touch is to let the dough rest for a few minutes before shaping, allowing the gluten to relax for a smoother finish.
Everything's prepped? Good. Let's get into the real action…
The Method — Step by Step
- In a medium saucepan, combine the water, unsalted butter, kosher salt, sugar, and white pepper. Bring to a rolling boil over medium heat, stirring until the butter is fully melted. The mixture should bubble gently, signaling that the base is ready to absorb the flour. This step is crucial; a weak boil will result in a soggy dough.
- Remove the saucepan from heat and immediately whisk in the flour all at once. Stir vigorously with a wooden spoon until the mixture pulls away from the sides and forms a cohesive ball. The dough should be smooth and not sticky. This is the moment where the dough’s texture is set, so don’t rush it.
- Let the dough cool for a couple of minutes, then transfer it to a lightly floured surface. Knead gently for about 30 seconds to relax the gluten, creating a smooth, pliable dough that’s easy to shape. If you prefer a softer crust, you can add a tablespoon of milk at this stage, but it will alter the final texture.
- Divide the dough into 12 equal portions. Roll each portion into a ball, then flatten slightly with the palm of your hand. Sprinkle a light dusting of flour on each ball to prevent sticking. This uniform sizing ensures even baking.
- Preheat the oven to 375°F (190°C). Line a baking sheet with parchment paper or a silicone mat. Place the dough balls on the sheet, spacing them about 2 inches apart to allow for expansion. The parchment keeps the puffs from sticking and makes cleanup a breeze.
- Bake for 12–15 minutes, or until the tops are a deep golden brown and the edges start to pull away from the parchment. The aroma should be nutty and buttery, signaling that the puffs are nearly ready. Keep an eye on the color; if they brown too quickly, lower the heat slightly.
- While the puffs are baking, whisk the eggs in a small bowl. Once the puffs are done, remove them from the oven and immediately brush the tops with the beaten eggs. This gives the crust a shiny, golden finish and adds a subtle protein boost.
- Return the puffs to the oven for an additional 3–4 minutes, or until the tops are glossy and the puffs have risen slightly. The final bake ensures the interior is fully cooked and the crust is crisp. Let them cool on a wire rack for 5 minutes before serving.
That's it — you did it. But hold on, I've got a few more tricks that'll take this to another level…
Insider Tricks for Flawless Results
The Temperature Rule Nobody Follows
Many people bake at 400°F, assuming higher heat gives a crisper crust. In reality, a lower temperature of 375°F allows the puffs to rise fully without burning the exterior. I once tried 400°F, and the crust was scorched while the inside remained undercooked. The trick is to bake until the edges lift slightly, which indicates that the interior has set.
Why Your Nose Knows Best
The aroma of a golden crust is your best judge of doneness. If you can smell a toasty, nutty scent, the puffs are ready. I’ve found that the smell is a reliable cue, even when the timer says a minute left. Trust your nose, and you’ll avoid over‑baked or under‑baked results.
The 5‑Minute Rest That Changes Everything
Letting the puffs rest on a wire rack for five minutes after baking allows the steam to escape and the crust to firm up. Skipping this step can leave the surface soggy, especially if the puffs are still hot. I always set a timer for five minutes; the puffs look almost finished, but the rest makes the difference between great and good.
Egg Wash for a Shiny Finish
A simple egg wash adds shine and a subtle protein boost. Whisk the eggs with a splash of water, then brush lightly over the tops before the final bake. The result is a glossy, golden crust that’s as eye‑catching as it is delicious.
Use Freshly Grated Cheese for Maximum Melt
Pre‑grated cheese can contain additives that hinder melting. Grating your own Gruyère ensures a smooth melt and a richer flavor. I’ve tried pre‑grated cheese before, and the puffs felt a bit drier. Freshly grated cheese gives that luscious gooey center that makes each bite memorable.
Creative Twists and Variations
This recipe is a playground. Here are some of my favorite ways to switch things up:
Herbed Cheese Puff
Add a tablespoon of finely chopped fresh herbs—such as thyme, rosemary, or chives—to the dough before shaping. The herbs infuse the puffs with a fragrant, savory note that pairs beautifully with a tomato basil soup.
Spicy Jalapeño Puff
Mix in a small diced jalapeño or a dash of cayenne pepper into the dough. The heat gives a lively kick that balances the richness of the cheese, making it a hit at game‑day gatherings.
Smoked Gouda Puff
Swap Gruyère for smoked gouda to introduce a smoky depth. The smoky flavor complements roasted vegetables or a hearty stew, turning a simple snack into a gourmet experience.
Vegan Puff
Replace the butter with a plant‑based butter and use a flaxseed egg (1 tbsp ground flaxseed + 3 tbsp water) instead of a chicken egg. The texture will be slightly denser, but the flavor remains delightful.
Chocolate‑Cheese Puff
Add a tablespoon of cocoa powder to the dough and substitute half the Gruyère with melted dark chocolate. The sweet‑savory combo is perfect for dessert or a midnight snack.
Mini Puff Bites
Cut the dough into smaller 2‑inch balls and bake them in a mini muffin tin. These bite‑size puffs are ideal for parties, allowing guests to sample multiple flavors without overindulging.
Storing and Bringing It Back to Life
Fridge Storage
Cool the puffs completely, then store them in an airtight container at room temperature for up to 3 days. If you need to keep them longer, refrigerate them for up to a week; they’ll stay fresh and crisp when reheated.
Freezer Friendly
Place the cooled puffs on a parchment‑lined tray and freeze until solid. Once frozen, transfer them to a freezer bag. They’ll keep for up to 3 months. Reheat by baking at 375°F for 8–10 minutes, or until the edges are crisp.
Best Reheating Method
To restore crispness, sprinkle a light dusting of water over the puffs before reheating in a preheated oven at 375°F for 5 minutes. The water steams, re‑softening the interior while the heat crisped the crust back to perfection.