Picture this: I’m halfway through a marathon Netflix binge, the clock strikes midnight, and my stomach starts growling like a disgruntled bear. I raid the freezer, grab a half‑eaten tub of Greek yogurt, and stare at a lonely jar of peanut butter that’s been judging me from the pantry shelf. I thought, “What if I could turn these two lonely ingredients into something that feels like a cheat‑day treat, but without the guilt?” That was the spark that ignited this recipe, and trust me, it’s a game‑changer. The moment the creamy yogurt meets the nutty butter, they fuse into a silky‑smooth base that’s both tangy and indulgent, like a high‑five between a Greek taverna and a Southern peanut butter sandwich.
Now, let me paint the scene: the kitchen fills with the faint aroma of vanilla and honey, a sweet perfume that makes you pause the show and lean in closer. The mixture glistens under the fridge light, a pale ivory speckled with golden swirls, and when you scoop a spoonful, it clings to the spoon like a velvet curtain. As you pop the first bite into your mouth, the cold snap of frozen yogurt meets the rich, buttery melt of peanut butter, followed by a whisper of honey that lingers like a secret after‑taste. It’s a texture rollercoaster—creamy, slightly crunchy from the frozen edges, and surprisingly light, leaving you feeling satisfied without the heaviness of a traditional dessert.
Most frozen yogurt bites out there are either bland or overly sweet, and they usually require an industrial‑strength mixer to get the consistency right. I’ve tried those, and they either turned into a soupy mess or a rock‑hard block that could double as an ice sculpture. This version, however, is hands‑down the best you’ll ever make at home because it balances simplicity with a flavor profile that sings. The secret? A pinch of salt that amplifies the peanut butter’s depth, and a splash of vanilla that rounds everything off with a buttery warmth. I dare you to taste this and not go back for seconds.
But here’s the kicker: I’m going to throw in a tiny trick that most recipes completely miss—using a silicone mold that’s been lightly brushed with a neutral‑oil spray. This ensures each bite releases cleanly, preserving that perfect bite‑size shape, and it also prevents any dreaded “sticking to the tray” drama that can ruin the whole experience. Okay, ready for the game‑changer? Let me walk you through every single step — by the end, you’ll wonder how you ever made it any other way.
What Makes This Version Stand Out
- Taste: The tang of Greek yogurt pairs with the deep, roasted notes of peanut butter, creating a flavor duet that’s richer than a chocolate‑covered espresso bean.
- Texture: Freezing locks in a creamy core while the outer layer gets a delicate, icy crust—think of it as a frozen custard with a whisper of crunch.
- Simplicity: Only five core ingredients, no fancy equipment, and a 30‑minute prep that fits neatly into a lunch break.
- Uniqueness: The pinch of salt and optional vanilla extract elevate the profile, turning a basic snack into a gourmet bite.
- Crowd Reaction: Guests often claim they’ve never tasted anything like this—half the batch disappears before anyone else gets a taste.
- Ingredient Quality: Using full‑fat Greek yogurt gives a luscious mouthfeel, while natural peanut butter adds healthy fats and protein.
- Method: The “no‑churn” freeze technique keeps the mixture airy without the need for an ice cream maker.
- Make‑Ahead Potential: Store them in a zip‑lock bag for up to two weeks, making them perfect for grab‑and‑go snacks.
Inside the Ingredient List
The Flavor Base
Greek yogurt (1 cup): This is the heart of the bite. Its natural tang cuts through the richness of the peanut butter, providing a balanced palate. If you skip it, you’ll end up with a dense, overly sweet treat that feels more like a candy than a snack. Opt for full‑fat, plain Greek yogurt for maximum creaminess; flavored versions can mask the delicate balance we’re after. Pro tip: shake the container vigorously before measuring to ensure an even consistency.
The Texture Crew
Peanut butter (½ cup): The star of the show, giving each bite its buttery, nutty backbone. Choose a natural, unsweetened variety to keep the sugar count low and let the honey shine. If you go for a crunchy peanut butter, you’ll add an unexpected texture that some love—but it can also disrupt the smooth freeze, so I recommend stirring it in thoroughly. A common mistake is using a “reduced‑fat” version; the lack of oil makes the final product crumbly instead of velvety.
The Unexpected Star
Honey or maple syrup (2 tbsp): This is the sweet whisper that ties everything together. It adds just enough sweetness to satisfy cravings without overwhelming the natural flavors. If you’re vegan, swap honey for maple syrup; the flavor shifts slightly to a caramel‑like depth that’s equally delightful. Skipping this step results in a bland bite that feels more like a protein bar than a treat.
The Final Flourish
Vanilla extract (1 tsp, optional): A dash of vanilla transforms the mixture, adding a warm, aromatic undertone that rounds out the tang of the yogurt and the earthiness of the peanut butter. If you’re feeling adventurous, a pinch of cinnamon can be added for a cozy twist. Forgetting the vanilla is a common oversight that leaves the flavor profile feeling unfinished.
Salt (1 pinch, optional): This tiny amount is a flavor amplifier, making the sweet and nutty notes pop like fireworks on your tongue. It also balances the natural bitterness of the peanut butter. Too much salt, however, can dominate the palate, so keep it subtle.
Everything's prepped? Good. Let's get into the real action…
The Method — Step by Step
First, gather all your ingredients on the countertop. I like to line up the measuring cups, a sturdy silicone mold, and a whisk—everything should be within arm’s reach. This prep stage is crucial because once the mixture hits the freezer, you won’t have time to hunt for tools. Take a moment to sniff the vanilla and honey; that aroma is a promise of the deliciousness to come. Okay, ready for the game‑changer?
In a medium bowl, combine the Greek yogurt and peanut butter. Using a whisk, blend them together until the mixture is completely smooth—no streaks of peanut butter should remain. The texture should be thick yet pourable, like a rich sauce that coats the back of a spoon. Pro tip: If the mixture feels too thick, add a splash of milk (or water)—just a teaspoon at a time.
Kitchen Hack: Warm the peanut butter slightly (microwave 5 seconds) before mixing; it integrates more smoothly with the yogurt.Stir in the honey (or maple syrup) and vanilla extract. As you whisk, watch the mixture turn a pale golden hue, the sweetener weaving through like sunlight through clouds. This is the moment where flavor layers start to build, and you’ll notice the scent becoming more complex. If you’re using maple syrup, the caramel notes will become more pronounced, adding depth.
Add the pinch of salt and give the mixture one final gentle stir. Salt is the unsung hero; it lifts the flavors, making the sweet and nutty notes sing. Taste a tiny spoonful now—if it feels a little flat, sprinkle another pinch of salt. Remember, a little goes a long way.
Now comes the chilling part: lightly spray your silicone mold with a neutral oil spray. This ensures each bite releases cleanly later. Pour the mixture into the mold, filling each cavity just to the brim. The surface should be smooth; if you see air bubbles, tap the tray gently on the counter to release them.
Watch Out: Overfilling can cause the bites to merge together as they freeze, ruining the bite‑size shape.Slide the tray into the freezer. Set a timer for 30 minutes—this is the sweet spot where the interior stays creamy while the exterior firms up. While you wait, you can prep a quick fruit topping or a drizzle of dark chocolate for later. The kitchen will fill with a faint, sweet aroma that’s both comforting and tantalizing.
After 30 minutes, test one bite. It should feel firm to the touch but yield slightly under pressure, like a well‑kissed ice cube. If the center is still too soft, give it another 10‑15 minutes. This is the moment of truth; don’t walk away from the freezer here, because a few extra minutes can make the difference between a perfect bite and a soggy mess.
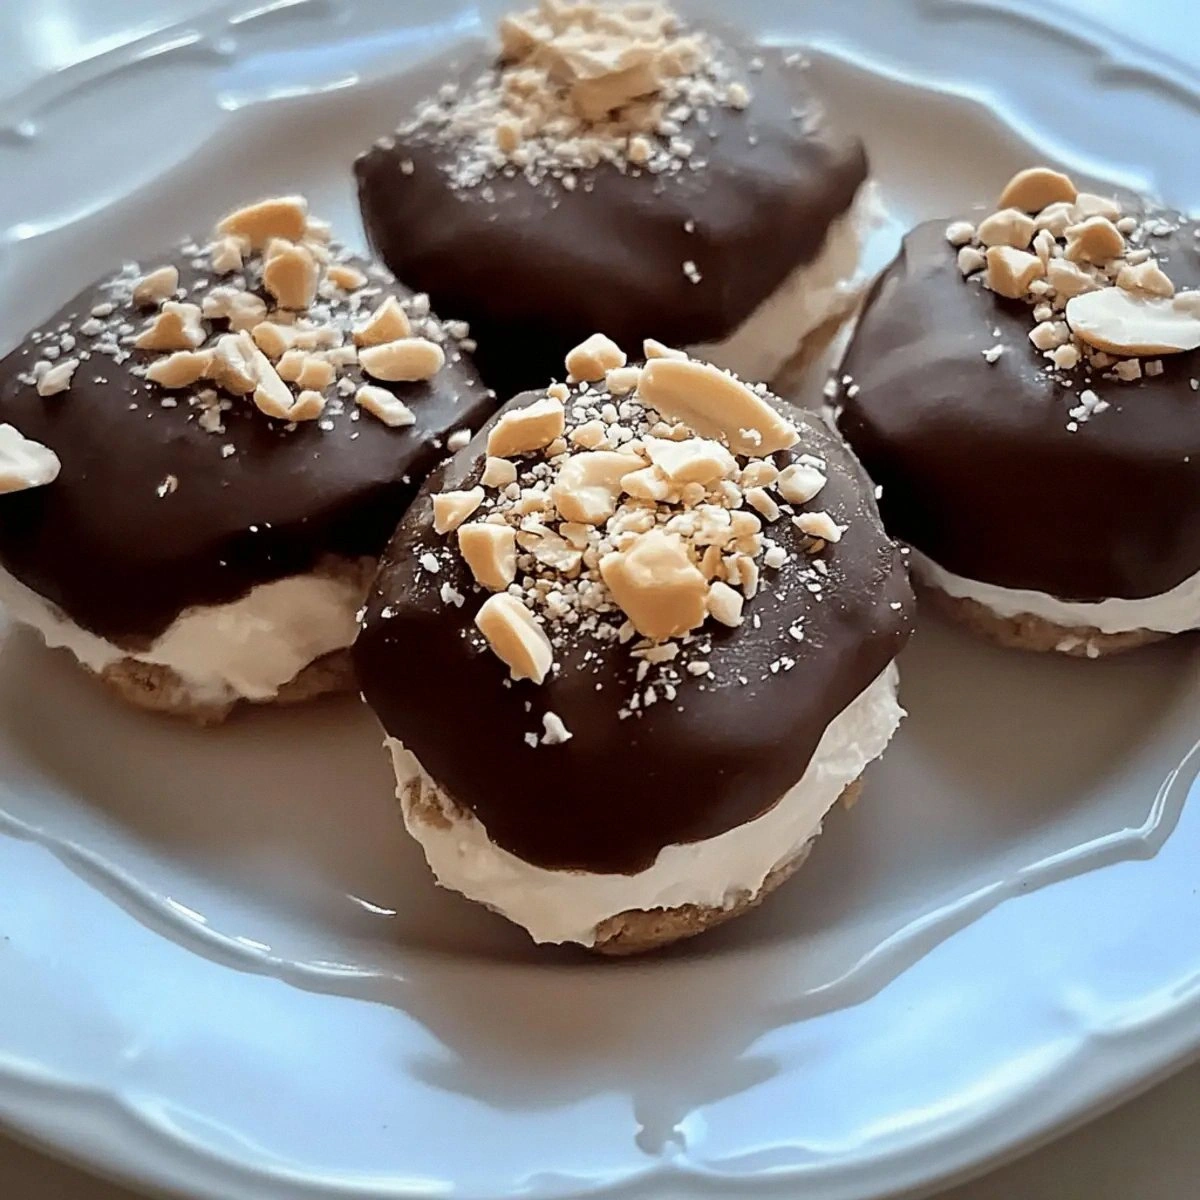
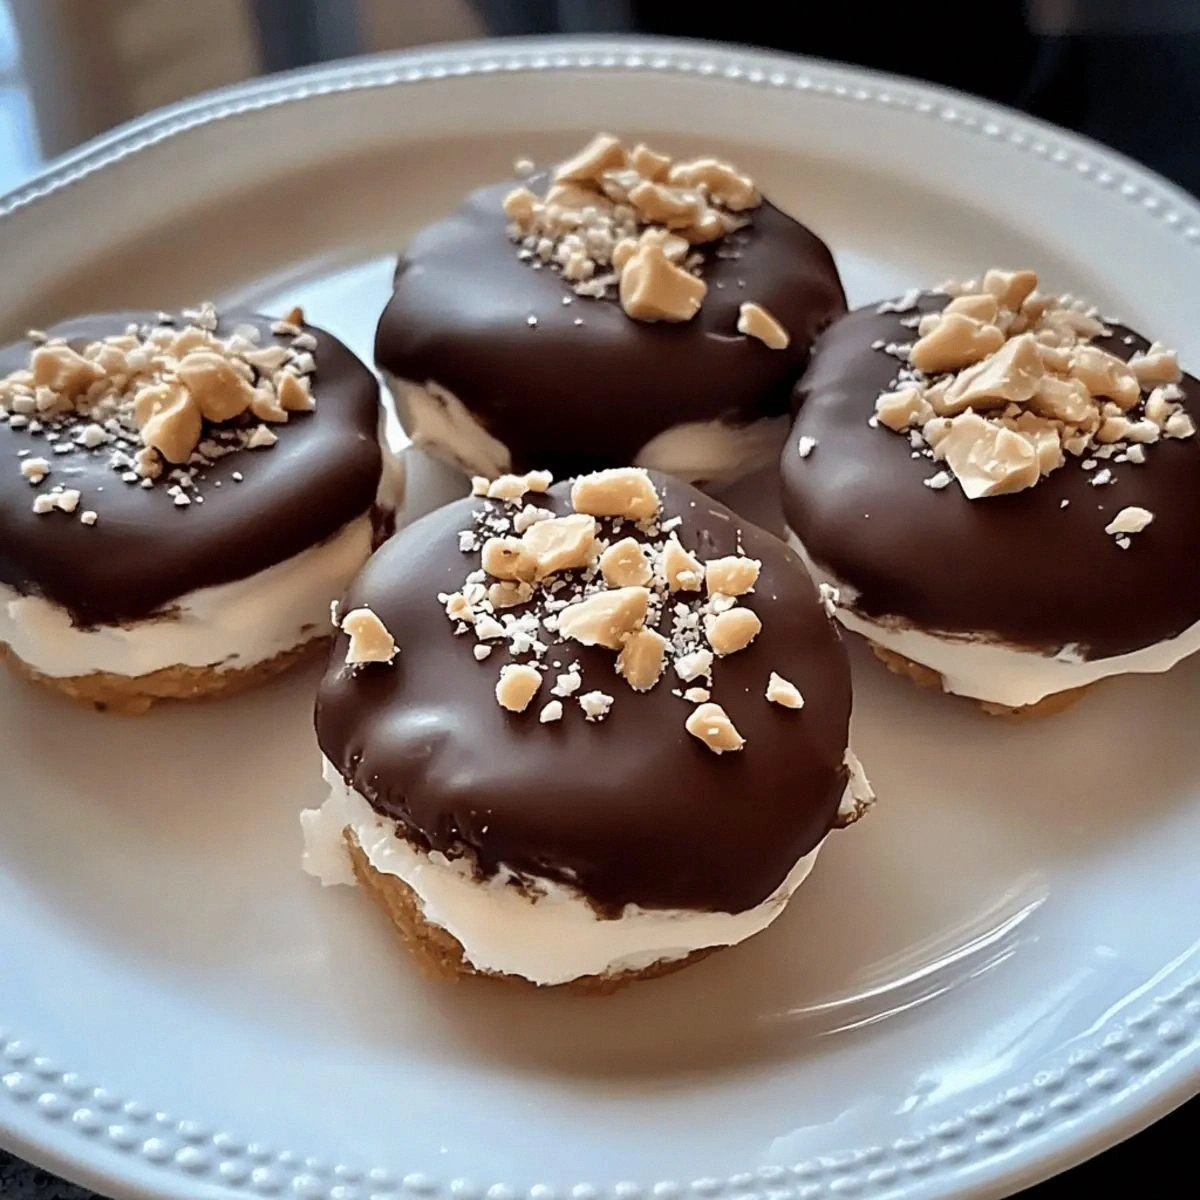
Once the texture is spot‑on, pop the tray out and carefully unmold each bite. They should lift effortlessly, retaining a smooth, rounded shape. If any stick, give the mold a quick 5‑second burst in the microwave (10% power) and try again. Transfer the bites to a parchment‑lined plate or a zip‑lock bag for storage.
Finally, drizzle with a thin ribbon of melted dark chocolate or a dusting of cocoa powder if you want an extra layer of decadence. This step is optional but adds a visual contrast that makes the bites look restaurant‑grade. Serve immediately, or keep them frozen for up to two weeks. And now the fun part—dig in and savor the crunchy‑cold‑cream symphony.
That's it — you did it. But hold on, I've got a few more tricks that'll take this to another level…
Insider Tricks for Flawless Results
The Temperature Rule Nobody Follows
Most people assume “freeze until solid,” but the magic lies in a controlled freeze. Set your freezer to the coldest setting for the first 15 minutes, then raise it slightly (to about 0°F) for the remaining time. This prevents the outer layer from becoming rock‑hard while the center stays creamy. I once left them at the lowest setting for the full 45 minutes and ended up with bites that cracked like ice shards—definitely not the texture we’re after.
Why Your Nose Knows Best
Before you even taste, trust your sense of smell. When the mixture is fully blended, you should detect a faint vanilla perfume and a sweet honey note. If the aroma feels muted, it’s a sign you may have under‑sweetened. A quick sniff can save you from a bland batch and lets you adjust the honey or maple syrup on the fly.
The 5‑Minute Rest That Changes Everything
After unmolding, let the bites rest at room temperature for five minutes before serving. This short rest allows the interior to soften just enough to melt in your mouth, while the exterior remains pleasantly chilled. Skipping this step can result in a bite that feels too icy, dulling the flavor release.
Silicone vs. Metal Molds
Silicone molds are flexible and make unmolding a breeze, but metal molds can give a sharper, more defined edge if you’re after a polished look. If you switch to metal, lightly oil it and reduce the freeze time by five minutes to avoid over‑hardening.
Batch‑Size Scaling Without Losing Texture
When you double the recipe, keep the freezing time the same; the increased volume actually helps the interior stay creamier because the larger mass retains heat longer. I tried scaling up and was amazed to find the bites were even smoother. Just remember to keep the same ratio of ingredients.
Creative Twists and Variations
This recipe is a playground. Here are some of my favorite ways to switch things up:
Chocolate Peanut Butter Explosion
Swap half of the Greek yogurt for chocolate Greek yogurt and add a tablespoon of cocoa powder to the mixture. The result is a deep, chocolatey bite that still retains the peanut butter’s nutty charm. Perfect for cocoa lovers who crave a protein boost.
Coconut Dream
Replace the peanut butter with almond butter and stir in shredded coconut (about ¼ cup). The coconut adds a tropical crunch, and the almond butter brings a lighter nut flavor. Top with a drizzle of coconut caramel for extra wow factor.
Spicy Kick
Mix in a pinch of cayenne pepper or a drizzle of sriracha into the base before freezing. The heat pairs surprisingly well with the cool yogurt, creating a sweet‑heat balance that’s addictive. Serve with a side of lime zest for a fresh finish.
Berry Burst
Fold in a handful of fresh raspberries or blueberries right before pouring the mixture into the molds. The fruit’s acidity cuts through the richness, and the tiny pockets of juice burst in the mouth, adding a refreshing pop.
Matcha Zen
Stir in 1 teaspoon of high‑quality matcha powder for an earthy, slightly bitter note that complements the sweetness. The vibrant green hue also makes these bites Instagram‑ready.
Nut‑Free Delight
If you have a nut allergy, swap peanut butter for sunflower seed butter or tahini. The flavor shifts to a more earthy, slightly bitter profile, but the creamy texture remains. Pair with a drizzle of agave syrup to keep the sweetness balanced.
Storing and Bringing It Back to Life
Fridge Storage
Keep the bites in an airtight container in the refrigerator for up to 48 hours. They’ll stay soft enough to eat straight from the fridge, perfect for a quick snack during work hours. If you notice condensation, simply pat the surface with a paper towel before serving.
Freezer Friendly
For longer storage, place the unmolded bites on a parchment‑lined tray and freeze them individually. Once solid, transfer them to a zip‑lock bag, removing as much air as possible. They’ll hold their quality for up to two weeks without freezer burn.
Best Reheating Method
When you’re ready to enjoy a frozen bite that’s a little softer, pop it on a plate and microwave for 5‑10 seconds. Add a tiny splash (about ½ tsp) of water to the plate before microwaving; the steam revives the creamy interior without melting the outer shell. This trick brings the texture back to that perfect melt‑in‑your‑mouth moment.