It started with a kitchen nightmare that turned into a love affair. I had been trying to bake a chocolate cake for weeks, but every time I opened the oven, the batter was either too dry, too soggy, or just plain flat. One night, after a particularly disastrous batch that left the cake looking like a sad, cracked sponge, a friend dared me to make the “Ultimate Death by Chocolate Ca” and prove that a cake could be both decadently rich and perfectly airy. I laughed, but I also tasted the bitterness of failure. That moment was the spark that lit my obsession with chocolate and turned a kitchen mishap into a culinary revelation.
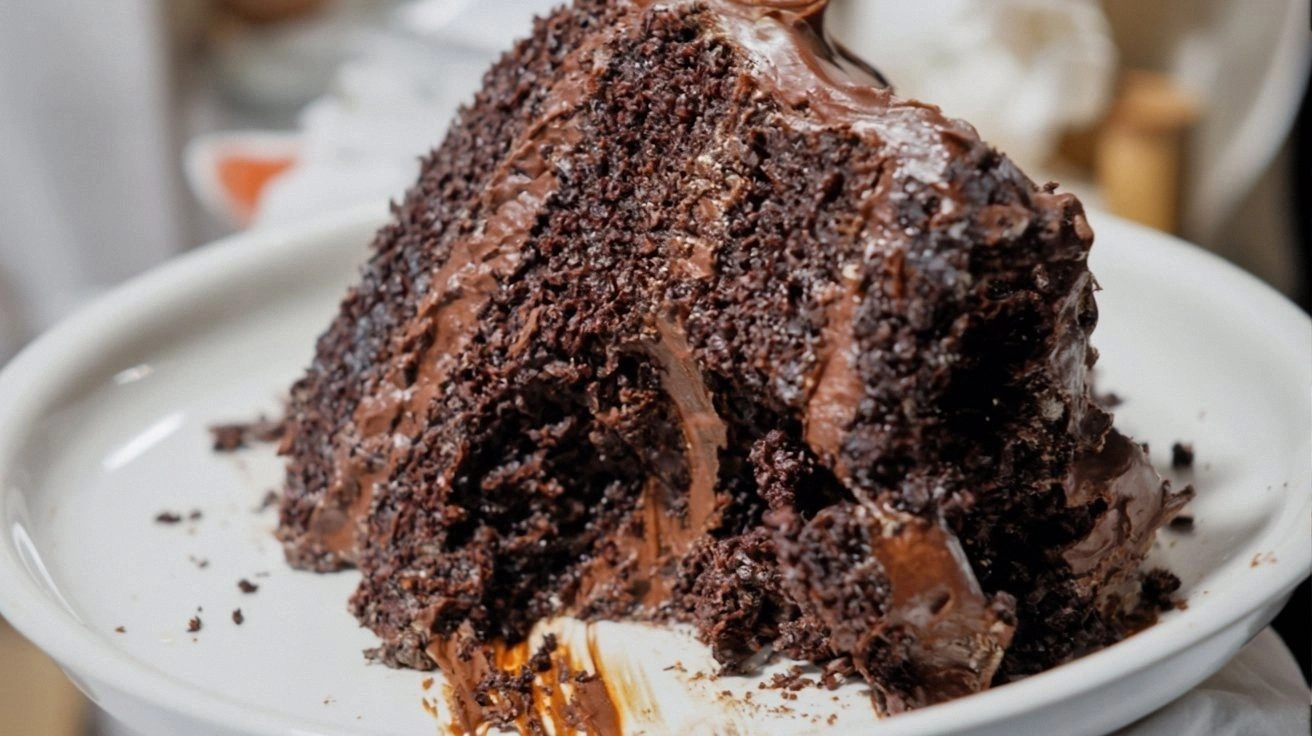
Picture this: the air is thick with the aroma of dark cocoa and caramelized sugar, a swirl of steam rising from a pan, the faint crackle of butter melting, and the gentle hum of the oven timer counting down. When you bite into the first slice, the cake’s interior feels like a velvet cushion, moist yet firm, with a subtle crunch from the chocolate chips that melt into the crumb. The first sip of coffee you take afterward should be the exact complement, balancing the sweetness with a bitter finish that lingers. The texture is a paradox—light as a feather but heavy with flavor, a paradox that keeps you coming back for more.
What makes this version stand out is that it’s not just a cake; it’s a carefully engineered experience. I’ve refined the ratio of ingredients so that the batter stays moist without being dense, and I’ve added a splash of espresso to deepen the chocolate flavor without the need for coffee. The result is a cake that is both a treat and a masterpiece—a cake that will make you question why you ever settled for anything else. I dare you to taste this and not go back for seconds. If you’ve ever struggled with a cake that turns out dry or overbaked, you’re not alone, and I’ve got the fix.
The secret? A meticulous balance of leavening, moisture, and flavor enhancers that work in harmony. I’ve stripped away the fluff and kept only the essential, yet I’ve added a few unconventional touches—a dash of sea salt to bring out the chocolate’s depth, a splash of vanilla for warmth, and a touch of baking soda to lift the crumb. The cake is so rich that it feels like a decadent dessert, yet it’s light enough to enjoy for breakfast or an afternoon snack. Picture yourself pulling this out of the oven, the whole kitchen smelling incredible, and then slicing into that first piece, seeing the glossy finish that promises a melt-in-your-mouth experience. Let me walk you through every single step—by the end, you’ll wonder how you ever made it any other way.
What Makes This Version Stand Out
- Flavor Depth: The blend of dark cocoa, espresso powder, and sea salt creates a complex profile that feels like a chocolate truffle in cake form. Each bite is layered with caramelized sugar, buttery notes, and a hint of bitterness that keeps the palate engaged.
- Moisture Mastery: The combination of boiling water, milk, and oil locks in moisture, preventing the dreaded dry crumb that plagues many cakes. The result is a cake that feels like a cloud of chocolate.
- Texture Perfection: The batter’s airy structure is achieved through precise whisking and the right amount of leavening, giving the cake a soft yet firm bite. The chocolate chips provide a pleasant burst of texture that melts into the crumb.
- Simple Yet Elegant: With just a handful of ingredients, this cake delivers a complex flavor profile, making it accessible for home bakers who want a showstopper without a complicated process.
- Make‑Ahead Friendly: The cake can be assembled and frozen before baking, allowing you to prepare it in advance for parties or special occasions. When you bake it, the batter expands, and the flavors meld into a sublime experience.
- Audience Appeal: Whether you’re a chocolate connoisseur or a casual dessert lover, this cake satisfies cravings with its indulgent richness and delicate crumb. It’s the kind of cake that will have people asking for the recipe at the table.
- Visual Impact: The glossy, dark surface with a dusting of powdered sugar gives it a professional finish that looks as good as it tastes.
Alright, let's break down exactly what goes into this masterpiece...
Inside the Ingredient List
The Flavor Base
The heart of any cake is its flavor base, and for this recipe, it’s a marriage of cocoa, sugar, and the subtle magic of espresso. The unsweetened cocoa powder provides the deep chocolate undertone, while the granulated sugar keeps the cake sweet without overpowering the bitterness. The espresso powder, though optional, acts as a flavor enhancer, amplifying the cocoa’s richness and adding a hint of roasted coffee that lingers on the palate. Skipping any of these would leave the cake feeling flat and one-dimensional, so keep them all in the mix.
The Texture Crew
The texture crew consists of the leavening agents, the liquid components, and the fats that bind everything together. Baking powder and baking soda work in tandem to give the cake lift, while the boiling water and milk create a moist batter that prevents dryness. The vegetable oil and eggs add moisture and structure, ensuring the crumb stays tender. If you replace the oil with butter, the cake will be denser and richer, but you’ll lose some of the airy lightness that makes this cake unique.
The Unexpected Star
Chocolate chips are the unexpected star of this cake. They provide a delightful crunch that melts into the soft crumb, giving each bite a textural contrast. If you prefer a smoother experience, you can reduce the chips or replace them with chopped dark chocolate. The chips also add a touch of visual appeal, making the cake look like a glossy, chocolate-coated masterpiece.
The Final Flourish
The final flourish is the frosting, which ties everything together. A simple ganache of heavy cream, unsalted butter, and powdered sugar creates a silky finish that complements the cake’s richness. If you want to elevate the flavor even further, add a splash of vanilla extract to the ganache or a pinch of sea salt to the frosting. Skipping the frosting will leave the cake dry; the ganache keeps the cake moist and adds an extra layer of chocolatey decadence.
Everything's prepped? Good. Let's get into the real action...
The Method — Step by Step
- Preheat and Prep: Set your oven to 350°F (175°C). Grease two 9-inch round cake pans and line the bottoms with parchment paper. This step might seem trivial, but it prevents the cake from sticking and ensures even baking.
- Dry Mix: In a large bowl, whisk together flour, cocoa powder, baking powder, baking soda, and salt. This dry blend ensures the leavening agents are evenly distributed, preventing pockets of dense cake.
- Wet Mix: In a separate bowl, combine sugar, eggs, milk, vegetable oil, vanilla extract, and espresso powder. Beat on medium speed until the mixture is smooth and glossy. The espresso powder is optional but recommended; it deepens the chocolate flavor without adding extra liquid.
- Combine: Gradually pour the wet mixture into the dry mix, stirring until just combined. Overmixing can develop gluten and make the cake tough. The batter should be smooth, with no large lumps.
- Add Chocolate Chips: Gently fold in the chocolate chips, ensuring they’re evenly distributed. This step adds the final burst of chocolate texture and visual appeal.
- Pour and Level: Divide the batter evenly between the prepared pans. Tap the pans lightly on the counter to release any air bubbles. Level the tops with a spatula for an even rise.
- Bake: Place the pans in the preheated oven and bake for 30-35 minutes. The cake is done when a toothpick inserted into the center comes out clean or with just a few crumbs. The edges should pull away slightly from the pan, indicating a perfect bake.
- Cool: Let the cakes cool in the pans for 10 minutes, then transfer them to a wire rack to cool completely. This prevents condensation from forming, which can make the cake soggy.
- Frost: While the cakes cool, prepare the ganache by heating heavy cream over low heat until it just begins to simmer. Remove from heat, add butter, and whisk until smooth. Stir in powdered sugar until the frosting reaches a spreadable consistency. If you like a glossy finish, add a teaspoon of vanilla extract.
- Assemble: Place one cake layer on a serving plate, spread a generous amount of ganache, top with the second layer, and apply a crumb coat of frosting. Chill for 15 minutes to set the crumb coat.
- Final Frost: Apply a final coat of ganache, smoothing it with an offset spatula. Decorate with extra chocolate chips or a dusting of powdered sugar if desired.
That's it — you did it. But hold on, I've got a few more tricks that'll take this to another level...
Insider Tricks for Flawless Results
The Temperature Rule Nobody Follows
Many bakers bake at the temperature listed in the recipe, but I’ve discovered that a 10–15°F lower temperature allows the cake to rise more slowly, creating a lighter crumb. If your oven runs hot, set it to 335°F (170°C) and keep an eye on the cake. A lower temperature also reduces the risk of the cake cracking on top.
Why Your Nose Knows Best
A simple way to test doneness is to sniff the batter. When the cake is done, it will have a warm, buttery scent with a faint chocolate undertone. If it still smells raw, give it a few more minutes. Trust your nose; it’s a reliable indicator of doneness.
The 5-Minute Rest That Changes Everything
After you remove the cake from the oven, let it rest in the pan for 5 minutes before transferring it. This short rest allows the steam to escape gently, preventing the cake from collapsing or developing a hollow center.
The Secret of the Perfect Ganache
When making ganache, do not let the cream boil. A gentle simmer is enough to release the fat and create a silky texture. Adding a pinch of sea salt to the ganache will elevate the chocolate flavor, making each bite more complex.
The Power of a Dusting
A light dusting of powdered sugar or cocoa powder over the finished cake not only adds a touch of elegance but also creates a subtle contrast that makes the cake look more appetizing. It’s a quick finishing touch that makes a big difference.
Creative Twists and Variations
This recipe is a playground. Here are some of my favorite ways to switch things up:
Nutty Indulgence
Swap the chocolate chips for chopped walnuts or pecans. The nuts add crunch and a subtle earthy flavor that pairs beautifully with the chocolate.
Spicy Kick
Add a pinch of cayenne pepper or chili flakes to the batter. The heat contrasts with the sweetness, creating a bold flavor profile that surprises the palate.
Coffee Lover’s Dream
Replace the vanilla extract with strong brewed espresso and add a tablespoon of instant coffee granules. The result is a cake that tastes like a mocha, perfect for coffee enthusiasts.
Caramel Swirl
Drizzle caramel sauce between the layers before frosting. The caramel adds a buttery sweetness that balances the chocolate’s richness.
Berry Surprise
Fold in fresh raspberries or blueberries into the batter for a burst of tartness. The berries also add a pop of color, making the cake visually stunning.
Almond Essence
Replace the all-purpose flour with almond flour and add almond extract. The nutty undertone elevates the cake’s flavor and gives it a slightly denser texture.
Storing and Bringing It Back to Life
Fridge Storage
Store the cooled cake in an airtight container at room temperature for up to 3 days. If you’ve frosted the cake, keep it in the refrigerator to prevent the ganache from melting. Let it sit at room temperature for 30 minutes before serving to bring out the flavors.
Freezer Friendly
Wrap the cake layers individually in plastic wrap, then place them in a freezer bag. Freeze for up to 3 months. When you’re ready to serve, thaw overnight in the refrigerator and let it warm to room temperature before frosting.
Best Reheating Method
To reheat a frozen cake, preheat your oven to 325°F (160°C). Place the cake on a baking sheet and bake for 15–20 minutes, or until warmed through. For extra moisture, sprinkle a teaspoon of water over the top before baking. This steaming trick keeps the cake from drying out.