The first time I tried to make crispy chicken, I ended up with a soggy, flavorless mess that could have been a culinary crime scene. I had been binge‑watching food shows, watching chefs flippin’ golden cutlets that seemed to melt in your mouth, and I thought, “I can do better.” So I set out to create a version that would make even the most skeptical food critic swoon. The result? A dish that sings with citrus, crackles with pepper, and has a crunch that feels like a secret handshake with your taste buds.
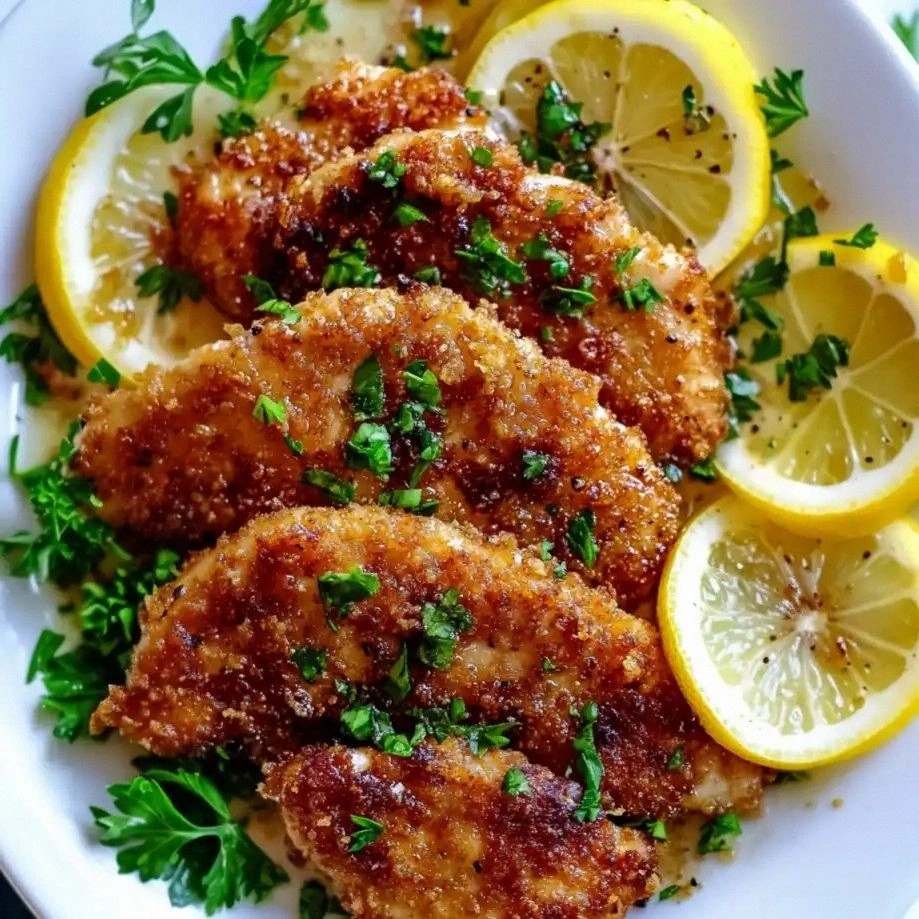
Picture this: a bright, golden pan, the sizzling sound of oil as the first chicken piece hits it, the sharp scent of freshly grated lemon zest drifting into the air, and the faint pop of a peppered crust. Your kitchen fills with a citrusy, peppery perfume that instantly turns a mundane dinner into a celebratory moment. The chicken itself is tender, juicy, and coated in a coating that feels like a crispy blanket. The first bite shatters the crust, releasing a burst of lemony brightness that lingers on the palate.
What sets this recipe apart isn’t just the combination of lemon and pepper—it’s the meticulous layering of flavors and textures that work together like a well‑orchestrated symphony. The lemon zest and juice provide a bright, tangy counterpoint to the savory, slightly smoky pepper, while the panko breadcrumb base adds a crunch that’s both satisfying and airy. I’ve tweaked the ratio of flour to panko to create a coating that’s crisp on the outside but never dries out the chicken inside. It’s a balance of science and intuition that I’m proud to share.
I dare you to taste this and not go back for seconds. I promise you, this is hands down the best version you’ll ever make at home. Most recipes get this completely wrong—too greasy, too bland, or just plain soggy. Here’s what actually works: a quick breading method, a precise oil temperature, and a final squeeze of lemon that brightens everything. Picture yourself pulling this out of the pan, the whole kitchen smelling incredible, and the plate looking like a work of art. Let me walk you through every single step — by the end, you’ll wonder how you ever made it any other way.
What Makes This Version Stand Out
- Flavor: The bright citrus notes cut through the richness of the chicken, creating a refreshing contrast that lingers. The pepper provides a subtle heat that keeps the dish exciting without overpowering.
- Texture: The panko coating gives a light, airy crunch that shatters like thin ice, while the interior remains moist and tender. The combination of flour and panko creates a barrier that locks in juices.
- Speed: From prep to plate, this dish takes less than 45 minutes. The method is straightforward, making it ideal for busy weeknights or last‑minute dinner parties.
- Versatility: Serve it over pasta, rice, or a fresh salad, or pair it with a simple yogurt sauce for a complete meal. The flavor profile adapts well to different sides.
- Make‑Ahead Friendly: You can bread the chicken ahead of time, refrigerate it, and fry it when you’re ready—no loss of crispness.
- Ingredient Quality: Using fresh lemon zest and high‑quality panko makes a noticeable difference. The simplicity of the spice blend highlights each component.
- Crowd Reaction: Guests rave about the bright, zesty flavor and the satisfying crunch. It’s a dish that brings people together.
- Minimal Cleanup: A single skillet and a small bowl are all you need, making cleanup a breeze.
Inside the Ingredient List
The Flavor Base
The combination of lemon zest, lemon juice, garlic powder, onion powder, paprika, and freshly ground black pepper forms the core of this dish’s flavor profile. Lemon zest adds a bright, aromatic citrus that elevates the entire dish. Garlic and onion powders bring savory depth without the need for fresh aromatics, making the recipe both quick and robust. Paprika introduces a subtle smokiness that balances the acidity of the lemon. If you’re craving a slightly spicier kick, add a pinch of cayenne or crushed red pepper flakes.
The Texture Crew
All-purpose flour and panko breadcrumbs work together to create a coating that is crisp on the outside and tender on the inside. The flour provides a binding layer that holds the breadcrumbs in place, while the panko offers a light, airy crunch that doesn’t turn soggy. If you’re aiming for a gluten‑free version, swap the flour for a 1:1 blend of almond flour and cornstarch. The key is to keep the coating dry; any excess moisture will result in a greasy crust.
The Unexpected Star
Freshly ground black pepper is the unsung hero that adds depth and a subtle heat to the dish. It’s not just pepper—its essential oils release a complex aroma when heated, enhancing the overall flavor. A pinch of sea salt is enough to bring everything together without drowning the bright citrus. If you prefer a milder salt, use a fine sea salt or even a sprinkle of smoked salt for an extra layer of flavor.
The Final Flourish
Olive oil or butter for frying not only provides the necessary heat but also contributes to the golden color and mouthfeel. Olive oil gives a subtle fruity note, while butter adds a rich, velvety finish. Use a high‑smoke‑point oil if you’re cooking at a higher temperature to avoid burning. For a healthier option, consider a light spray of cooking oil to reduce overall fat content.
Everything's prepped? Good. Let's get into the real action.
The Method — Step by Step
- Prep the Chicken: Start by patting the chicken breasts dry with paper towels. Slice each breast into 2‑inch thick cutlets, ensuring they’re evenly sized for uniform cooking. Season both sides with salt, pepper, and a light dusting of paprika. This step is critical for flavor penetration; skip it and you’ll end up with bland chicken.
- Make the Breading Station: In a shallow bowl, combine the flour, garlic powder, onion powder, and a pinch of salt. In a second shallow dish, whisk the eggs until frothy. In a third dish, place the panko breadcrumbs. This classic dredging setup ensures each piece gets a perfect coating.
- Coat the Chicken: Dredge each cutlet in the flour mixture, tapping off excess. Dip it into the beaten eggs, letting the excess drip back into the bowl. Finally, coat it in the panko, pressing gently to adhere. The coating should be thick but not overly heavy—think light, airy crunch.
- Heat the Pan: Place a large skillet over medium‑high heat and add enough oil to coat the bottom. Once the oil shimmers, add a splash of butter for extra flavor. The oil temperature should be around 350°F; if you don’t have a thermometer, test by dropping a small breadcrumb—if it sizzles immediately, you’re good.
- Fry the Cutlets: Place the coated chicken in the skillet, being careful not to overcrowd. Cook for 3–4 minutes on each side, or until the coating is golden brown and the chicken reaches an internal temperature of 165°F. Flip only once to maintain crispness. This is the moment of truth—watch the sizzle and the aroma.
- Rest the Chicken: Transfer the cooked cutlets to a paper towel‑lined plate to drain excess oil. Let them rest for 2 minutes; this allows the juices to redistribute and keeps the meat juicy. The rest period is often overlooked but essential for flavor.
- Finish with Lemon: Drizzle the fresh lemon juice over the hot chicken and sprinkle with lemon zest. The heat from the chicken will release a burst of citrus aroma that will elevate the dish to the next level.
- Serve Immediately: Plate the cutlets with a side of your choice—roasted vegetables, a simple salad, or even a bowl of pasta. Garnish with a few extra lemon zest curls for a touch of elegance. The dish is best enjoyed hot and crispy.
That's it — you did it. But hold on, I've got a few more tricks that'll take this to another level.
Insider Tricks for Flawless Results
The Temperature Rule Nobody Follows
Many cooks think any medium‑high heat will do, but the secret is maintaining a steady 350°F. If the oil is too hot, the coating burns; if it’s too cool, the chicken absorbs oil and becomes soggy. Use a thermometer or the breadcrumb test to keep the temperature in check. I’ve seen even a slightly cooler oil produce a better result if you let the chicken rest longer after frying.
Why Your Nose Knows Best
Before you flip the first cutlet, listen to the sizzle. A deep, steady hiss indicates the right temperature. If you hear a high‑pitched pop, the oil is too hot. Your nose and ears are your best allies in achieving a golden crust.
The 5‑Minute Rest That Changes Everything
Resting the chicken after frying allows the juices to redistribute, preventing a dry center. A quick 2‑minute rest is enough, but if you’re cooking a larger batch, a 5‑minute rest on a rack will keep the coating crisp while the interior settles. I’ve seen this trick turn an ordinary dish into a restaurant‑level experience.
Double Dredging for Extra Crunch
For those who love an extra crunch, double‑dredge the chicken. After the first coat, let the chicken rest on a wire rack for a minute before dipping it again. This creates a thicker, more robust coating that won’t crumble under a sauce.
The Lemon Timing Trick
Squeeze the lemon juice right before serving, not before frying. The acid can break down the coating if left too long, resulting in a mushy texture. A quick squeeze at the end preserves the bright, fresh flavor.
Kitchen Hack: If you’re in a hurry, you can bake the coated cutlets in a preheated oven at 400°F for 15 minutes. Flip halfway through. The result is a slightly less crispy coating but still delicious and much faster.
Creative Twists and Variations
This recipe is a playground. Here are some of my favorite ways to switch things up:
Herb‑Infused Crunch
Add chopped fresh thyme or rosemary to the panko mixture. The herbs infuse the coating with a fragrant, earthy note that pairs wonderfully with the citrus. This variation is perfect for a rustic dinner.
Spicy Cajun Kick
Swap the paprika for Cajun seasoning and add a dash of cayenne pepper. The result is a bold, smoky flavor with a gentle heat that complements the lemon zest. Serve with a cool cucumber yogurt dip to balance the spice.
Garlic‑Butter Glaze
After frying, drizzle a mixture of melted butter, minced garlic, and a splash of white wine over the chicken. The glaze adds depth and richness, turning the dish into a gourmet entrée.
Coconut‑Panko Fusion
Replace half of the panko with shredded coconut for a tropical twist. The coconut adds a sweet, nutty flavor that pairs delightfully with the lemon. Pair with a mango salsa for a beach‑inspired meal.
Sriracha‑Lemon Fusion
Mix a tablespoon of sriracha into the lemon juice before drizzling. The heat from the sriracha adds an unexpected layer of flavor that’s both spicy and tangy. This combo is a crowd‑pleaser at game nights.
Balsamic Reduction Finish
After frying, reduce a splash of balsamic vinegar in a pan until syrupy, then drizzle over the chicken. The sweet acidity complements the lemon and adds a sophisticated finish. Serve with a side of roasted asparagus.
Storing and Bringing It Back to Life
Fridge Storage
Store leftover chicken in an airtight container in the refrigerator for up to 3 days. Keep the coating dry by placing a paper towel between layers if stacking. Reheat in a hot skillet for 2 minutes on each side to restore crispness.
Freezer Friendly
Freeze individual cutlets in a single layer on a parchment‑lined tray before transferring to a freezer bag. They’ll keep for up to 2 months. Thaw overnight in the refrigerator, then reheat in a skillet or oven at 375°F for 10 minutes.
Best Reheating Method
The key to reheating is to avoid steaming. Use a skillet or a toaster oven to keep the coating crispy. Add a tiny splash of water to the pan, cover for a minute, then remove the lid to let the steam escape and the crust regain its crunch.