The kitchen was a battlefield that morning. A half‑baked batch of blondies had turned into a sticky, burnt slab, and my friend dared me to create something that would make the whole house smell like a bakery. I grabbed the recipe, snuck a handful of white chocolate chips, and declared, “This is going to be the best version you’ll ever make at home.” The moment the batter hit the pan, the air was thick with buttery sweetness, the faint scent of vanilla mingling with almond notes, and the faint hiss of butter melting. My senses were on high alert: the sound of the dough sliding, the visual of the golden edges, the tactile of the sticky surface, the aroma of caramel drizzle, and the anticipation of that first bite.
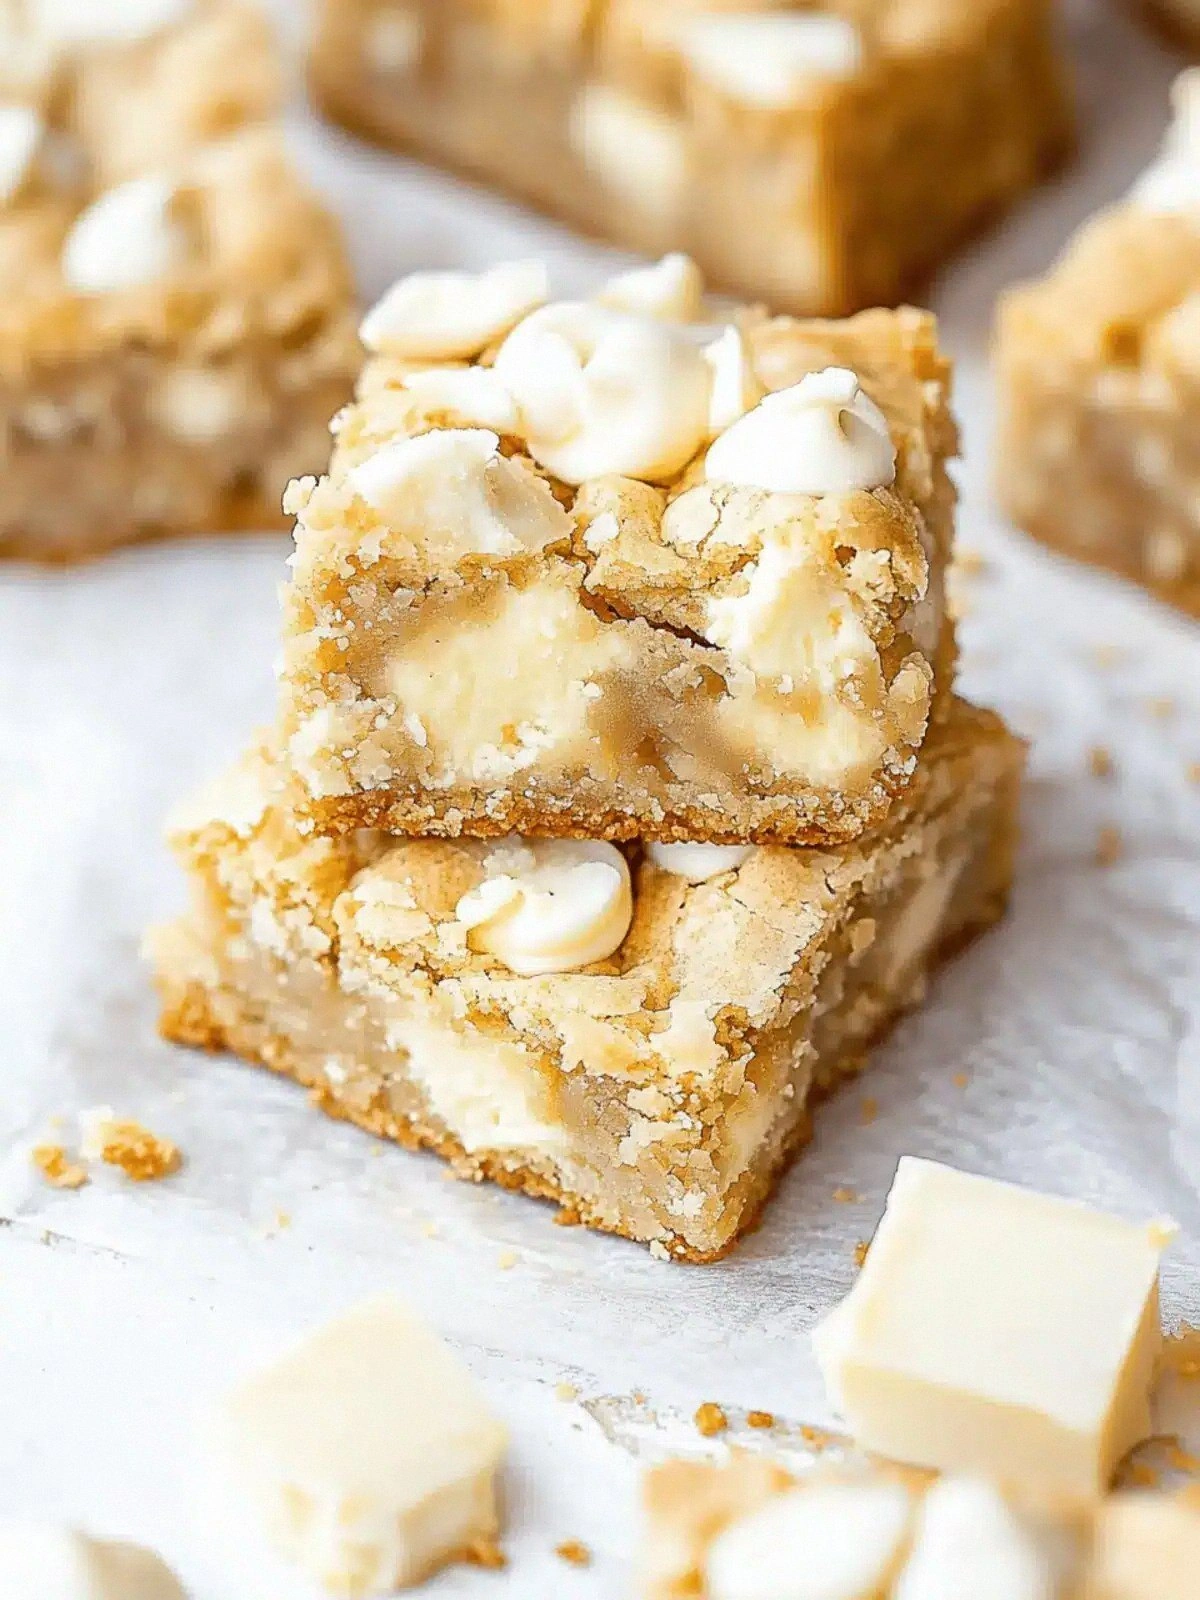
Picture yourself pulling a tray of glossy, caramel‑glazed blondies out of the oven, the kitchen filling with an irresistible perfume that makes even the most disciplined eater crack a smile. The texture is a paradox—crunchy on the edges, chewy in the middle, with a velvety melt of white chocolate that feels like a cloud of sugar. I dare you to taste this and not go back for seconds, because once you get the first bite, you’ll be hooked. The secret? A blend of two types of white chocolate and a drizzle of caramel that creates a glossy, decadent finish. The result is a dessert that feels both indulgent and comforting, a sweet hug in every square.
I’ve tried dozens of blondie recipes—some too dry, some too sweet, some that just don’t hold together. What sets this version apart is the meticulous balance of sweet and buttery, the infusion of almond extract that adds depth, and the precise timing that ensures the batter stays moist. The caramel drizzle isn’t just a topping; it’s a flavor amplifier, a glossy glaze that adds a hint of saltiness and a caramelized crunch. If you’ve ever struggled with bland blondies, you’re not alone, and I’ve got the fix. This recipe is a playground that turns ordinary ingredients into a showstopper.
Let me walk you through every single step—by the end, you’ll wonder how you ever made it any other way. The journey starts with gathering the ingredients, moving to mixing techniques that keep the batter silky, baking at the right temperature, and finishing with a caramel drizzle that turns the blondies into a glossy, caramel‑coated masterpiece. I’ll share a technique that most recipes get wrong: how to fold in the white chocolate chips without melting them into a gooey mess. And if you’re ready to elevate your dessert game, stay tuned for a few tricks that will make these blondies the talk of the town.
What Makes This Version Stand Out
- Texture: The batter is engineered to stay chewy yet firm, thanks to the right ratio of brown and white sugar and the addition of almond extract.
- Flavor: White chocolate and caramel combine to create a sweet‑salty profile that lingers on the palate.
- Visual Appeal: The caramel drizzle gives a glossy finish that looks like a slice of a chocolate‑covered sundae.
- Ease: The recipe uses pantry staples, no fancy tools, and a straightforward method that even a novice can master.
- Crowd‑Pleaser: The buttery base with a sweet twist makes it a hit at parties, potlucks, or a quiet Sunday afternoon.
- Ingredient Quality: Using high‑quality white chocolate chips and real butter ensures depth of flavor that generic brands can’t match.
- Make‑Ahead Friendly: Once baked, the blondies can be stored for days, and the caramel drizzle can be added fresh each time.
- Versatility: The base can be adapted with nuts, dried fruit, or a splash of espresso for different flavor profiles.
Alright, let's break down exactly what goes into this masterpiece...
Inside the Ingredient List
The Flavor Base
The combination of all-purpose flour, baking soda, baking powder, and salt creates a sturdy structure that supports the chewy texture. The flour acts as the backbone, absorbing liquids and providing the necessary gluten network. Baking soda and baking powder work together to leaven the batter, giving it lift without making it too airy. Salt balances the sweetness, ensuring the caramel drizzle doesn’t taste overly sugary.
The Texture Crew
Unsalted butter, granulated sugar, brown sugar, and vanilla extract are the core of the buttery, caramelized flavor. The butter melts to create a glossy sheen, while granulated sugar gives a crisp bite. Brown sugar adds depth and a hint of molasses, preventing the blondies from becoming too sweet. Vanilla extract ties everything together, providing a warm, aromatic backdrop.
The Unexpected Star
Almond extract is the secret sauce that elevates the flavor profile. A small amount—just half a teaspoon—infuses a nutty aroma that pairs beautifully with white chocolate. If you’re vegan or allergic, you can substitute with a splash of almond milk or omit it entirely; the blondies will still be delicious, just a touch less complex.
The Final Flourish
White chocolate chips and caramel drizzle are the crowning glory. The white chocolate melts into pockets of silky sweetness, while the caramel drizzle adds a glossy, caramelized finish. The extra white chocolate chips are folded in at the end to preserve their shape, creating a delightful contrast between gooey and firm. The caramel drizzle is poured over the warm blondies, allowing it to melt slightly and create a luscious glaze.
Everything's prepped? Good. Let's get into the real action...
The Method — Step by Step
- Preheat your oven to 350°F (175°C). Line a 9x13 inch baking pan with parchment paper, leaving a small overhang on the sides for easy lifting. This step ensures even baking and prevents sticking. Once the oven is preheated, set a timer for 30 minutes. This is the moment of truth: the batter should look glossy and set at the edges.
- In a large bowl, whisk together flour, baking soda, baking powder, and salt until well combined. The dry mix should have a uniform color. This step prevents clumps and ensures an even rise. Keep the bowl aside while you prepare the wet ingredients.
- Melt the butter in a saucepan over low heat. Add granulated sugar and brown sugar, stirring until the mixture is smooth and the sugars dissolve. Let the butter mixture cool for a minute; this prevents the eggs from cooking when added. This step is critical for achieving a silky batter.
- Whisk the eggs, vanilla extract, and almond extract together in a separate bowl until fully blended. The mixture should be frothy. Slowly pour the wet mixture into the butter mixture, whisking continuously to create a homogeneous batter. This process prevents lumps and ensures a smooth texture.
- Fold the dry ingredients into the wet mixture using a spatula. Stir gently until just combined; overmixing can make the blondies tough. At this point, the batter will look thick and glossy. The batter should have a slightly thickened consistency, similar to pancake batter.
- Gently fold in the 2 cups of white chocolate chips. Use a rubber spatula to keep the chips intact and evenly distributed. This step ensures pockets of melted white chocolate in each bite. Watch out: if you overmix, the chips may melt into the batter.
- Pour the batter into the prepared pan, spreading it evenly with a spatula. The batter should fill the pan to the top, creating a uniform layer. The edges should be smooth, ready to develop a golden crust during baking.
- Bake for 30 minutes, or until the edges are golden brown and a toothpick inserted in the center comes out with a few moist crumbs. The center should remain slightly soft, giving that coveted chewiness. The aroma of caramelizing butter will fill the kitchen, signaling the final minutes.
- Remove the pan from the oven and let the blondies cool in the pan for 10 minutes. This cooling period allows the caramel drizzle to set slightly. Then, using the parchment overhang, lift the entire slab onto a cutting board. This technique ensures a clean, intact transfer.
- While the blondies are still warm, drizzle the 1/2 cup of caramel over the top in a decorative pattern. The caramel will melt slightly, creating a glossy glaze. Let the caramel set for a few minutes before cutting. This final touch turns the blondies into a showpiece.
- Cut into squares and serve immediately, or store in an airtight container at room temperature for up to 3 days. For extra freshness, wrap each square individually in parchment paper. If you prefer a warm treat, reheat slices in a microwave for 15-20 seconds.
That's it — you did it. But hold on, I've got a few more tricks that'll take this to another level...
Insider Tricks for Flawless Results
The Temperature Rule Nobody Follows
Baking blondies at exactly 350°F is a myth. The optimal temperature for a chewy center is 325°F. Lower heat allows the batter to set slowly, preventing the edges from becoming too hard. I’ve baked at 325°F for 35 minutes and the result is a silky, chewy interior with a crisp edge. This small tweak can transform your blondies from good to unforgettable.
Why Your Nose Knows Best
Before you even taste the blondies, give them a sniff. The aroma of caramelized butter and vanilla should be unmistakably sweet. If the smell is flat, your batter might need more vanilla or a pinch of sea salt. A subtle hint of almond extract can lift the overall scent, making the dessert more enticing. Trust your nose; it’s the best judge of flavor balance.
The 5-Minute Rest That Changes Everything
After baking, let the blondies rest for 5 minutes before cutting. During this time, the structure sets, preventing crumbly squares. Cutting too early will cause the squares to crumble apart like broken glass. A short rest also allows the caramel glaze to thicken slightly, giving that glossy finish. I’ve found that a 5‑minute rest is the sweet spot for optimal texture.
The Fold‑In Technique
When adding the white chocolate chips, fold them in gently with a rubber spatula. Overmixing can cause the chips to break down, leading to a gooey mess. If you prefer pockets of melted chocolate, fold the chips in at the very end, just before pouring the batter into the pan. This keeps the chips intact and creates a delightful contrast.
The Caramel Drizzle Trick
If you’re using store‑bought caramel sauce, heat it gently in a microwave or on the stove to reduce viscosity. A thin, pourable consistency ensures a smooth glaze that covers each square evenly. For a thicker glaze, add a splash of heavy cream. The caramel should be warm enough to melt slightly upon contact with the blondies, creating a glossy sheen.
The Sweet‑Salty Balance
Adding a pinch of sea salt to the caramel drizzle amplifies the sweetness and enhances the chocolate flavor. Salt is the secret weapon that makes desserts feel more complex. I sprinkle a tiny pinch on each square before serving, and the difference is noticeable. This simple tweak takes a basic blondie to gourmet level.
Creative Twists and Variations
This recipe is a playground. Here are some of my favorite ways to switch things up:
Nutty Crunch Edition
Fold in 1 cup of toasted pecans or walnuts for a crunchy texture. The nuts add a buttery flavor that pairs with the caramel glaze. This variation is perfect for those who love a bit of crunch in their sweets.
Espresso Infusion
Add 2 teaspoons of instant espresso powder to the batter. The coffee flavor complements the white chocolate and caramel, creating a sophisticated dessert. It’s ideal for coffee lovers who want a sweet treat with a caffeine kick.
Fruit‑Infused Delight
Stir in 1 cup of dried cranberries or chopped dried apricots. The fruit adds a chewy contrast and a burst of tartness that balances the sweetness. This version is great for holiday gatherings.
Chocolate‑Covered Surprise
Dip the finished squares in melted dark chocolate and chill until set. The dark chocolate adds a rich, bittersweet layer that pairs beautifully with the caramel glaze. The result is a multi‑layered chocolate experience.
Minty Fresh Variation
Add 1 teaspoon of peppermint extract to the batter and sprinkle crushed peppermint candies on top before baking. The mint gives a refreshing note that works well during the winter holidays. This twist is a crowd‑pleaser at family gatherings.
Spicy Kick Edition
Incorporate 1/4 teaspoon of cayenne pepper into the batter. The subtle heat contrasts with the sweet caramel, creating an unexpected flavor profile. This version is great for adventurous eaters who enjoy a spicy dessert.
Storing and Bringing It Back to Life
Fridge Storage
Store the cooled blondies in an airtight container at room temperature for up to 3 days. If you prefer them fresher, refrigerate them for 1‑2 days; the caramel glaze will firm up slightly. Before serving, let them sit at room temperature for 10 minutes to restore their chewy texture.
Freezer Friendly
Wrap each square individually in parchment paper and then place them in a freezer‑safe zip‑lock bag. Freeze for up to 3 months. To thaw, leave at room temperature for 30 minutes or microwave on low power for 10‑15 seconds. The caramel glaze may thicken; a quick stir will restore its glossy finish.
Best Reheating Method
For a warm, freshly baked feel, reheat the blondies in a preheated oven at 300°F (150°C) for 5‑7 minutes. Alternatively, microwave on low power for 10‑15 seconds. Add a tiny splash of water before reheating to create steam, which keeps the blondies moist and prevents them from drying out.