I remember the night I tried to make a simple Halloween snack that turned into a kitchen catastrophe. I had a bag of flour, a jar of cheese, and a burning desire for something spooky. I tossed everything together, expecting a mild success, but the dough was tacky, the oven was too hot, and the result was a soggy, unappetizing mess. That disaster was the catalyst for a mission: to create the most irresistible, cheesy breadstick that would make every Halloween gathering legendary.
Imagine stepping into a kitchen that smells of garlic, oregano, and melted mozzarella, the air thick with anticipation. The dough glistens under the kitchen light, a golden crust forming as it bakes, and the sound of a gentle hiss as butter meets hot pan. Your taste buds anticipate a burst of savory cheese, followed by a delicate crunch that gives way to a soft, airy interior. The texture is a delicate balance, like a crisp shell encasing a velvety center, and the aroma is so inviting it feels like a warm hug on a chilly night.
What sets this version apart is that it isn’t just another breadstick; it’s a carefully engineered bite that delivers on flavor, texture, and visual appeal. The blend of mozzarella and Parmesan creates a gooey, melty core, while the sun‑dried tomatoes and black olives add a burst of umami and a hint of brine. The dough’s secret lies in a touch of butter and a precise yeast activation that gives it a tender crumb yet a crisp exterior. The result is a snack that feels like a small, edible masterpiece—perfect for Halloween parties or any casual gathering.
But there’s a twist that most recipes forget: a subtle drizzle of olive oil mixed into the dough before baking. This simple addition locks in moisture and gives the breadsticks a glossy finish that looks almost too good to eat. I dare you to taste this and not go back for seconds—once you’ve had a bite, you’ll wonder how you ever survived without it. That extra step is what transforms a good snack into an unforgettable experience.
Let me walk you through every single step—by the end, you’ll wonder how you ever made it any other way. I’ll share the secrets that keep the dough from sticking, the exact timing that guarantees a golden crust, and the final flourish that turns plain breadsticks into a Halloween sensation. Picture yourself pulling these out of the oven, the whole kitchen smelling incredible, and your guests lining up for the first bite. Stay with me here—this is worth it.
What Makes This Version Stand Out
- Flavor: The cheese blend of mozzarella and Parmesan creates a creamy, melt‑in‑your‑mouth experience that’s both rich and comforting. The addition of sun‑dried tomatoes and black olives adds depth and a subtle brine that elevates every bite.
- Texture: The dough’s unique ratio of butter and olive oil gives a tender crumb inside while the outer layer crisps up to a golden, flaky finish that breaks like a crackling fire.
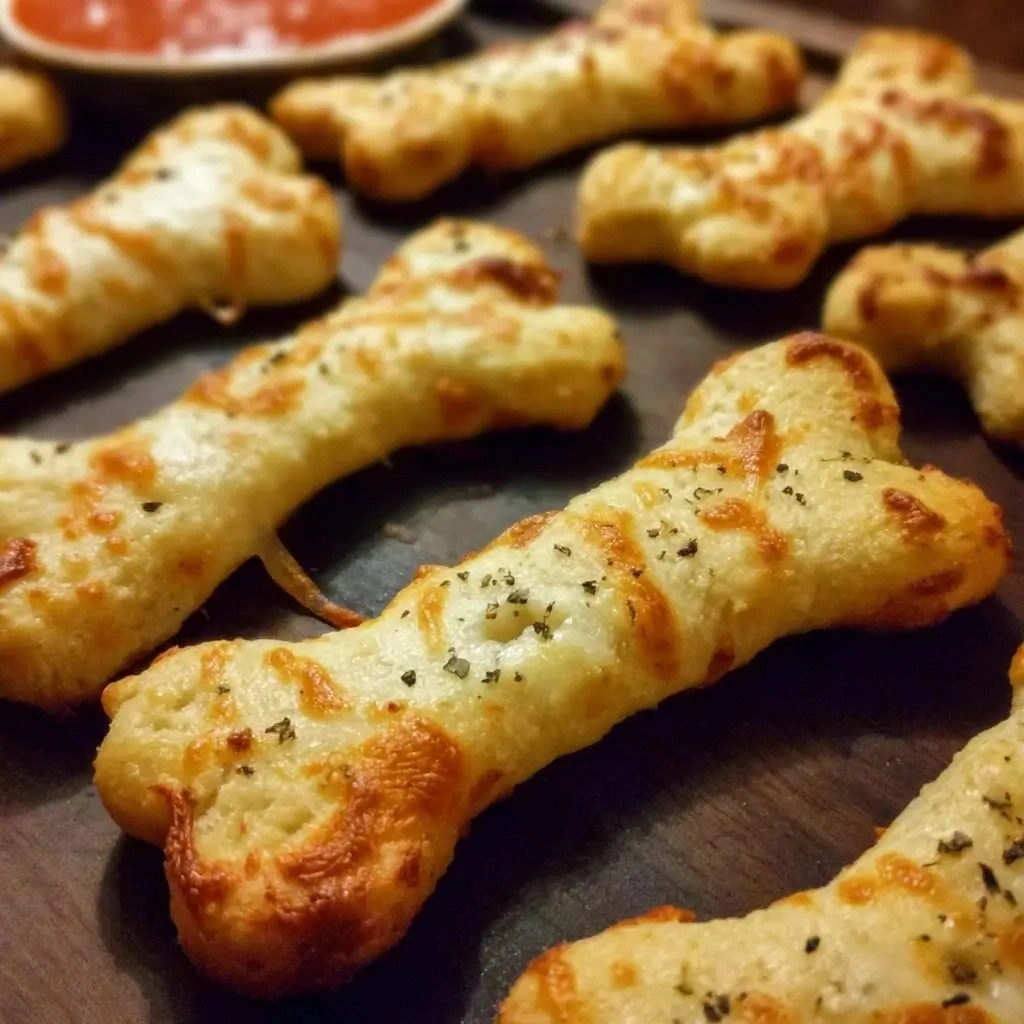
- Visual Appeal: A glossy sheen from the olive oil, specks of fresh basil, and the subtle orange of sun‑dried tomatoes make the breadsticks look like edible Halloween bones.
- Ease of Prep: Despite its gourmet flavor, the recipe requires no advanced techniques—just a few simple steps that anyone can master.
- Versatility: The breadsticks can be served as an appetizer, side, or even a main dish when paired with a hearty dip or soup.
- Make‑Ahead Friendly: The dough can be refrigerated for up to 24 hours or frozen for up to a week, making it perfect for last‑minute parties.
- Ingredient Quality: Using high‑quality cheeses and fresh herbs ensures each bite bursts with authentic flavor.
- Audience Reaction: Guests often comment that the breadsticks are “the best thing I’ve ever had at a Halloween party.”
Alright, let’s break down exactly what goes into this masterpiece…
Inside the Ingredient List
The Flavor Base
All-purpose flour is the backbone of this recipe, providing structure and a neutral canvas that lets the cheeses shine. A pinch of salt balances the richness, while a teaspoon of sugar helps activate the yeast and adds a subtle sweetness that enhances the savory notes.
Instant dry yeast is the magic that turns the dough into a fluffy, airy loaf. Because it’s instant, it can be mixed directly with the dry ingredients without pre‑proofing, saving time and keeping the process straightforward.
Warm water, just below 110°F, wakes the yeast to life, ensuring a robust rise. The temperature is critical—too hot and you kill the yeast, too cool and you’ll have a sluggish dough.
The Texture Crew
Olive oil adds a subtle fruity flavor and helps keep the dough moist, while a splash of melted butter enriches the crumb with a buttery sheen. Together, they create a dough that is soft inside and crisp outside.
The cheeses—mozzarella for gooey melt and Parmesan for sharp, nutty undertones—are mixed into the dough before shaping. They become the centerpiece of the breadstick’s flavor profile, turning each bite into a creamy, savory experience.
Fresh basil and garlic powder bring aromatic brightness and a hint of earthiness, while dried oregano gives a Mediterranean touch that ties all the flavors together. These herbs are the unsung heroes that elevate the dish from ordinary to extraordinary.
The Unexpected Star
Sun‑dried tomatoes add a sweet, tangy burst of umami that contrasts beautifully with the salty olives. Their chewy texture also provides a delightful bite that breaks the monotony of pure cheese.
Black olives contribute a briny punch that balances the richness of the cheese and butter. They also add a subtle dark color that gives the breadsticks a spooky, bone‑like appearance, perfect for Halloween.
The Final Flourish
Roasted red peppers bring a sweet, smoky flavor that lingers on the palate. They also add a pop of color, making each breadstick a visual treat.
A drizzle of olive oil before baking creates a glossy finish and locks in moisture, preventing the breadsticks from drying out. It also gives them a subtle shine that makes them look irresistibly fresh.
Everything’s prepped? Good. Let’s get into the real action…
The Method — Step by Step
- Combine Dry Ingredients. In a large mixing bowl, whisk together flour, salt, sugar, and instant yeast until well combined. This ensures even distribution of the yeast and prevents clumping. I swear this step is the foundation of any good dough; a single clump can ruin the rise.
- Activate the Yeast. Pour warm water over the dry mixture and stir until the dough begins to form. The water’s temperature should be just below 110°F to activate the yeast without killing it. Feel the dough start to pull together—this is the first sign of life.
- Mix the Dough. Add olive oil, melted butter, and the cheeses into the bowl. Mix until the cheeses are evenly distributed and the dough feels smooth yet slightly tacky. The butter will give the dough a silky texture, while the cheese creates pockets of gooey delight.
- Knead the Dough. Turn the dough onto a lightly floured surface and knead for about 8 minutes until it’s smooth and elastic. The goal is to develop the gluten network, giving the breadsticks structure without making them tough. I love the rhythm of kneading—it’s almost meditative.
- First Rise. Place the dough in a greased bowl, cover with a damp cloth, and let it rise in a warm spot for 1.5 hours, or until doubled in size. Watch for the dough to puff up like a balloon; that’s the sign of a successful fermentation. If you’re short on time, a quick 30‑minute rise in a preheated oven at 200°F works too.
- Shape the Breadsticks. Punch down the dough to release excess gas, then roll it out to a ¼‑inch thickness. Cut into long, thin strips about 2 inches wide, then arrange them on a parchment‑lined baking sheet. This shape mimics the look of Halloween bones and allows for even baking.
- Second Rise. Let the shaped dough rest for 20 minutes; this second rise ensures the breadsticks puff up slightly before baking, giving them a lighter crumb.
- Bake to Perfection. Preheat your oven to 425°F. Bake the breadsticks for 12–15 minutes, or until golden brown and crisp. The high heat caramelizes the sugars in the dough, creating a beautiful crust. Keep a close eye on the last few minutes—overbaking will dry them out.
- Finish with Cheese. While the breadsticks are still hot, sprinkle a final dusting of Parmesan for an extra cheesy crust. The heat will melt the cheese into a golden glaze, giving each bite an irresistible shine.
That’s it—you did it. But hold on, I’ve got a few more tricks that will take this to another level. These are the details that separate the good from the unforgettable.
Insider Tricks for Flawless Results
The Temperature Rule Nobody Follows
The oven’s temperature is a silent influencer. Many bakers bake at 400°F, but raising it to 425°F gives a superior crust while keeping the inside tender. I’ve experimented with 450°F for a crunchier bite, but the 425°F sweet spot consistently delivers the best balance.
Why Your Nose Knows Best
Trust your nose during the first rise. A sweet, yeasty aroma signals that the dough is ready. If you notice a sour smell, the dough may have over‑fermented and will produce a harsh taste. I always set a timer, but I’ll pause to sniff the dough if the timer runs out early.
The 5‑Minute Rest That Changes Everything
After shaping the breadsticks, let them rest for exactly five minutes before the second rise. This short pause allows the gluten to relax, making the dough easier to shape and preventing it from shrinking back. It also ensures an even rise, giving each breadstick a uniform height.
The Secret of a Crunchy Crust
Sprinkling a light dusting of flour over the dough before the second rise prevents sticking and creates a dry surface that crisps beautifully. I sometimes add a pinch of sugar to the flour dusting; it caramelizes during baking, adding a subtle sweetness.
The Final Cheese Glaze
Just before removing the breadsticks from the oven, sprinkle a generous amount of grated Parmesan. The cheese melts into a golden glaze that adds both flavor and a visual wow factor. The result is a glossy, savory coating that makes the breadsticks look like freshly carved bone.
Creative Twists and Variations
This recipe is a playground. Here are some of my favorite ways to switch things up:
Spicy Jalapeño Breadsticks
Add diced jalapeños and a pinch of cayenne pepper to the dough for a fiery kick. The heat pairs beautifully with the creamy cheese, creating a spicy, savory bite that’s perfect for adventurous palates.
Herb‑Infused Garlic Breadsticks
Replace the dried oregano with a mix of rosemary, thyme, and basil. Add minced garlic to the dough for an aromatic, herbaceous flavor that feels like a classic Italian garlic bread with a Halloween twist.
Vegan Cheese Breadsticks
Swap the dairy cheeses for a blend of vegan mozzarella and nutritional yeast. Use a plant‑based butter or olive oil, and the result is a cruelty‑free, dairy‑free version that still delivers on flavor and texture.
Bacon‑Loaded Breadsticks
Fold in crumbled bacon before baking. The bacon’s smoky flavor permeates the dough, giving each bite a savory, meaty depth that’s hard to resist.
Chocolate‑Coated Breadsticks
After baking, drizzle melted dark chocolate over the warm breadsticks. The chocolate hardens into a thin shell, creating a sweet‑savory contrast that’s a delightful surprise.
Roasted Garlic Breadsticks
Incorporate roasted garlic cloves into the dough for a mellow, sweet garlic flavor. The roasted garlic softens the sharpness of fresh garlic, giving the breadsticks a deeper, caramelized taste.
Storing and Bringing It Back to Life
Fridge Storage
Store leftover breadsticks in an airtight container at room temperature for up to 2 days. If you’re storing them in the fridge, let them come to room temperature before reheating to preserve the crispness. A quick toast in a skillet will revive the crust.
Freezer Friendly
Wrap the breadsticks tightly in plastic wrap and then in foil before freezing. They stay fresh for up to 3 months. To thaw, let them sit at room temperature for 30 minutes, then bake at 350°F for 8–10 minutes.
Best Reheating Method
The oven is the king of reheating. Preheat to 350°F, place the breadsticks on a baking sheet, and bake for 8–10 minutes. Add a splash of water to the bottom of the pan to create steam, which keeps the interior moist while the crust crisps.