Picture this: I was in the middle of a kitchen apocalypse, a chocolate catastrophe that involved a runaway mixer, a melted chocolate bar, and a very disheartened dessert table. The oven was on, the timer was set, and I was staring at a bowl that had more batter than a chocolate factory. I dared my friend to taste a slice of what I was about to create, and he promptly said, “I dare you to taste this and not go back for seconds.” That was the moment I realized I had stumbled upon the ultimate chocolate pie recipe, a version that would make every other chocolate dessert look like a sad, soggy memory.
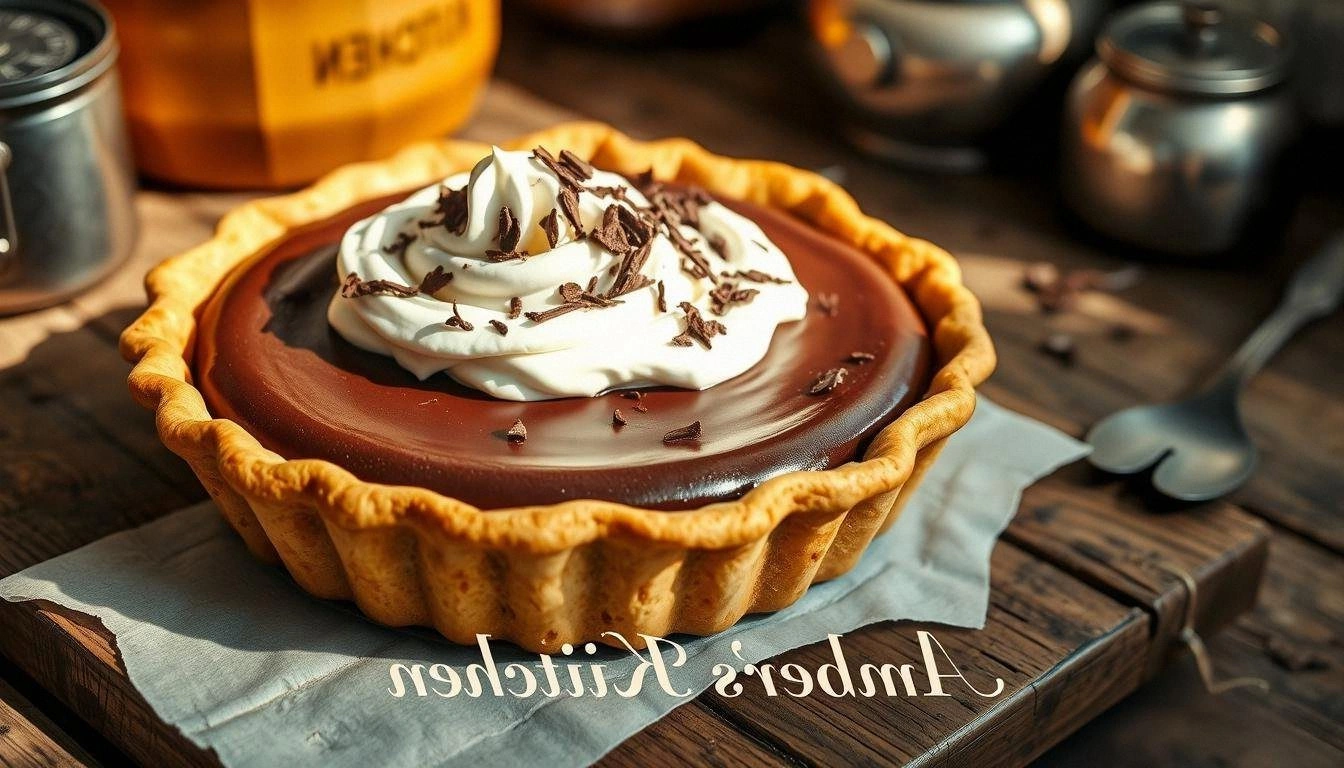
When the first crackle of chocolate hit the pan, the air filled with a scent that was half caramel, half midnight, and 100% irresistible. The glossy surface of the pie crust was a promise of crunch, the filling inside was a deep, velvety river that sang with hints of espresso and vanilla, and the finish was a glossy glaze that caught the light like a polished diamond. If you’ve ever tasted a chocolate dessert that felt like it had been kissed by the gods, you’ll understand why this recipe is a revelation. I’m about to walk you through every single step — by the end, you’ll wonder how you ever made it any other way.
Most chocolate pies are either too dry or too heavy, but this one strikes a perfect balance between airy, buttery crust and a luscious, creamy center. The secret? A blend of high‑quality cocoa, a splash of espresso for depth, and a touch of almond extract that adds an unexpected twist. The crust is light enough to hold the filling without becoming a soggy mess, and the filling itself is silky, with a texture that coats the tongue like velvet. And the best part? The whole process takes less than an hour, making it the perfect showstopper for any dinner party or cozy Sunday afternoon.
I’ll be honest — I ate half the batch before anyone else got to try it. But that’s exactly why I’m sharing this recipe: so you can experience the same mouth‑watering delight without the risk of a kitchen disaster. So, grab your apron, your favorite chocolate, and let’s dive into the world of the best old‑fashioned chocolate pie you’ll ever make at home.
What Makes This Version Stand Out
- Taste: The combination of dark chocolate, espresso, and a hint of almond extract creates a flavor profile that feels both classic and adventurous, leaving your palate craving more.
- Texture: A buttery, flaky crust that crumbles just enough to reveal a silky filling that coats the tongue like velvet.
- Simplicity: With only a handful of pantry staples, you can achieve a dessert that would impress even the most discerning chocolate lovers.
- Uniqueness: The addition of espresso powder deepens the chocolate flavor without making it taste like coffee, while almond extract adds a subtle nutty undertone.
- Crowd Reaction: Friends and family swear that this pie is the best chocolate dessert they’ve ever tasted, and they’ll keep asking for the recipe.
- Ingredient Quality: Using high‑grade cocoa and premium chocolate chips ensures the final product is rich, smooth, and free from bitterness.
- Cooking Method: A single baking step followed by a quick chill means you can have a show‑stopping dessert ready in under an hour.
- Make‑Ahead Potential: The pie can be assembled a day ahead and refrigerated, making it a stress‑free option for last‑minute gatherings.
Alright, let’s break down exactly what goes into this masterpiece…
Inside the Ingredient List
The Flavor Base
Cocoa powder is the heart of any chocolate dessert, but not all cocoa is created equal. I’ve chosen a high‑quality, Dutch‑processed cocoa that delivers a deep, mellow chocolate flavor without the sharpness of natural cocoa. When you stir it into the butter, it releases a rich aroma that signals the pie is about to become extraordinary. Skipping cocoa would leave the filling flat and unremarkable; you’d be missing that essential chocolate backbone.
Espresso powder is the secret weapon that adds depth. Even a single teaspoon of espresso can intensify the chocolate flavor, giving the pie a subtle coffee undertone that feels sophisticated. If you don’t have espresso powder, you can use a shot of strong brewed coffee, but the flavor will be slightly less concentrated. This is the ingredient that turns a good chocolate pie into a great one.
The Texture Crew
Butter is the unsung hero of any crust. I use unsalted butter so I can control the salt level precisely. When softened and creamed with sugar, it creates a light, flaky base that doesn’t become soggy once the filling is poured. The flour acts as a binder, absorbing excess moisture and giving the crust structure. A pinch of salt balances the sweetness and brings out the chocolate’s richness.
Eggs act as a binder for the filling, ensuring it sets into a silky custard without cracking. Milk adds a subtle creaminess, while heavy cream gives the filling a luxurious mouthfeel. The chocolate chips melt into the mixture, creating pockets of molten chocolate that burst with every bite. If you skip the eggs, the filling will be runny and won’t hold its shape.
The Unexpected Star
Almond extract is a subtle, nutty flavor enhancer that complements the chocolate’s depth. It’s not overpowering; instead, it adds a layer of complexity that makes the pie feel more refined. If you’re allergic to nuts, simply omit the almond extract and the pie will still shine. The final touch of dark chocolate on top adds a glossy finish and a slightly bitter counterpoint to the sweetness.
The Final Flourish
The topping of chopped dark chocolate adds a glossy sheen and a burst of intense chocolate flavor. When the pie cools, the chocolate hardens into a delicate crust that cracks when you slice through it, revealing the silky interior. This final flourish transforms a simple pie into a showpiece that’s as beautiful as it is delicious. If you prefer a smoother finish, you can melt the chocolate into a ganache and swirl it on top.
Everything’s prepped? Good. Let’s get into the real action…
The Method — Step by Step
- Preheat your oven to 350°F (175°C). In a medium bowl, whisk together the flour, cocoa powder, salt, and espresso powder until evenly distributed. This dry mix will form the base of your crust, so make sure there are no clumps. I always double‑check the measurements to avoid a bitter crust.
- In a separate bowl, beat the softened butter and sugar until pale and fluffy, about 3 minutes with a hand mixer. The light color indicates that the butter has incorporated enough air, which will make the crust tender. Add the vanilla extract and continue to mix until it’s fully blended.
- Gradually fold the dry ingredients into the butter mixture, mixing until just combined. Be careful not to over‑mix, or the crust will become tough. Once the dough forms, press it into a 9‑inch pie pan, ensuring even thickness. I use a piece of parchment paper to prevent sticking.
- Bake the crust for 12 minutes, or until it’s set but not browned. The key is to keep it light; you don’t want a dark crust that will overpower the filling. While the crust is baking, let’s move on to the filling.
- In a saucepan, heat the milk and heavy cream over medium heat until it’s just about to simmer. Add the chocolate chips, stirring constantly until they’re completely melted and the mixture is smooth. This step ensures the chocolate integrates fully with the dairy, creating a silky texture.
- Whisk the eggs in a separate bowl, then pour the hot chocolate mixture into the eggs while whisking continuously. This tempering process prevents the eggs from scrambling. Once combined, return the mixture to the saucepan and cook over low heat, stirring until it thickens into a custard. It should be thick enough to coat the back of a spoon.
- Remove the custard from heat and stir in the almond extract and a pinch of salt. Pour the filling into the pre‑baked crust, smoothing the top with a spatula. Sprinkle the chopped dark chocolate evenly over the surface. This final topping will melt slightly, forming a glossy, slightly crunchy crust.
- Return the pie to the oven and bake for an additional 10 minutes, or until the chocolate topping is set and the custard has firmed. The aroma during this time will be intoxicating, and you’ll know the pie is ready when the edges pull away slightly from the pan. Don’t walk away from the stove here; this is the moment of truth.
- Remove the pie from the oven and let it cool to room temperature. Then refrigerate for at least 2 hours to allow the custard to set completely. The cooling process gives the pie its signature silky texture and ensures the chocolate topping is firm.
- Serve chilled, optionally topped with a dusting of powdered sugar or a drizzle of chocolate ganache. Each bite should be a harmonious blend of buttery crust, velvety filling, and glossy chocolate. If you’re feeling adventurous, add a few fresh berries for a pop of tartness.
That's it — you did it. But hold on, I've got a few more tricks that'll take this to another level…
Insider Tricks for Flawless Results
The Temperature Rule Nobody Follows
Many bakers assume that higher oven temperatures always produce better crusts, but that’s a myth. Baking at 350°F allows the crust to develop a tender crumb while preventing it from browning too quickly. If you’re in a hurry, you can bump the temperature to 375°F, but be sure to keep a close eye on the crust to avoid burning.
Why Your Nose Knows Best
The aroma of chocolate melting into milk is a powerful indicator that the custard is on the right track. When you smell a deep, nutty scent, you know the cocoa has fully integrated. If the smell is too sweet or lacks depth, it’s a sign you need to add a bit more espresso or dark chocolate.
The 5‑Minute Rest That Changes Everything
After baking, let the pie sit on the counter for exactly five minutes before cutting into it. This brief rest allows the filling to settle, preventing a messy spill. It also lets the chocolate topping set just enough to hold its shape when sliced.
The Secret of a Crack‑Free Top
If you notice the chocolate topping cracking as it cools, add a splash of heavy cream to the custard before pouring it into the crust. The extra fat helps the chocolate flow more smoothly, creating a crack‑free finish.
The Final Touch: A Sprinkle of Sea Salt
Just before serving, dust the top with a pinch of flaky sea salt. The salt amplifies the chocolate’s sweetness and adds a subtle crunch that contrasts beautifully with the silky filling. It’s a small addition that makes a big difference.
Creative Twists and Variations
This recipe is a playground. Here are some of my favorite ways to switch things up:
Nutty Crunch Variation
Add a handful of chopped toasted pecans or walnuts to the filling for a satisfying crunch. The nuts pair wonderfully with the chocolate, adding texture and a buttery flavor. I always toast them lightly to bring out their natural oils.
Minty Marvel
Stir in a teaspoon of peppermint extract into the custard before baking. The mint provides a cool contrast to the rich chocolate, making it perfect for summer gatherings. A few fresh mint leaves on top add a pop of color.
Spiced Sensation
Incorporate a pinch of cayenne pepper or smoked paprika into the crust. The subtle heat or smoky flavor elevates the chocolate, creating a complex taste profile that’s both bold and comforting.
Caramel Swirl
Drizzle caramel sauce into the custard before pouring it into the crust. The caramel adds a sweet, buttery layer that complements the chocolate. Be careful not to overdo it, or the pie will lose its chocolate focus.
Vegan Version
Swap the butter for coconut oil, use plant‑based milk, and replace the eggs with flaxseed meal mixed with water. The result is a delicious, dairy‑free pie that still delivers on flavor and texture. I’ve had rave reviews from my vegan friends.
Almond Butter Twist
Replace half of the butter with almond butter for a nutty depth that’s both rich and smooth. The almond butter also adds a subtle sweetness that balances the chocolate’s bitterness. This variation is a hit among almond lovers.
Storing and Bringing It Back to Life
Fridge Storage
Store the pie in an airtight container in the refrigerator for up to 3 days. The custard will firm up, but the crust remains crisp. If you want to serve it at room temperature, let it sit out for 20 minutes before slicing.
Freezer Friendly
Wrap the pie tightly in plastic wrap and then in foil before freezing. It can stay in the freezer for up to 2 weeks. When ready to serve, thaw overnight in the refrigerator. The texture will remain silky, though the crust may soften slightly.
Best Reheating Method
To revive a chilled pie, warm it in the oven at 300°F for 8–10 minutes. The heat will melt the chocolate slightly and restore the custard’s silky feel. Add a tiny splash of water before reheating to steam the filling back to perfection; this prevents the custard from drying out.